Toshiba SD-V395 Owners Manual - Page 24
Toshiba SD-V395 Manual
 |
View all Toshiba SD-V395 manuals
Add to My Manuals
Save this manual to your list of manuals |
Page 24 highlights
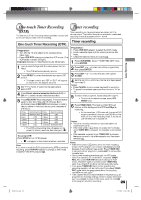
Basic setup (VCR) To set DAYLIGHT SAVING TIME You can set the DAYLIGHT SAVING TIME automatically or manually. Tuner setting This DVD/VCR is equipped with a channel memory feature which allows channels to skip up or down to the next channel set into memory, skipping over unwanted channels. Before selecting channels, they must be programmed into the DVD/ VCR's memory. In addition to normal VHF and UHF channels, this DVD/VCR can receive up to 113 Cable TV channels. To use this DVD/VCR with an antenna, set the TV/CABLE menu option to the TV mode. When shipped from the factory, this menu option is in the CABLE mode. VCR MENU. 1 Press Press SET + or - to select "SYSTEM SETUP", then press ENTER. SET + or - to select "DAYLIGHT SAVING 2 Press TIME", then press ENTER. SET + or - to select one of the options, then 3 Press press ENTER. Press VCR MENU until the MENU screen is cleared. ON: for manual setting (forward one hour) OFF: for manual setting (back one hour) AUTO: for automatic setting (read XDS in the signal) When you want to set the DAYLIGHT SAVING TIME manually, on the first Sunday in April you set to "ON", and on the last Sunday in October you set to "OFF". TV/CABLE selection Preparation: • Turn ON the TV and select the corresponding video input. • Press VCR DVD selector to select the VCR mode. (The VCR mode indicator will light.) VCR MENU. Press SET + or - to select "CH 1 Press SETUP", then press ENTER. 2 Press SET + or - to select "TV/CABLE". 3 Press ENTER to select the TV or CABLE mode. • The arrow indicates the selected mode. CH SETUP TV CABLE AUTO CH MEMORY ADD/DELETE Notes: • When shipped from factory, the DAYLIGHT SAVING TIME is set to "AUTO" position. • When the clock is not set, DAYLIGHT SAVING TIME setting is not available. • When there is no DAYLIGHT SAVING TIME in your area, always select "OFF" position in step 3. Manual clock setting If the AUTO CLOCK process did not set the date and time correctly, you must set them manually for timer recording and DAYLIGHT SAVING TIME. TV - VHF/UHF channels CABLE - Cable TV channels +/-/ENTER/MENU 1 SET + or - to select "SYSTEM SETUP", then 2 Press press ENTER. SET + or - to select "CLOCK SET", then press Setting channels automatically 3 Press ENTER. SET + or - to set the month, then press above step 1 and press SET + or - to select 4 Press ENTER. 1 Repeat "AUTO CH MEMORY". 5 Set the day, year and time as in step 4. 2 Press ENTER. setting the clock, date and time starts 6 After functioning automatically. Press VCR MENU. Note: You can't select "CH SETUP" if you set the channel to "L1" or "L2". Note: After a power failure or disconnection of the power, the timer settings will be lost. In this case, reset the present time. 4 Press VCR MENU until the menu screen is cleared. • Auto tuning will begin. The channel display will count up and when finished, the screen returns to normal. To make corrections any time during the process Press CANCEL repeatedly until the item you want to change blinks, then press SET + or -. 24 2K60121A.indb 24 1/12/2007 3:50:10 PM
-
 1
1 -
2
-
3
-
4
-
5
-
6
-
7
-
8
-
9
-
10
-
11
-
12
-
13
-
14
-
15
-
16
-
17
-
18
-
 19
19 -
 20
20 -
 21
21 -
 22
22 -
 23
23 -
 24
24 -
 25
25 -
 26
26 -
 27
27 -
 28
28 -
 29
29 -
30
-
31
-
32
-
33
-
34
-
35
-
36
-
37
-
38
-
39
-
40
-
41
-
42
-
43
-
44
-
45
-
46
-
47
-
48
-
49
 |
 |