Toshiba Satellite P870 PSPLFC Users Manual Canada; English - Page 89
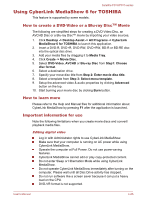
Using CyberLink MediaShow 6 for TOSHIBA, How to create a DVD-Video or a Blu-ray DiscTM Movie
 |
View all Toshiba Satellite P870 PSPLFC manuals
Add to My Manuals
Save this manual to your list of manuals |
Page 89 highlights
Satellite P870/P875 series Using CyberLink MediaShow 6 for TOSHIBA This feature is supported by some models. How to create a DVD-Video or a Blu-ray DiscTM Movie The following are simplified steps for creating a DVD-Video Disc, an AVCHD Disc or a Blu-ray Disc™ movie by importing your video sources. 1. Click Desktop -> Desktop Assist -> All Programs -> CyberLink MediaShow 6 for TOSHIBA to launch this application. 2. Insert a DVD-R, DVD+R, DVD-RW, DVD+RW, BD-R or BD-RE disc into the optical disc drive. 3. Add your media files by dragging it to Media Tray. 4. Click Create -> Movie Disc. 5. Select DVD-Video, AVCHD or Blu-ray Disc from Step1: Choose disc format. 6. Select a destination drive. 7. Specify your move disc title from Step 2: Enter movie disc title. 8. Select a template from Step 3: Select menu template. 9. Setup the advanced video & audio properties by clicking Advanced button on the top. 10. Start burning your movie disc by clicking Burn button. How to learn more Please refer to the Help and Manual files for additional information about CyberLink MediaShow by pressing F1 after the application is launched. Important information for use Note the following limitations when you create movie discs and convert/ playback media files. Editing digital video Log in with Administrator rights to use CyberLink MediaShow. Make sure that your computer is running on AC power while using CyberLink MediaShow. Operate the computer at Full Power. Do not use power-saving features. CyberLink MediaShow cannot edit or play copy-protected content. Do not enter Sleep or Hibernation Mode while using CyberLink MediaShow. Do not operate CyberLink MediaShow immediately after turning on the computer. Please wait until all Disc Drive activity has stopped. Do not run software like a screen saver because it can put a heavy load on the CPU. DVD-VR format is not supported. User's Manual 4-26
-
 1
1 -
2
-
3
-
4
-
5
-
6
-
7
-
8
-
9
-
10
-
11
-
12
-
13
-
14
-
15
-
16
-
17
-
18
-
19
-
20
-
21
-
22
-
23
-
24
-
25
-
26
-
27
-
28
-
29
-
30
-
31
-
32
-
33
-
34
-
35
-
36
-
37
-
38
-
39
-
40
-
41
-
42
-
43
-
44
-
45
-
46
-
47
-
48
-
49
-
50
-
51
-
52
-
53
-
54
-
55
-
56
-
57
-
58
-
59
-
60
-
61
-
62
-
63
-
64
-
65
-
66
-
67
-
68
-
69
-
70
-
71
-
72
-
73
-
74
-
75
-
76
-
77
-
78
-
79
-
80
-
81
-
82
-
83
-
 84
84 -
 85
85 -
 86
86 -
 87
87 -
 88
88 -
 89
89 -
 90
90 -
 91
91 -
 92
92 -
 93
93 -
 94
94 -
95
-
96
-
97
-
98
-
99
-
100
-
101
-
102
-
103
-
104
-
105
-
106
-
107
-
108
-
109
-
110
-
111
-
112
-
113
-
114
-
115
-
116
-
117
-
118
-
119
-
120
-
121
-
122
-
123
-
124
-
125
-
126
-
127
-
128
-
129
-
130
-
131
-
132
-
133
-
134
-
135
-
136
-
137
-
138
-
139
-
140
-
141
-
142
-
143
-
144
-
145
-
146
-
147
-
148
-
149
-
150
-
151
-
152
-
153
-
154
-
155
-
156
-
157
-
158
-
159
-
160
-
161
-
162
-
163
-
164
-
165
 |
 |