Uniden D3098S English Owner's Manual - Page 12
Menus, Setting
 |
View all Uniden D3098S manuals
Add to My Manuals
Save this manual to your list of manuals |
Page 12 highlights
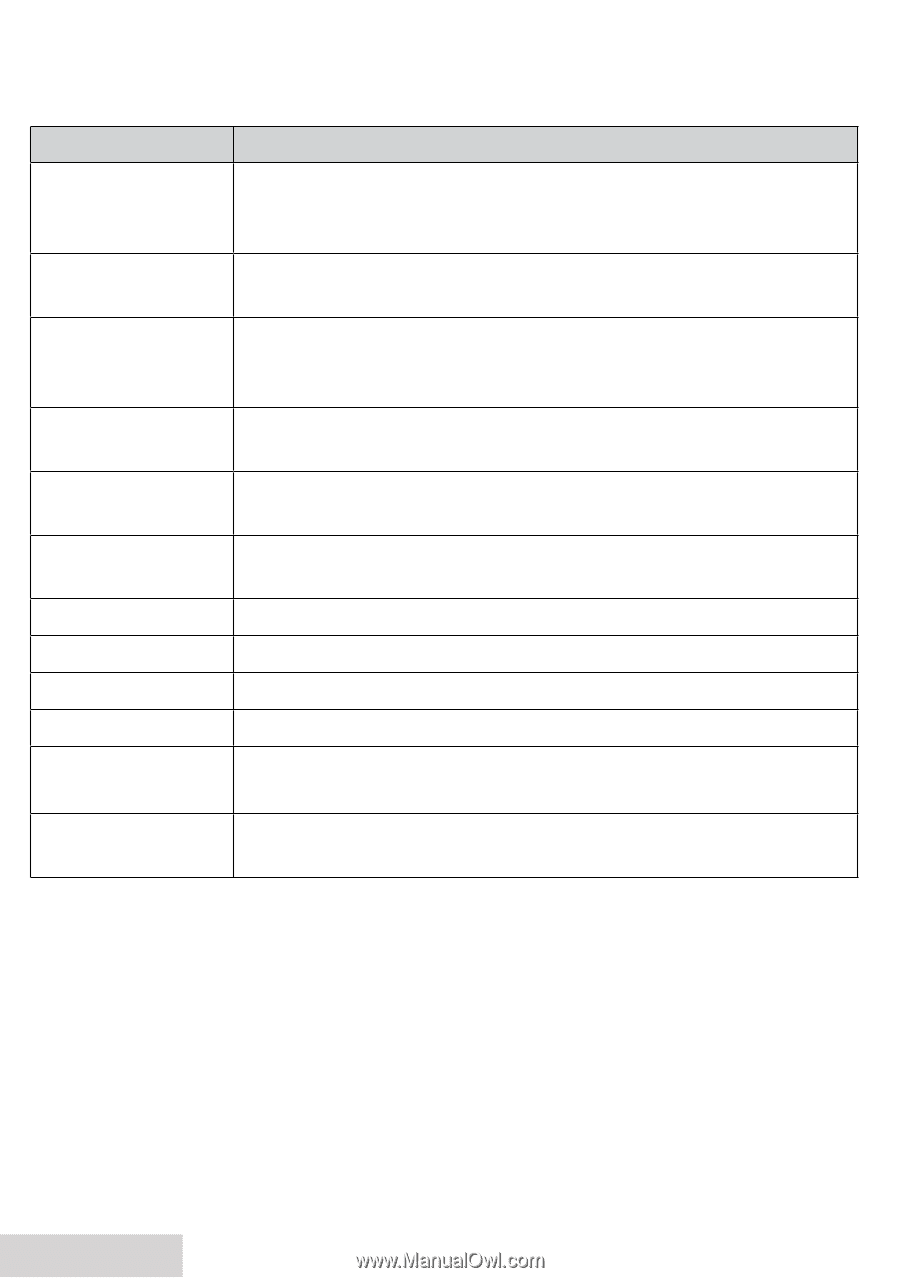
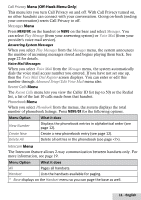
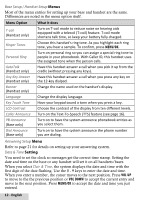
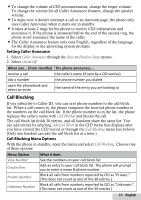
Base Setup / Handset Setup Menus Most of the menu entries for setting up your base and handset are the same. Differences are noted in the menu option itself. Menu Option What it does T-coil (Handset only) Turn on T-coil mode to reduce noise on hearing aids equipped with a telecoil (T-coil) feature. T-coil mode shortens talk time, so keep your battery fully charged. Ringer Tones Personal Ring Choose this handset's ring tone. As you highlight each ring tone, you hear a sample. To confirm, press MENU/OK. Turn on personal ring so you can assign a special ring tone to people in your phonebook. With Caller ID, this handset uses the assigned tone when the person calls. AutoTalk (Handset only) Have this handset answer a call when you pick it up from the cradle (without pressing any keys). Any Key Answer Have this handset answer a call when you press any key on (Handset only) the 12-key dialpad. Banner (Handset only) Change the name used on the handset's display. Language Change the display language. Key Touch Tone Have your keypad sound a tone when you press a key. LCD Contrast Choose the contrast of the display from ten different levels. Caller Announce Turn on the Text-To-Speech (TTS) feature (see page 16). PB Announce (Base only) Turn on to have the system announce phonebook entries as you select them. Dial Announce (Base only) Turn on to have the system announce the phone number you are dialing. Answering Setup Menu Refer to page 21 for details on setting up your answering system. Date & Time Setting You need to set the clock so messages get the correct time stamp. Setting the date and time on the base or any handset will set it on all handsets/bases. When you select Date & Time, the system displays the date and time with the first digit of the date flashing. Use the 0 - 9 keys to enter the date and time. When you enter a number, the curser moves to the next position. Press VOL UP to move to the the previous position or VOL DOWN to accept the current entry and move to the next position. Press MENU/OK to accept the date and time you just entered. 12 - English
-
 1
1 -
2
-
3
-
4
-
5
-
6
-
 7
7 -
 8
8 -
 9
9 -
 10
10 -
 11
11 -
 12
12 -
 13
13 -
 14
14 -
 15
15 -
 16
16 -
 17
17 -
18
-
19
-
20
-
21
-
22
-
23
-
24
-
25
-
26
-
27
-
28
-
29
-
30
 |
 |