ViewSonic PJ862 User Manual - Page 46
Click on OK.
 |
View all ViewSonic PJ862 manuals
Add to My Manuals
Save this manual to your list of manuals |
Page 46 highlights
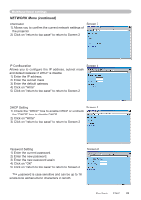
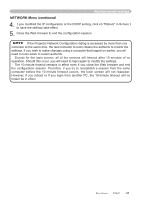
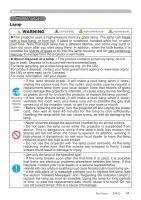
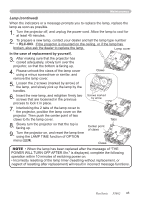
Multifunctional settings NETWORK Menu (continued) Information 1) Allows you to confirm the current network settings of the projector. 2) Click on "return to top page" to return to Screen 2. Screen 3 IP Configuration Allows you to configure the IP address, subnet mask and default gateway if DHCP is disable. 1) Enter the IP address. 2) Enter the subnet mask. 3) Enter the default gateway. 4) Click on "Write". 5) Click on "return to top page" to return to Screen 2. Screen 4 DHCP Setting Screen 5 1) Check the "DHCP" box to enable DHCP or uncheck the "DHCP" box to disable DHCP. 2) Click on "Write". 3) Click on "return to top page" to return to Screen 2. Password Setting 1) Enter the current password. 2) Enter the new password. 3) Enter the new password again. 4) Click on "OK". 5) Click on "return to top page" to return to Screen 2. Screen 6 • The password is case sensitive and can be up to 16 single-byte alphanumeric characters in length. ViewSonic PJ862 42
-
 1
1 -
2
-
3
-
4
-
5
-
6
-
7
-
8
-
9
-
10
-
11
-
12
-
13
-
14
-
15
-
16
-
17
-
18
-
19
-
20
-
21
-
22
-
23
-
24
-
25
-
26
-
27
-
28
-
29
-
30
-
31
-
32
-
33
-
34
-
35
-
36
-
37
-
38
-
39
-
40
-
 41
41 -
 42
42 -
 43
43 -
 44
44 -
 45
45 -
 46
46 -
 47
47 -
 48
48 -
 49
49 -
 50
50 -
 51
51 -
52
-
53
-
54
-
55
-
56
-
57
-
58
-
59
-
60
-
61
-
62
-
63
 |
 |
