ViewSonic Pro7827HD Pro7827HD User Guide English - Page 39
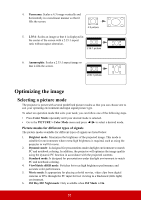
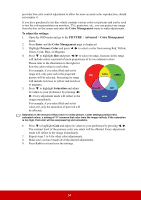
Optimizing the image, Selecting a picture mode, Adjusting Brightness, Adjusting Contrast
 |
View all ViewSonic Pro7827HD manuals
Add to My Manuals
Save this manual to your list of manuals |
Page 39 highlights
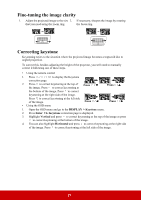
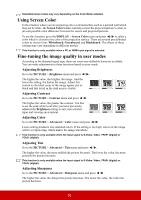
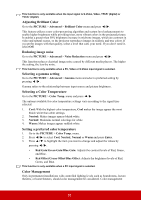
Selectable lamp modes may vary depending on the Color Mode selected. Using Screen Color In the situation where you are projecting onto a colored surface such as a painted wall which may not be white, the Screen Color feature can help correct the projected picture's colors to prevent possible color difference between the source and projected pictures. To use this function, go to the DISPLAY > Screen Color menu and press / to select a color which is closest to the color of the projection surface. There are several precalibrated colors to choose from: Whiteboard, Greenboard, and Blackboard. The effects of these settings may vary depending on different models. This function is only available when a PC or HDMI input signal is selected. Fine-tuning the image quality in user modes According to the detected signal type, there are some user-definable functions available. You can make adjustments to these functions based on your needs. Adjusting Brightness Go to the PICTURE > Brightness menu and press / . The higher the value, the brighter the image. And the lower the setting, the darker the image. Adjust this control so the black areas of the image appear just as black and that detail in the dark areas is visible. -30 50 +80 Adjusting Contrast Go to the PICTURE > Contrast menu and press / . The higher the value, the greater the contrast. Use this to set the peak white level after you have previously adjusted the Brightness setting to suit your selected input and viewing environment. -30 0 +40 Adjusting Color Go to the PICTURE > Advanced > Color menu and press / . Lower setting produces less saturated colors. If the setting is too high, colors on the image will be overpowering, which makes the image unrealistic. This function is only available when the input signal is S-Video, Video, YPbPr (digital) or YCbCr (digital). Adjusting Tint Go to the PICTURE > Advanced > Tint menu and press / . The higher the value, the more reddish the picture becomes. The lower the value, the more greenish the picture becomes. This function is only available when the input signal is S-Video, Video, YPbPr (digital) or YCbCr (digital). Adjusting Sharpness Go to the PICTURE > Advanced > Sharpness menu and press / . The higher the value, the sharper the picture becomes. The lower the value, the softer the picture becomes. 32
-
 1
1 -
2
-
3
-
4
-
5
-
6
-
7
-
8
-
9
-
10
-
11
-
12
-
13
-
14
-
15
-
16
-
17
-
18
-
19
-
20
-
21
-
22
-
23
-
24
-
25
-
26
-
27
-
28
-
29
-
30
-
31
-
32
-
33
-
 34
34 -
 35
35 -
 36
36 -
 37
37 -
 38
38 -
 39
39 -
 40
40 -
 41
41 -
 42
42 -
 43
43 -
 44
44 -
45
-
46
-
47
-
48
-
49
-
50
-
51
-
52
-
53
-
54
-
55
-
56
-
57
-
58
-
59
-
60
-
61
-
62
-
63
-
64
-
65
-
66
-
67
-
68
-
69
-
70
-
71
-
72
-
73
-
74
-
75
-
76
-
77
-
78
-
79
-
80
-
81
-
82
-
83
-
84
-
85
-
86
-
87
 |
 |