ViewSonic Pro9500 PRO9500 User Guide (English) - Page 52
ViewSonic, Description, KEYSTONE, PERFECT FIT, Correcting the distortion, AUTO ECO MODE, ECO MODE,
 |
UPC - 766907522518
View all ViewSonic Pro9500 manuals
Add to My Manuals
Save this manual to your list of manuals |
Page 52 highlights
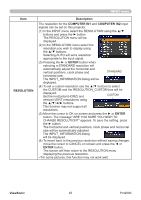
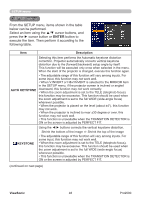
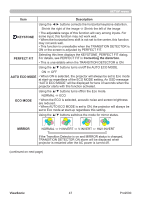
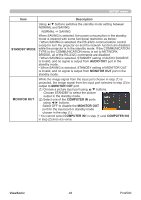
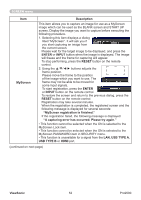
SETUP menu Item Description KEYSTONE Using the ◄/► buttons corrects the horizontal keystone distortion. Shrink the right of the image ó Shrink the left of the image • The adjustable range of this function will vary among inputs. For some input, this function may not work well. • When the horizontal lens shift is not set to the center, this function may not work well. • This function is unavailable when the TRANSITION DETECTOR is ON or the screen is adjusted by PERFECT FIT. PERFECT FIT Selecting this item displays the KEYSTONE_PERFECT FIT dialog. For details, see PERFECT FIT in Correcting the distortion. • This is unavailable when the TRANSITION DETECTOR is ON. Using the ▲/▼ buttons turns on/off the AUTO ECO MODE. ON ó OFF AUTO ECO MODE • When ON is selected, the projector will always be set to Eco mode at start-up regardless of the ECO MODE setting. An OSD message "AUTO ECO MODE" will be displayed for tens of seconds when the projector starts with this function activated. ECO MODE Using the ▲/▼ buttons turns off/on the Eco mode. NORMAL ó ECO • When the ECO is selected, acoustic noise and screen brightness are reduced. • When AUTO ECO MODE is set to ON, the projector will always be set to Eco mode at start-up regardless this setting. Using the ▲/▼ buttons switches the mode for mirror status. MIRROR NORMAL ó H:INVERT ó V:INVERT ó H&V:INVERT If the Transition Detector is on and MIRROR status is changed, TRANSITION DETECTOR ON alarm will be displayed when projector is restarted after the AC power is turned off. (continued on next page) ViewSonic 47 Pro9500
-
 1
1 -
2
-
3
-
4
-
5
-
6
-
7
-
8
-
9
-
10
-
11
-
12
-
13
-
14
-
15
-
16
-
17
-
18
-
19
-
20
-
21
-
22
-
23
-
24
-
25
-
26
-
27
-
28
-
29
-
30
-
31
-
32
-
33
-
34
-
35
-
36
-
37
-
38
-
39
-
40
-
41
-
42
-
43
-
44
-
45
-
46
-
 47
47 -
 48
48 -
 49
49 -
 50
50 -
 51
51 -
 52
52 -
 53
53 -
 54
54 -
 55
55 -
 56
56 -
 57
57 -
58
-
59
-
60
-
61
-
62
-
63
-
64
-
65
-
66
-
67
-
68
-
69
-
70
-
71
-
72
-
73
-
74
-
75
-
76
-
77
-
78
-
79
-
80
-
81
-
82
-
83
-
84
-
85
-
86
-
87
-
88
-
89
-
90
-
91
-
92
-
93
-
94
-
95
-
96
-
97
-
98
-
99
-
100
-
101
-
102
-
103
-
104
-
105
-
106
-
107
-
108
-
109
-
110
-
111
-
112
-
113
-
114
-
115
-
116
-
117
-
118
-
119
-
120
-
121
-
122
-
123
-
124
-
125
-
126
-
127
-
128
-
129
-
130
-
131
-
132
-
133
-
134
-
135
-
136
-
137
-
138
-
139
-
140
-
141
-
142
-
143
-
144
-
145
-
146
-
147
-
148
-
149
-
150
-
151
-
152
-
153
-
154
-
155
-
156
-
157
-
158
-
159
-
160
-
161
-
162
-
163
-
164
-
165
-
166
-
167
-
168
-
169
-
170
-
171
-
172
-
173
-
174
-
175
-
176
-
177
-
178
-
179
-
180
-
181
-
182
-
183
-
184
-
185
-
186
-
187
-
188
-
189
-
190
-
191
-
192
-
193
-
194
-
195
-
196
-
197
-
198
-
199
-
200
-
201
-
202
-
203
-
204
-
205
-
206
-
207
-
208
-
209
-
210
-
211
-
212
-
213
-
214
-
215
-
216
-
217
-
218
-
219
-
220
-
221
-
222
-
223
-
224
-
225
-
226
-
227
-
228
-
229
-
230
-
231
-
232
-
233
-
234
-
235
-
236
-
237
-
238
-
239
-
240
-
241
-
242
-
243
-
244
-
245
-
246
-
247
-
248
-
249
-
250
-
251
-
252
-
253
-
254
-
255
-
256
-
257
-
258
-
259
-
260
-
261
-
262
-
263
-
264
-
265
-
266
-
267
-
268
-
269
-
270
-
271
-
272
-
273
-
274
-
275
-
276
-
277
-
278
-
279
-
280
-
281
-
282
-
283
-
284
-
285
-
286
-
287
-
288
-
289
 |
 |