ViewSonic VT2755LED User Manual - Page 35
ENTER, Picture Mode, Contrast, Brightness, Sharpness, Color, Color Mode, Aspect Ratio, Noise,
 |
View all ViewSonic VT2755LED manuals
Add to My Manuals
Save this manual to your list of manuals |
Page 35 highlights
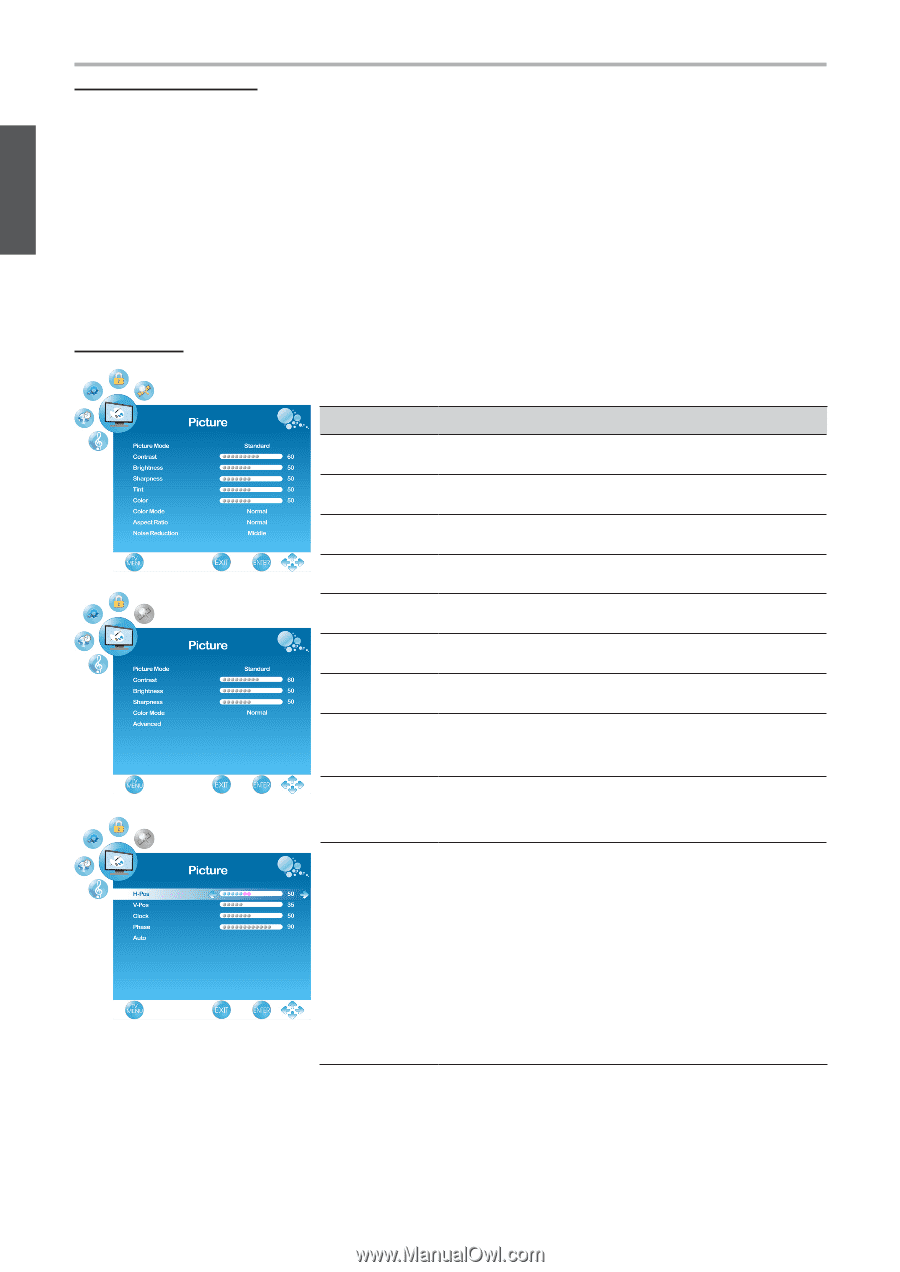
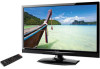
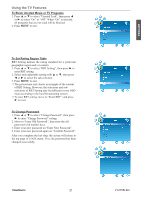
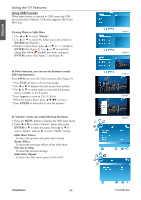
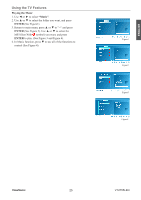
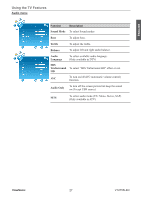
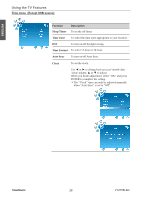
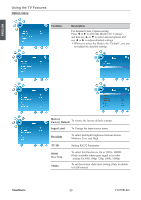
ENGLISH Using the TV Features Adjusting the Settings 1. Press the MENU button to display the OSD main menu. There are six top menus on the screen: PICTURE, AUDIO, TIME, OPTION, LOCK, and CHANNEL. (CHANNEL menu can only be enabled in TV source.) 2. Press ◄ or ► to select your desired top menu. 3. Press ENTER or ▼ to enter the menu you select. 4. Use ▲▼ to select the control you want to adjust. 5. When selecting the control with ►, press ► to enter next level menu or enable the function. (► will only appear when the control is highlighted) 6. Press ◄► to adjust or select the settings. 7. Press MENU to exit from the OSD menu. Picture menu Function Description Picture Mode To select picture mode. Contrast To adjust contrast of video. Brightness To adjust luminance of video. Sharpness To adjust picture sharpness. Tint To adjust tint level.(Except PC source) Color To adjust color.(Except PC source) Color Mode To select and adjust color mode. Aspect Ratio To select image size between Normal, Movie Scale, Zoom in and 4:3.(Except PC and USB source) Noise Reduction To reduce the noise level of connected equipment. (Except PC and USB source) Advanced To fine tune the image.(Only enabled in PC source) * H-Pos: To adjust the horizontal position of the picture. * V-Pos: To adjust the vertical position of the picture. * Clock: To adjust delay time of clock in order to reduce the noise of picture. * Phase: To adjust delay time of phase in order to reduce the noise of picture. * Auto: To auto adjust picture's horizontal position, vertical position, clock, phase, fine tune and H-Size. ViewSonic 26 VT2755LED
-
 1
1 -
2
-
3
-
4
-
5
-
6
-
7
-
8
-
9
-
10
-
11
-
12
-
13
-
14
-
15
-
16
-
17
-
18
-
19
-
20
-
21
-
22
-
23
-
24
-
25
-
26
-
27
-
28
-
29
-
 30
30 -
 31
31 -
 32
32 -
 33
33 -
 34
34 -
 35
35 -
 36
36 -
 37
37 -
 38
38 -
 39
39 -
 40
40 -
41
-
42
-
43
-
44
-
45
-
46
-
47
-
48
-
49
-
50
-
51
-
52
-
53
-
54
-
55
-
56
-
57
-
58
-
59
 |
 |