Vivitar DVR 840XHD DVR840XHD User Manual - Page 38
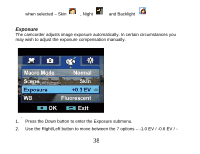
Backlight / Black and White / Classic / Negative.
 |
View all Vivitar DVR 840XHD manuals
Add to My Manuals
Save this manual to your list of manuals |
Page 38 highlights
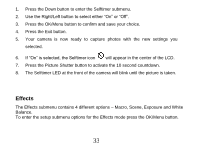
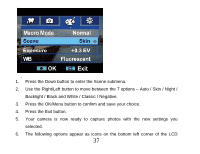
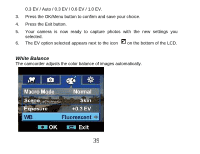
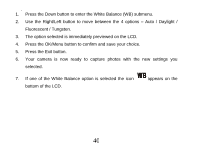
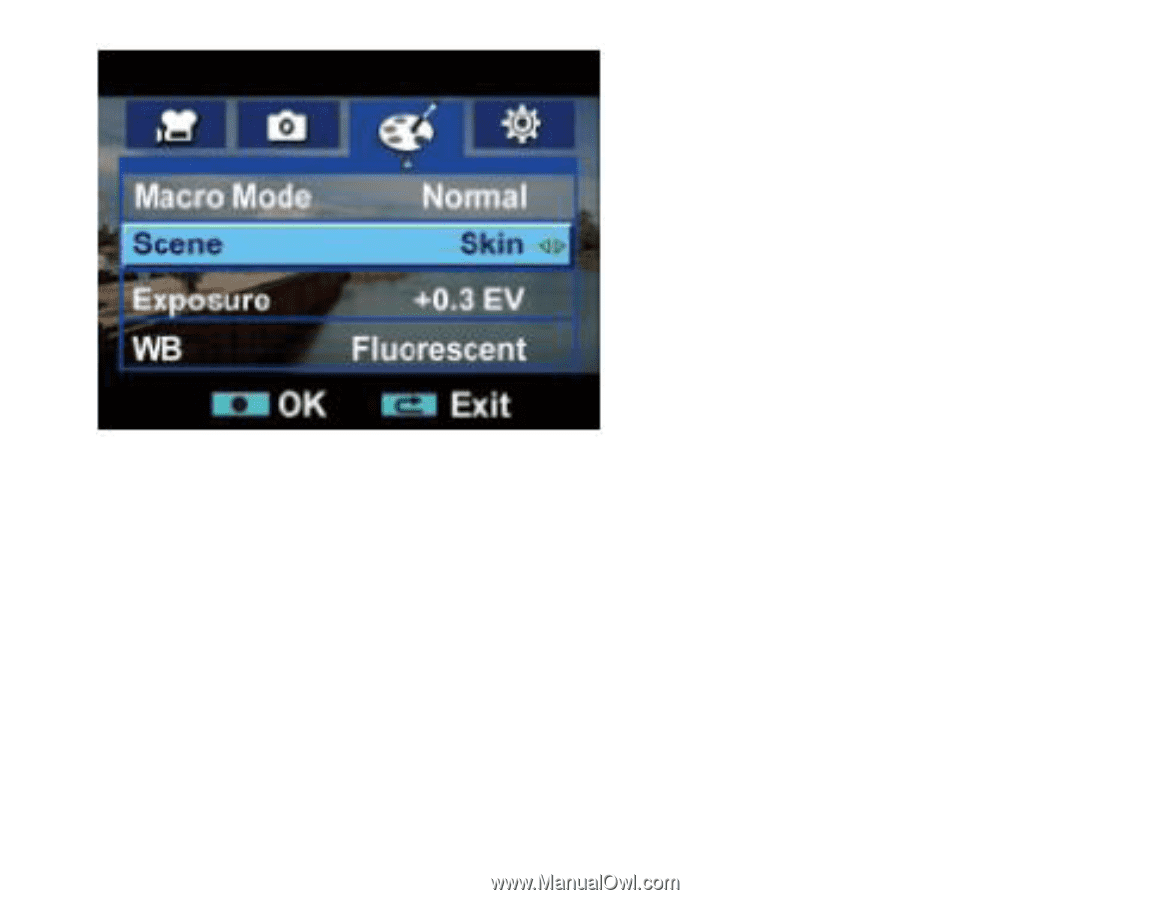
. 1. Press the Down button to enter the Scene submenu. 2. Use the Right/Left button to move between the 7 options - Auto / Skin / Night / Backlight / Black and White / Classic / Negative. 3. Press the OK/Menu button to confirm and save your choice. 4. Press the Exit button. 5. Your camera is now ready to capture photos with the new settings you selected. 6. The following options appear as icons on the bottom left corner of the LCD 37
-
 1
1 -
2
-
3
-
4
-
5
-
6
-
7
-
8
-
9
-
10
-
11
-
12
-
13
-
14
-
15
-
16
-
17
-
18
-
19
-
20
-
21
-
22
-
23
-
24
-
25
-
26
-
27
-
28
-
29
-
30
-
31
-
32
-
 33
33 -
 34
34 -
 35
35 -
 36
36 -
 37
37 -
 38
38 -
 39
39 -
 40
40 -
 41
41 -
 42
42 -
 43
43 -
44
-
45
-
46
-
47
-
48
-
49
-
50
-
51
-
52
-
53
-
54
-
55
-
56
-
57
-
58
-
59
-
60
-
61
-
62
-
63
-
64
-
65
-
66
-
67
-
68
-
69
-
70
-
71
-
72
-
73
-
74
-
75
-
76
-
77
-
78
-
79
-
80
-
81
-
82
-
83
-
84
-
85
-
86
-
87
-
88
-
89
-
90
-
91
-
92
-
93
-
94
-
95
-
96
-
97
-
98
-
99
-
100
-
101
 |
 |
37
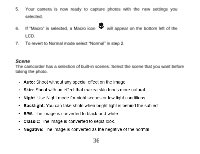
.
1.
Press the Down button to enter the Scene submenu.
2.
Use the Right/Left button to move between the 7 options
–
Auto / Skin / Night /
Backlight / Black and White / Classic / Negative.
3.
Press the OK/Menu button to confirm and save your choice.
4.
Press the Exit button.
5.
Your camera is now ready to capture photos with the new settings you
selected.
6.
The following options appear as icons on the bottom left corner of the LCD