Weider Pro 4100 English Manual - Page 8
Attach the Left Top Frame 3 to the Left Upright - weight
 |
View all Weider Pro 4100 manuals
Add to My Manuals
Save this manual to your list of manuals |
Page 8 highlights
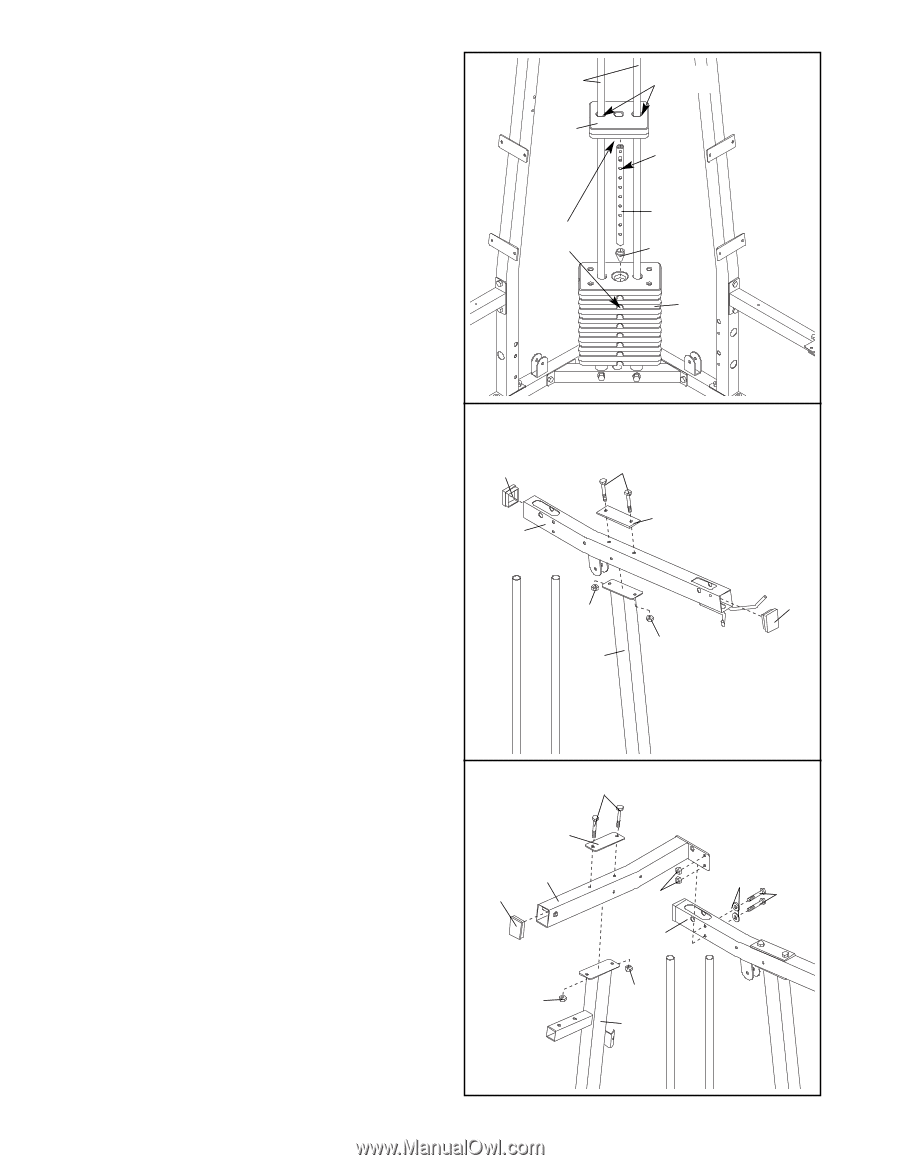
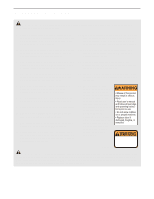
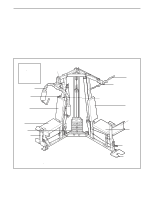
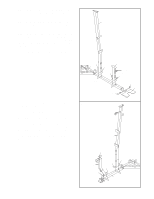
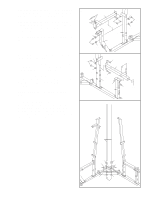
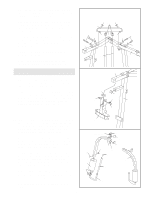
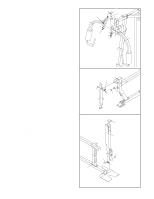
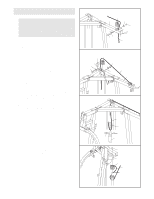
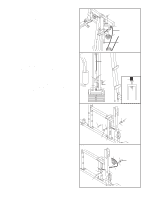
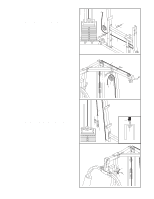
8. Slide the eight Weights (72) onto the Weight 8 Guides (20) with the pin grooves on the side shown. Press the Weight Tube Bumper (32) into the bottom of the Weight Tube (82). Insert the Weight Tube into the center hole in the stack of Weights (72). Be sure the Weight Tube is oriented as shown. Lubricate the indicated holes in the Top Weight (74). Slide the Top Weight onto the Weight Guides (20), with the pin groove on the bottom. 20 74 Pin Groove Lubricate Holes 82 32 72 9. Press two 2" x 2 1/2" Inner Caps (22) into the ends of the Left Top Frame (3). Attach the Left Top Frame (3) to the Left Upright (7) with two 5/16" x 3 1/4" Bolts (59), a Support Plate (21), and two 5/16" Nylon Locknuts (71). Do not tighten the Locknuts yet. 9 22 3 59 21 71 22 71 7 10. Press a 2" x 2 1/2" Inner Cap (22) into the end of the Right Top Frame (8). Attach the Right Top Frame (8) to the Right Upright (6) with two 5/16" x 3 1/4" Bolts (59), a Support Plate (21), and two 5/16" Nylon Locknuts (71). Attach the Right Top Frame (8) to the Left Top Frame (3) with two 5/16" x 2 3/4" Bolts (60), two 5/16" Washers (26), and two 5/16" Nylon Locknuts (71). Do not tighten the 5/16" Nylon Locknuts (71) yet. 10 59 21 8 22 71 3 71 71 6 26 60 8
-
 1
1 -
2
-
 3
3 -
 4
4 -
 5
5 -
 6
6 -
 7
7 -
 8
8 -
 9
9 -
 10
10 -
 11
11 -
 12
12 -
 13
13 -
14
-
15
-
16
-
17
-
18
-
19
-
20
-
21
-
22
-
23
-
24
-
25
-
26
-
27
-
28
-
29
-
30
-
31
-
32
 |
 |