Weslo Body Shop 9 English Manual - Page 16
Weslo Body Shop 9 Manual
 |
View all Weslo Body Shop 9 manuals
Add to My Manuals
Save this manual to your list of manuals |
Page 16 highlights
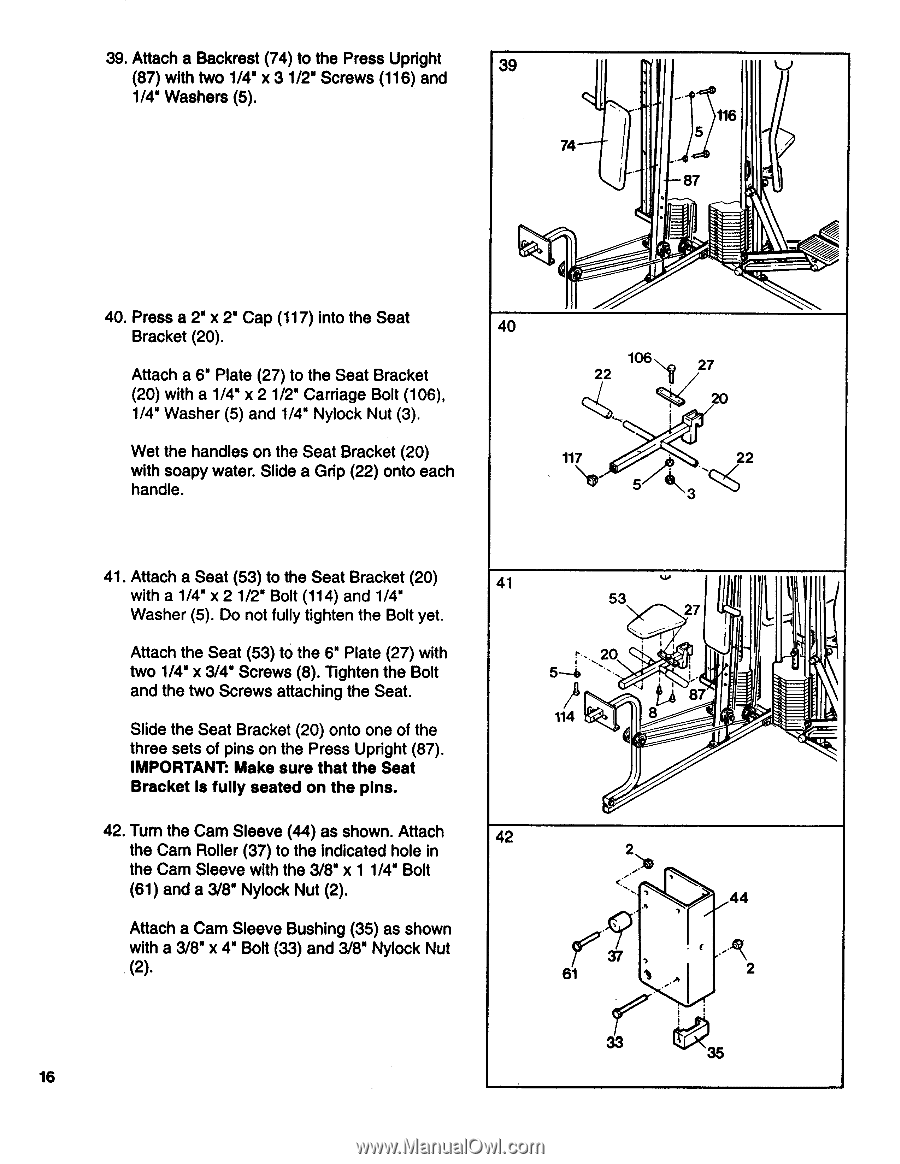
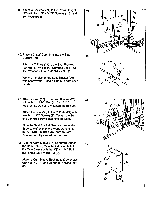
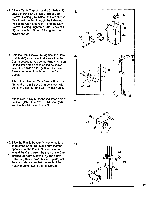
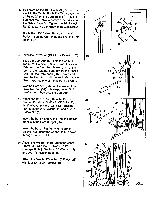
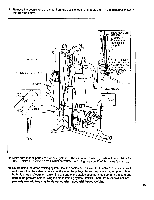
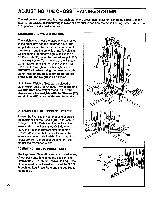
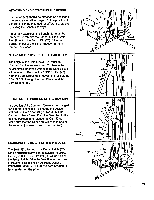
39. Attach a Backrest (74) to the Press Upright (87) with two 1/4" x 3 1/2" Screws (116) and 1/4" Washers (5). 39 74 1 116 -87 40. Press a 2" x 2" Cap (117) into the Seat Bracket (20). 40 Attach a 6" Plate (27) to the Seat Bracket (20) with a 1/4" x 2 1/2" Carriage Bolt (106), 1/4" Washer (5) and 1/4" Nylock Nut (3). 106 22 27 i. Wet the handles on the Seat Bracket (20) with soapy water. Slide a Grip (22) onto each handle. 117 22 5 3 41. Attach a Seat (53) to the Seat Bracket (20) with a 1/4" x 2 1/2" Bolt (114) and 1/4" Washer (5). Do not fully tighten the Bolt yet. Attach the Seat (53) to the 6" Plate (27) with two 1/4" x 3/4" Screws (8). Tighten the Bolt and the two Screws attaching the Seat. Slide the Seat Bracket (20) onto one of the three sets of pins on the Press Upright (87). IMPORTANT: Make sure that the Seat Bracket Is fully seated on the pins. 41 W 53 27 II ..- I- 20 5---i, '.- •J / I1 114 8 L. .• 87 42. Turn the Cam Sleeve (44) as shown. Attach 42 the Cam Roller (37) to the indicated hole in the Cam Sleeve with the 3/8" x 1 1/4" Bolt (61) and a 3/8" Nylock Nut (2). Attach a Cam Sleeve Bushing (35) as shown with a 3/8" x 4" Bolt (33) and 3/8" Nylock Nut (2). 2, JO . , .. , 44 37 , 61 % .,.„ I 2 ! ! 33 35 16
-
 1
1 -
2
-
3
-
4
-
5
-
6
-
7
-
8
-
9
-
10
-
 11
11 -
 12
12 -
 13
13 -
 14
14 -
 15
15 -
 16
16 -
 17
17 -
 18
18 -
 19
19 -
 20
20 -
 21
21 -
22
-
23
-
24
 |
 |