Western Digital My Passport for Mac User Manual - Page 15
Locking and Unlocking the Drive, Password Protecting the Drive
 |
View all Western Digital My Passport for Mac manuals
Add to My Manuals
Save this manual to your list of manuals |
Page 15 highlights
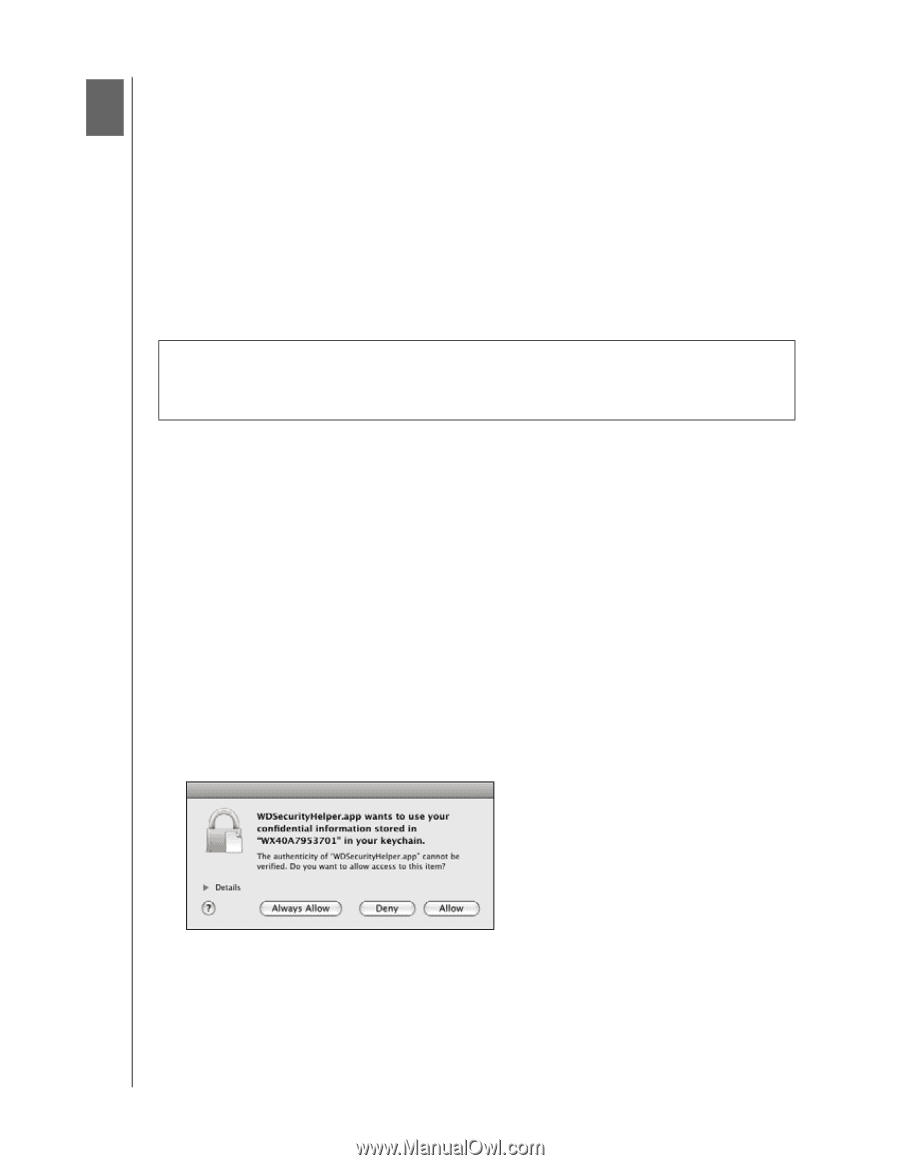
MY PASSPORT FOR MAC USER MANUAL 13 Locking and Unlocking the Drive This chapter includes the following topics: Password Protecting the Drive Unlocking the Drive Changing Your Password Turning Off the Drive Lock Feature Password Protecting the Drive You should password protect your drive if you are worried that someone else will gain access to your drive and you do not want them to see your files on the drive. CAUTION! The WD Security software uses your password to electronically lock and unlock your drive. If you forget your password, you will not be able to access the data that is on your drive or write new data to it. You will have to erase the drive before you can use it again. 1. Click Go > Applications > WD Security to display the WD Security screen, Set Security dialog (see Figure 5 on page 10). 2. If you have more than one supported device connected to your computer, select the one that you want to create a password for. 3. Read the warning about the possibility of data loss if you forget your password. 4. Type your password in the Password box, using up to 25 characters. 5. Retype your password in the Verify Password box. 6. Type a hint to help remember your password in the Password Hint box. 7. Select the Enable auto unlock for this computer... check box if you want the WD Security software to remember your password for the selected drive on this computer. Important: If you select the Enable auto unlock for this computer... check box, the first time you restart your computer or disconnect and reconnect the drive after creating a password, your operating system requests permission to allow the WD Security software to access your password: Click Always Allow to avoid this dialog in the future. 8. Click Set Password to save your password and enable hardware encryption for your drive. LOCKING AND UNLOCKING THE DRIVE - 11
-
 1
1 -
2
-
3
-
4
-
5
-
6
-
7
-
8
-
9
-
 10
10 -
 11
11 -
 12
12 -
 13
13 -
 14
14 -
 15
15 -
 16
16 -
 17
17 -
 18
18 -
 19
19 -
 20
20 -
21
-
22
-
23
-
24
-
25
-
26
-
27
-
28
-
29
-
30
-
31
-
32
-
33
-
34
-
35
-
36
 |
 |