Whirlpool SF265LXTT Installation Instructions - Page 9
do not light properly
 |
UPC - 883049054919
View all Whirlpool SF265LXTT manuals
Add to My Manuals
Save this manual to your list of manuals |
Page 9 highlights
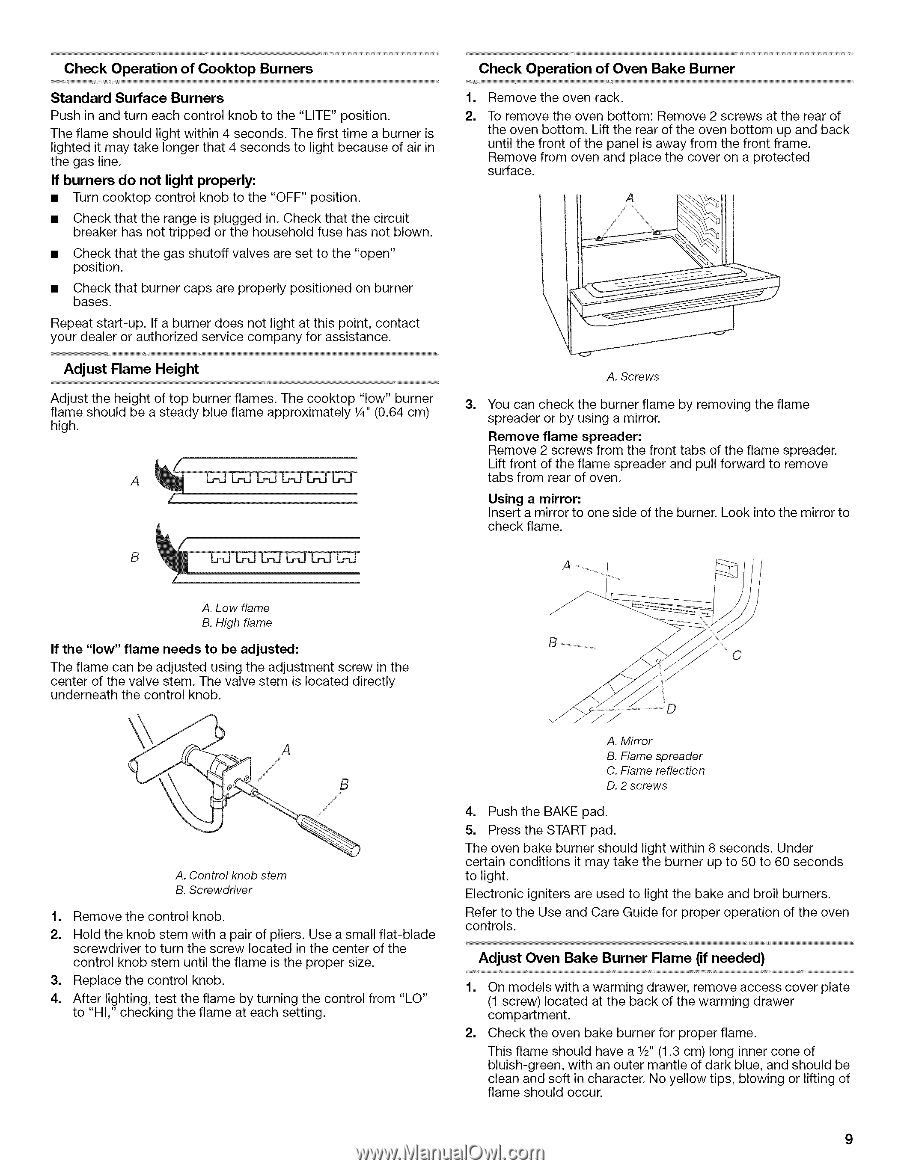
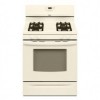
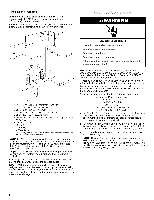
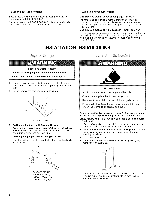
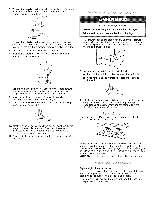
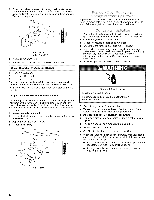
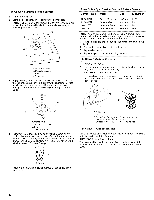
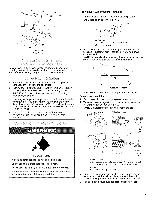
Check Operation of Cooktop Burners Standard Surface Burners Push in and turn each control knob to the "LITE" position. The flame should light within 4 seconds. The first time a burner is lighted it may take longer that 4 seconds to light because of air in the gas line. If burners do not light properly: • Turn cooktop control knob to the "OFF" position. • Check that the range is plugged in. Check that the circuit breaker has not tripped or the household fuse has not blown. • Check that the gas shutoff valves are set to the "open" position. • Check that burner caps are properly positioned on burner bases. Repeat start-up. If a burner does not light at this point, contact your dealer or authorized service company for assistance. Adjust Flame Height 2,",""""'-- Adjust the height of top burner flames. The cooktop "low" burner flame should be a steady blue flame approximately 1A" (0.64 cm) high. A Check Operation of Oven Bake Burner 1. Remove the oven rack. 2. To remove the oven bottom: Remove 2 screws at the rear of the oven bottom. Lift the rear of the oven bottom up and back until the front of the panel is away from the front frame. Remove from oven and place the cover on a protected surface. J A. Screws You can check the burner flame by removing the flame spreader or by using a mirror. Remove flame spreader: Remove 2 screws from the front tabs of the flame spreader. Lift front of the flame spreader and pull forward to remove tabs from rear of oven. Using a mirror: Insert a mirror to one side of the burner. Look into the mirror to check flame. A. Low flame B. High flame If the "low" flame needs to be adjusted: The flame can be adjusted using the adjustment screw in the center of the valve stem. The valve stem is located directly underneath the control knob. A. Control knob stem B. Screwdriver 1. Remove the control knob. 2. Hold the knob stem with a pair of pliers. Use a small flat-blade screwdriver to turn the screw located in the center of the control knob stem until the flame is the proper size. 3. Replace the control knob. 4. After lighting, test the flame by turning the control from "LO" to "HI," checking the flame at each setting. ff A. Mirror B. Flame spreader C. Flame reflection D. 2 screws 4. Push the BAKE pad. 5. Press the START pad. The oven bake burner should light within 8 seconds. Under certain conditions it may take the burner up to 50 to 60 seconds to light. Electronic igniters are used to light the bake and broil burners. Refer to the Use and Care Guide for proper operation of the oven controls. Adjust Oven Bake Burner Flame (if needed) 1. On models with a warming drawer, remove access cover plate (1 screw) located at the back of the warming drawer compartment. 2. Check the oven bake burner for proper flame. This flame should have a V=" (1.3 cm) long inner cone of bluish-green, with an outer mantle of dark blue, and should be clean and soft in character. No yellow tips, blowing or lifting of flame should occur.
-
 1
1 -
2
-
3
-
 4
4 -
 5
5 -
 6
6 -
 7
7 -
 8
8 -
 9
9 -
 10
10 -
 11
11 -
 12
12 -
 13
13 -
 14
14 -
15
-
16
 |
 |