Xerox 3210 User Guide - Page 30
Machine's basic settings, Altitude adjustment, Changing the display language - printer driver
 |
UPC - 095205754322
View all Xerox 3210 manuals
Add to My Manuals
Save this manual to your list of manuals |
Page 30 highlights
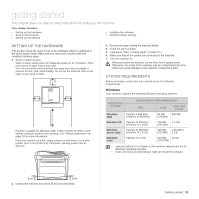
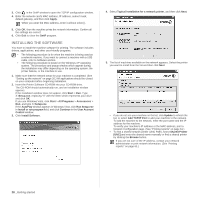
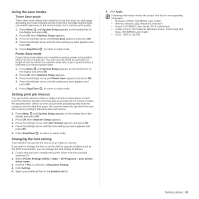
6. After the installation is finished, a window appears asking you to print a test page. If you desire, select the corresponding checkbox(es) and click Finish. The window appears asking you to register yourself as a user of Xerox machines in order to receive information from Xerox. • If your machine does not work properly after the installation, try to reinstall the printer driver. See Software section. • During the printer driver installation process, the driver installer detects the location information for your operating system and sets the default paper size for your machine. If you use a different Windows location, you must change the paper size to match the paper you usually use. Go to printer properties to change the paper size after installation is complete. MACHINE'S BASIC SETTINGS After installation is complete, you may want to set the machine's default settings. Refer to the next section if you would like to set or change values. Altitude adjustment The print quality is affected by atmospheric pressure, which is determined by the height of the machine above sea level. The following information will guide you on how to set your machine to the best print quality or best quality of print. Before you set the altitude value, find the altitude where you are using the machine. 1 Normal 0 2 High 1. Ensure that you have installed the printer driver with the provided Printer Software CD. 2. From the Windows Start menu, select All Programs > your printer driver name > Printer Settings Utility. 3. Click Setting > Altitude Adjustment. Select the appropriate value from the dropdown list, and then click Apply. If your machine is connected to a network, you can enter CentreWare IS by typing the IP address of the machine in the address bar of your browser. Click Properties > General > Printer Default. Select the appropriate altitude value, and then click Apply. Changing the display language To change the language that appears on the control panel, follow these steps: 1. Press Menu until System Setup appears on the bottom line of the display and press OK. 2. Press OK when Machine Setup appears. 3. Press the left/right arrow until Language appears and press OK. 4. Press the left/right arrow until the language you want appears and press OK. 5. Press Stop/Clear to return to ready mode. Setting the date and time The current date and time are shown on the display when your machine is on and ready to work. All of your faxes will have the date and time printed on them. 1. Press Menu until System Setup appears on the bottom line of the display and press OK. 2. Press OK when Machine Setup appears. 3. Press the left/right arrow until Date & Time appears and press OK. 4. Enter the correct time and date using the number keypad. Month = 01 to 12 Day = 01 to 31 Year = requires four digits Hour = 01 to 12 (12-hour mode) 00 to 23 (24-hour mode) Minute = 00 to 59 The date format may differ from country to country You can also use the left/right arrow to move the cursor under the digit you want to correct and enter a new number. 5. To select AM or PM for 12-hour format, press the *or # button or any number button. When the cursor is not under the AM or PM indicator, pressing the *or # button immediately moves the cursor to the indicator. You can change the clock mode to 24-hour format (e.g. 01:00 PM as 13:00). For details, see the next section. 6. Press OK to save the time and date. When you enter a wrong number, Out of Range appears and the machine does not proceed to the next step. If this happens, simply reenter the correct number. 7. Press Stop/Clear to return to ready mode. Changing the clock mode You can set your machine to display the current time using either a 12-hour or 24-hour format. 1. Press Menu until System Setup appears on the bottom line of the display and press OK. 2. Press OK when Machine Setup appears. 3. Press the left/right arrow until Clock Mode appears and press OK. 4. Press the left/right arrow to select the other mode and press OK. 5. Press Stop/Clear to return to ready mode. Getting started_ 29
-
 1
1 -
2
-
3
-
4
-
5
-
6
-
7
-
8
-
9
-
10
-
11
-
12
-
13
-
14
-
15
-
16
-
17
-
18
-
19
-
20
-
21
-
22
-
23
-
24
-
 25
25 -
 26
26 -
 27
27 -
 28
28 -
 29
29 -
 30
30 -
 31
31 -
 32
32 -
 33
33 -
 34
34 -
 35
35 -
36
-
37
-
38
-
39
-
40
-
41
-
42
-
43
-
44
-
45
-
46
-
47
-
48
-
49
-
50
-
51
-
52
-
53
-
54
-
55
-
56
-
57
-
58
-
59
-
60
-
61
-
62
-
63
-
64
-
65
-
66
-
67
-
68
-
69
-
70
-
71
-
72
-
73
-
74
-
75
-
76
-
77
-
78
-
79
-
80
-
81
-
82
-
83
-
84
-
85
-
86
-
87
-
88
-
89
-
90
-
91
-
92
-
93
-
94
-
95
-
96
-
97
-
98
-
99
-
100
-
101
-
102
-
103
-
104
-
105
-
106
-
107
-
108
-
109
-
110
-
111
-
112
-
113
-
114
-
115
-
116
-
117
-
118
-
119
-
120
-
121
-
122
-
123
-
124
-
125
-
126
-
127
-
128
-
129
-
130
-
131
-
132
-
133
-
134
-
135
-
136
-
137
-
138
-
139
-
140
 |
 |
