Xerox 3210 User Guide - Page 39
Adjusting the output support, Stacking papers firmly, Setting the paper size and type
 |
UPC - 095205754322
View all Xerox 3210 manuals
Add to My Manuals
Save this manual to your list of manuals |
Page 39 highlights
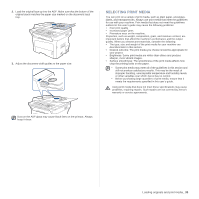
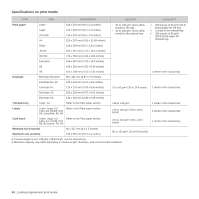
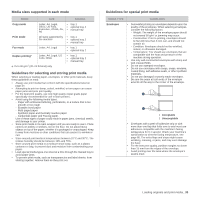
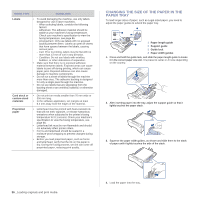
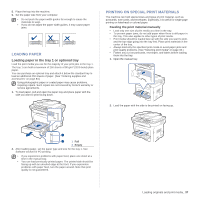
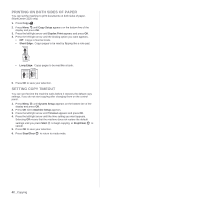
Place the side to be printed facing up. Envelope Preprinted paper Transparency ADJUSTING THE OUTPUT SUPPORT The printed pages stack on the output tray, and the output support will help the printed pages align. To let the output support correctly align the pages you need to pull it out appropriately depending on the paper size. Punched paper Card stock Letterhead paper Label 3. When you print in application, start the print menu. 4. Before you print, open printer properties. 5. Press the Paper tab in printer properties, and select an appropriate paper type. If you want to use a label, set the paper type to Label. 6. Select Manual Feeder in paper source then, press OK. 7. Start printing in application. • If you are printing multiple pages, load the next sheet after first page prints out. Repeat this step for every page to be printed. • The settings you change remain in effect only while you are using the current application. • If envelopes are printed out with wrinkles, crease or black bold lines, open the rear cover and pull down the pressure lever on the right side about 90 degrees and try printing again. Keep the rear cover opened during printing. Pressure lever 38 _Loading originals and print media 1 Output support • If the output support is incorrectly adjusted, printed pages may be mis-aligned or fall. • If you continuously print many pages, the surface of the output tray may become hot. Be careful not to touch the surface, and especially keep children away from the surface. Stacking papers firmly If you use a machine in a humid area, or you are using the damp print media caused by a high humidity, the print-outs on the output tray may be curled and may not be stacked properly. In this case, you can set the machine to use the Paper Stacking function to let print-outs stacked firmly. But, using this function will make the print speed slow. 1. Press Menu until System Setup appears on the bottom line of the display and press OK. 2. Press the left/right arrow until Maintenance appears and press OK. 3. Press the left/right arrow until Paper Stacking appears and press OK. 4. Press the left/right arrow to select On or Off and press OK. 5. Press Stop/Clear to return to ready mode. SETTING THE PAPER SIZE AND TYPE After loading paper in the paper tray, you need to set the paper size and type using the control panel buttons. These settings will apply to Copy and Fax modes. For PC-printing, you need to select the paper size and type in the application program you use on your PC. 1. Press Menu until System Setup appears on the bottom line of the display and press OK. 2. Press the left/right arrow until Paper Setup appears and press OK. 3. Press OK when Paper Size appears. 4. Press the left/right arrow until the paper tray you want appears and press OK. 5. Press the left/right arrow until the paper size you are using appears and press OK. 6. Press the left/right arrow until Paper Type appears and press OK. 7. Press the left/right arrow until the paper tray you want appears and press OK. 8. Press the left/right arrow until the paper type you are using appears and press OK. 9. Press Stop/Clear to return to ready mode.
-
 1
1 -
2
-
3
-
4
-
5
-
6
-
7
-
8
-
9
-
10
-
11
-
12
-
13
-
14
-
15
-
16
-
17
-
18
-
19
-
20
-
21
-
22
-
23
-
24
-
25
-
26
-
27
-
28
-
29
-
30
-
31
-
32
-
33
-
 34
34 -
 35
35 -
 36
36 -
 37
37 -
 38
38 -
 39
39 -
 40
40 -
 41
41 -
 42
42 -
 43
43 -
 44
44 -
45
-
46
-
47
-
48
-
49
-
50
-
51
-
52
-
53
-
54
-
55
-
56
-
57
-
58
-
59
-
60
-
61
-
62
-
63
-
64
-
65
-
66
-
67
-
68
-
69
-
70
-
71
-
72
-
73
-
74
-
75
-
76
-
77
-
78
-
79
-
80
-
81
-
82
-
83
-
84
-
85
-
86
-
87
-
88
-
89
-
90
-
91
-
92
-
93
-
94
-
95
-
96
-
97
-
98
-
99
-
100
-
101
-
102
-
103
-
104
-
105
-
106
-
107
-
108
-
109
-
110
-
111
-
112
-
113
-
114
-
115
-
116
-
117
-
118
-
119
-
120
-
121
-
122
-
123
-
124
-
125
-
126
-
127
-
128
-
129
-
130
-
131
-
132
-
133
-
134
-
135
-
136
-
137
-
138
-
139
-
140
 |
 |
