Yamaha CDR-D651 Owner's Manual - Page 16
RECORDING TO, A DISC, Setting the Recording Level, Manual Track Marking
 |
View all Yamaha CDR-D651 manuals
Add to My Manuals
Save this manual to your list of manuals |
Page 16 highlights
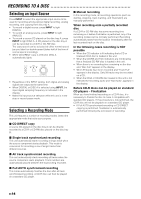
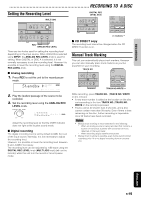
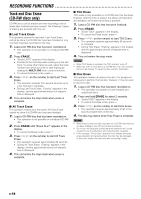
GETTING STARTED RECORDING PLAYBACK RECORDING TO A DISC Setting the Recording Level MULTI JOG COPY REC MODE TRACK NO. INPUT DISC A DIGITAL ANALOG MULTI JOG PUSH MODE FINALIZE ERASE DIGITAL REC LEVEL B DISC Recordable ReWritable REC MUTE REC ANALOG REC LEVEL FADE IN/OUT MIN MAX REC ANALOG REC LEVEL There are two knobs used for setting the recording level depending on the input source. When ANALOG is selected using INPUT, the ANALOG REC LEVEL knob is used for setting. When DIGITAL or DISC A is selected, it is not normally necessary to set the recording level. However it is possible to lower the recording level using the DIGITAL REC LEVEL knob. I Analog recording 1. Press REC to set this unit to the record pause mode. Standby CD-R REC L dB -60 -30 -I0 R -6 -4 -2 -I 0 OVER 2. Play the loudest passage of the source to be recorded. 3. Set the recording level using the ANALOG REC LEVEL knob. ANALOG REC LEVEL MIN MAX L dB -60 -30 -I0 R -6 -4 -2 -I 0 OVER Adjust the recording level so that the OVER indicator does not light at the loudest sound levels. I Digital recording The digital recording level is set by default to 0dB, the level of the input source. Normally, it is not necessary to adjust the recording level. However, it is possible to lower the recording level between 0 and -64dB if necessary. The recording level can be adjusted by 1dB steps using the DIGITAL REC LEVEL knob (MULTI JOG knob) (+/- on the remote), while this unit is in the record or record pause mode. DIGITAL REC LEVEL knob COPY REC MODE TRACK NO. INPUT DISC A DIGITAL ANALOG MULTI JOG PUSH MODE FINALIZE ERASE DIGITAL REC LEVEL B DISC Recordable ReWritable REC MUTE REC ANALOG REC LEVEL FADE IN/OUT MIN MAX DISPLAY A/B INPUT TIME TEXT DIMMER MENU EDIT DELETE SET +/- buttons I CD DIRECT copy The recording level cannot be changed when the CD DIRECT function is on. Manual Track Marking This unit can automatically place track markers. However you can also manually place track markers as you like anywhere in your recording. TRACK NO. COPY COPY REC MODE TRACK NO. INPUT DISC A DIGITAL ANALOG MULTI JOG PUSH MODE FINALIZE ERASE DIGITAL REC LEVEL B DISC Recordable ReWritable REC MUTE REC ANALOG REC LEVEL FADE IN/OUT MIN MAX A OPEN/CLOSE B FADE IN/OUT TRACK NO. REC REC MUTE WRITE REC MODE FINALIZE ERASE TRACK NO. WRITE While recording, press TRACK NO. (TRACK NO. WRITE on the remote). • A new track number is added at the location on the disc corresponding to the time TRACK NO. (TRACK NO. WRITE on the remote) is pressed. • Tracks cannot be shorter than 4 seconds, and a disc cannot contain more than 99 tracks. Even if there is time remaining on the disc, further recording is impossible once 99 tracks have been recorded. Notes • Manual track marking is recommended for the following: * When an analog source is being recorded that contains a section or numerous sections with levels too low to be detected on the level meter. * When recording digital satellite broadcasts • Manual track marking is possible even during synchronized recording only if it is not digital recording from an external unit. ADDITIONAL INFORMATION ENGLISH E-15
-
 1
1 -
2
-
3
-
4
-
5
-
6
-
7
-
8
-
9
-
10
-
 11
11 -
 12
12 -
 13
13 -
 14
14 -
 15
15 -
 16
16 -
 17
17 -
 18
18 -
 19
19 -
 20
20 -
 21
21 -
22
-
23
-
24
-
25
-
26
-
27
-
28
-
29
-
30
-
31
-
32
-
33
 |
 |
