Yamaha CLP-525 Owner's Manual
Yamaha CLP-525 Manual
 |
View all Yamaha CLP-525 manuals
Add to My Manuals
Save this manual to your list of manuals |
Yamaha CLP-525 manual content summary:
- Yamaha CLP-525 | Owner's Manual - Page 1
English Français Owner's Manual Mode d'emploi CLP-525 For information on assembling the keyboard stand, refer to the instructions at the end of this manual. EN Pour obtenir des informations sur l'assemblage du support du clavier, reportez-vous aux FR instructions à la fin de ce manuel. - Yamaha CLP-525 | Owner's Manual - Page 2
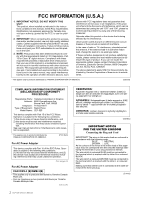
Adaptor CAN ICES-3 (B)/NMB-3(B) • This applies only to products distributed by Yamaha Canada Music Ltd. • Ceci ne s'applique qu'aux produits distribués par Yamaha Canada Musique Ltée. (can_b_01) 2 CLP-525 Owner's Manual OBSERVERA! Apparaten kopplas inte ur växelströmskällan (nätet) så länge som - Yamaha CLP-525 | Owner's Manual - Page 3
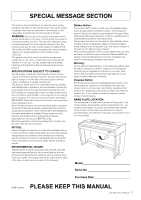
are designed to be dealer assembled or installed. Please make sure by Yamaha are designed for seating only. No other uses are recommended. NOTICE: Service manual as a permanent record of your purchase. Model Serial No. Purchase Date 92-BP (bottom) PLEASE KEEP THIS MANUAL 3 CLP-525 Owner's Manual - Yamaha CLP-525 | Owner's Manual - Page 4
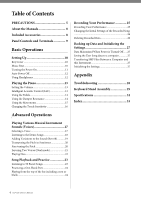
Listening to the Demo Songs 18 Adding Variations to the Sound (Reverb 19 Transposing the Pitch in Semitones 20 Fine-tuning the Pitch 20 Layering Two Voices Initializing the Settings 27 Appendix Troubleshooting 28 Keyboard Stand Assembly 29 Specifications 32 Index 33 4 CLP-525 Owner's Manual - Yamaha CLP-525 | Owner's Manual - Page 5
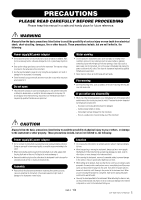
problems occur, immediately turn off the power switch and disconnect the electric plug from the outlet. Then have the device inspected by Yamaha service Assembly • Read carefully the attached documentation explaining the assembly process. Failure to assemble some trouble or CLP-525 Owner's Manual - Yamaha CLP-525 | Owner's Manual - Page 6
injury. Yamaha cannot be Clavinova instructions for proper usage. Saving data • Saved data may be lost due to malfunction or incorrect operation. Save important data to an external device such as a computer (see the online manual, Computer-related Operations (page 8)). 6 CLP-525 Owner's Manual - Yamaha CLP-525 | Owner's Manual - Page 7
but not limited to MIDI data and/or audio data is strictly prohibited except for your personal use. • This product incorporates and bundles computer programs and contents in which Yamaha owns copyrights or with is connected to the [USB TO HOST] terminal of the instrument. 7 CLP-525 Owner's Manual - Yamaha CLP-525 | Owner's Manual - Page 8
website, select your country, enter "CLP-525" in the Model Name box, then click [SEARCH]. Yamaha Downloads http://download.yamaha.com/ Included Accessories • Owner's Manual (this book) • Quick Operation Guide (separate sheet) • "50 Greats for the Piano" (music book) • Online Member Product - Yamaha CLP-525 | Owner's Manual - Page 9
20 Simultaneously holding these two buttons and pressing the specified key sets will set the MIDI or Transpose parameters. [PHONES] jacks page 12 For connecting a set of standard stereo headphones. 14 For controlling expression and sustain, just as on an acoustic piano. 9 CLP-525 Owner's Manual - Yamaha CLP-525 | Owner's Manual - Page 10
the music rest up and toward yourself as far as it will go. 2. Flip down the two metal supports at the left and right on the rear of the music rest. 3. Lower the music rest so that it rests on do not release your hands from the music rest until it is all the way down. 10 CLP-525 Owner's Manual - Yamaha CLP-525 | Owner's Manual - Page 11
level. When not using the instrument for an extended period of time, be sure to unplug the power cord from the wall AC outlet. 11 CLP-525 Owner's Manual - Yamaha CLP-525 | Owner's Manual - Page 12
SONG] and [PIANO/VOICE] and Assembly" on page 29 for instructions on installing the headphone hanger. NOTICE Do not hang anything other than the headphones on the hanger. Doing so may damage this instrument or the hanger. Bottom surface Standard stereo phone plug PHONES 12 CLP-525 Owner's Manual - Yamaha CLP-525 | Owner's Manual - Page 13
clearly. Default setting: On To turn on IAC: While holding down [PIANO/VOICE], press the F♯0 key. To turn off IAC: While holding down [PIANO/VOICE], press the F0 key. Lowest key F♯0 To adjust IAC levels. Setting range: A-1 (-3) - D♯0 (+3) Default setting: C0 (0) 13 CLP-525 Owner's Manual - Yamaha CLP-525 | Owner's Manual - Page 14
effect is applied to the entire sound of the instrument. To turn on the Damper Resonance: While holding [PIANO/VOICE], press the G♯2 key. To turn off the Damper Resonance: While holding [PIANO/VOICE], press the G2 key. Default setting: On Lowest key 14 CLP-525 Owner's Manual G2 G♯2 (Off) (On) - Yamaha CLP-525 | Owner's Manual - Page 15
Playing the Piano Using the Metronome The metronome feature ], press the D5 key to increase or the A♯4 key to decrease. • To specify a three-digit value: While holding down [METRONOME], press the relevant C4 - A4 keys one by one in order - G2 (20) Default setting: D2 (15) 15 CLP-525 Owner's Manual - Yamaha CLP-525 | Owner's Manual - Page 16
you play the keyboard soft or hard. B6 Medium This is the standard piano touch response. The volume level changes very widely from pianissimo to fortissimo C7 Hard to facilitate dynamic and dramatic expression. You have to hit the keys hard to produce a loud sound. 16 CLP-525 Owner's Manual - Yamaha CLP-525 | Owner's Manual - Page 17
C1 D1 E1 F1 G1 A1 Voice List Key Voice Name C1 Grand Piano 1 C♯1 Grand Piano 2 D1 Grand Piano 3 D♯1 E.Piano 1 E1 E.Piano 2 F1 Harpsichord F♯1 Vibraphone G1 Pipe Organ G♯1 Jazz Organ A1 Strings with realistic reverb. Try combining this Voice with piano in the Dual mode. 17 CLP-525 Owner's Manual - Yamaha CLP-525 | Owner's Manual - Page 18
lamp turns off. Demo Song List Key Voice Name C1 Grand Piano 1 C♯1 Grand Piano 2 D1 Grand Piano 3 D♯1 E.Piano 1 E1 E.Piano 2 F1 Harpsichord F♯1 Vibraphone G1 Pipe Organ G♯1 Jazz Organ compositions. The original Demo Songs are Yamaha originals (©2013 Yamaha Corporation). 18 CLP-525 Owner's Manual - Yamaha CLP-525 | Owner's Manual - Page 19
one of the C3 - G♯4 keys. The Depth value increases as you press higher keys. Reverb Depth range: 0 (no effect) - 20 (maximum depth) While holding down [PIANO/VOICE], press the A4 key to set the Reverb Depth to the most suitable value for the current Voice. 19 CLP-525 Owner's Manual - Yamaha CLP-525 | Owner's Manual - Page 20
set the pitch to 442.0 Hz: Press and hold down the [DEMO/ SONG] and [PIANO/VOICE] simultaneously, and press the A0 key. To restore default pitch: Press and hold down the [DEMO/SONG] and [PIANO/VOICE] simultaneously, and press [+R] and [-L] simultaneously. Lowest key A0 20 CLP-525 Owner's Manual - Yamaha CLP-525 | Owner's Manual - Page 21
more richly textured sound. 1. Engage the Dual mode. While holding down [PIANO/VOICE], simultaneously hold down two keys between C1 and A1 to select the exit from Dual mode, press [PIANO/VOICE]. NOTE The Dual and Duo modes (page 22) cannot be engaged at the same time. 21 CLP-525 Owner's Manual - Yamaha CLP-525 | Owner's Manual - Page 22
left section. 3. To exit from Duo, simultaneously hold down [PIANO/ VOICE] and press [+R] and [-L]. NOTE The Split Point cannot be changed from E3. NOTE If the keyboard is in Dual, engaging Duo will exit from Dual. The Voice 1 is used as the Voice of the entire keyboard. 22 CLP-525 Owner's Manual - Yamaha CLP-525 | Owner's Manual - Page 23
you want to play back from the included "50 Greats for the Piano." The number of each piano Preset Song is assigned to the C2 - C♯6 keys. 2. [+R] or [-L] to increase or decrease the Tempo value by 1. Other instructions are the same as those of the Metronome Tempo (page 15). To CLP-525 Owner's Manual - Yamaha CLP-525 | Owner's Manual - Page 24
Quick Play: Hold down [DEMO/SONG] and press the lowest key (A-1) to play from the top of the first measure (including a rest or blank). 24 CLP-525 Owner's Manual Lowest key (A-1) - Yamaha CLP-525 | Owner's Manual - Page 25
the desired Voice and other parameters, such as beat, for recording. For instructions on selecting a Voice, refer to page 17. If necessary, set other computer as a Standard MIDI file (SMF). For details, refer to the "Computerrelated Operations" on the website (page 8). 25 CLP-525 Owner's Manual - Yamaha CLP-525 | Owner's Manual - Page 26
[-L]) lamp flashes. 3. Press [REC] or [PLAY] to stop recording. All data recorded for the selected Part will be deleted, and the lamp turns off. 26 CLP-525 Owner's Manual - Yamaha CLP-525 | Owner's Manual - Page 27
, while the [REC], [PLAY], [+R] and [-L] lamps are flashing). NOTE If this instrument somehow becomes disabled or malfunctions, turn off the power then execute Initialization. 27 CLP-525 Owner's Manual - Yamaha CLP-525 | Owner's Manual - Page 28
Appendix Troubleshooting Problem Possible Cause and Solution Power jack (page 12). Make sure that Local Control is On. For details, refer to the "MIDI Reference" (page 8). Pedals do not function. The pedal cord may not be securely connected to to reset the function. 28 CLP-525 Owner's Manual - Yamaha CLP-525 | Owner's Manual - Page 29
in the correct orientation. Please assemble the unit in accordance with the sequence given below. • Assembly should be carried out by at illustration above, depending on your particular area. Please check with your Yamaha dealer. Cord holders x 2 4 × 10 mm thin screws x ). 29 CLP-525 Owner's Manual - Yamaha CLP-525 | Owner's Manual - Page 30
Keyboard Stand Assembly 2-3 Insert the other two tapping screws (4 x 20 mm) into the other two screw holes to secure B. 2-4 Securely tighten the screws on be pinched by it. • Do not hold the main unit in any position other than the position specified above. 6-2 6-3 30 CLP-525 Owner's Manual - Yamaha CLP-525 | Owner's Manual - Page 31
Keyboard Stand Assembly After completing the assembly, please check the following. • Are there any parts left over? Review the assembly procedure and the assembled instrument, make sure all screws are properly tightened and have not been loosened by moving the instrument. 31 CLP-525 Owner's Manual - Yamaha CLP-525 | Owner's Manual - Page 32
manual are for information purposes only. Yamaha Corp. reserves the right to change or modify products or specifications at any time without prior notice. Since specifications, equipment or options may not be the same in every locale, please check with your Yamaha dealer. 32 CLP-525 Owner's Manual - Yamaha CLP-525 | Owner's Manual - Page 33
Reverb Depth 19 Reverb Type 19 Reverb Type List 19 Right-hand Part 24 S Soft Pedal 14 Sostenuto Pedal 14 T Tempo 15 Touch Sensitivity 16 Transpose 20 Tuning 20 U USB TO HOST 9 User Song 25 V Voice 17 Voice List 17 Volume 13, 15 33 CLP-525 Owner's Manual - Yamaha CLP-525 | Owner's Manual - Page 34
MEMO - Yamaha CLP-525 | Owner's Manual - Page 35
number in the space provided below and retain this manual as a permanent record of your purchase to aid trouve dans le bas de l'unité. For CLP-525 and AC Power Adaptor (bottom_fr_01) Information for Users , your waste disposal service or the point of sale where you purchased the - Yamaha CLP-525 | Owner's Manual - Page 36
- Yamaha CLP-525 | Owner's Manual - Page 37
Skifan HF Skeifan 17 P.O. Box 8120, IS-128 Reykjavik, Iceland Tel: 525 5000 RUSSIA Yamaha Music (Russia) LLC. Room 37, bld. 7, Kievskaya street, Moscow Tsimshatsui, Kowloon, Hong Kong Tel: 2737-7688 INDIA Yamaha Music India Pvt. Ltd. Spazedge building, Ground Floor, Tower A, Sector 47, Gurgaon- - Yamaha CLP-525 | Owner's Manual - Page 38
ZH76640 Yamaha Global Site http://www.yamaha.com/ Yamaha Downloads http://download.yamaha.com/ C.S.G., DMI Development Division © 2013 Yamaha Corporation 312MWAP*.*-01B0 Printed in Vietnam ZH76640
-
 1
1 -
 2
2 -
 3
3 -
 4
4 -
 5
5 -
 6
6 -
 7
7 -
8
-
9
-
10
-
11
-
12
-
13
-
14
-
15
-
16
-
17
-
18
-
19
-
20
-
21
-
22
-
23
-
24
-
25
-
26
-
27
-
28
-
29
-
30
-
31
-
32
-
33
-
34
-
35
-
36
-
37
-
38
 |
 |

FR
EN
Owner’s Manual
Mode d’emploi
CLP
-
525
For information on assembling the keyboard stand, refer to the instructions at the end of
this manual.
Pour obtenir des informations sur l'assemblage du support du clavier, reportez-vous aux
instructions à la fin de ce manuel.
English
Français