Yamaha HTR-5540 Owners Manual - Page 25
Yamaha HTR-5540 Manual
 |
View all Yamaha HTR-5540 manuals
Add to My Manuals
Save this manual to your list of manuals |
Page 25 highlights
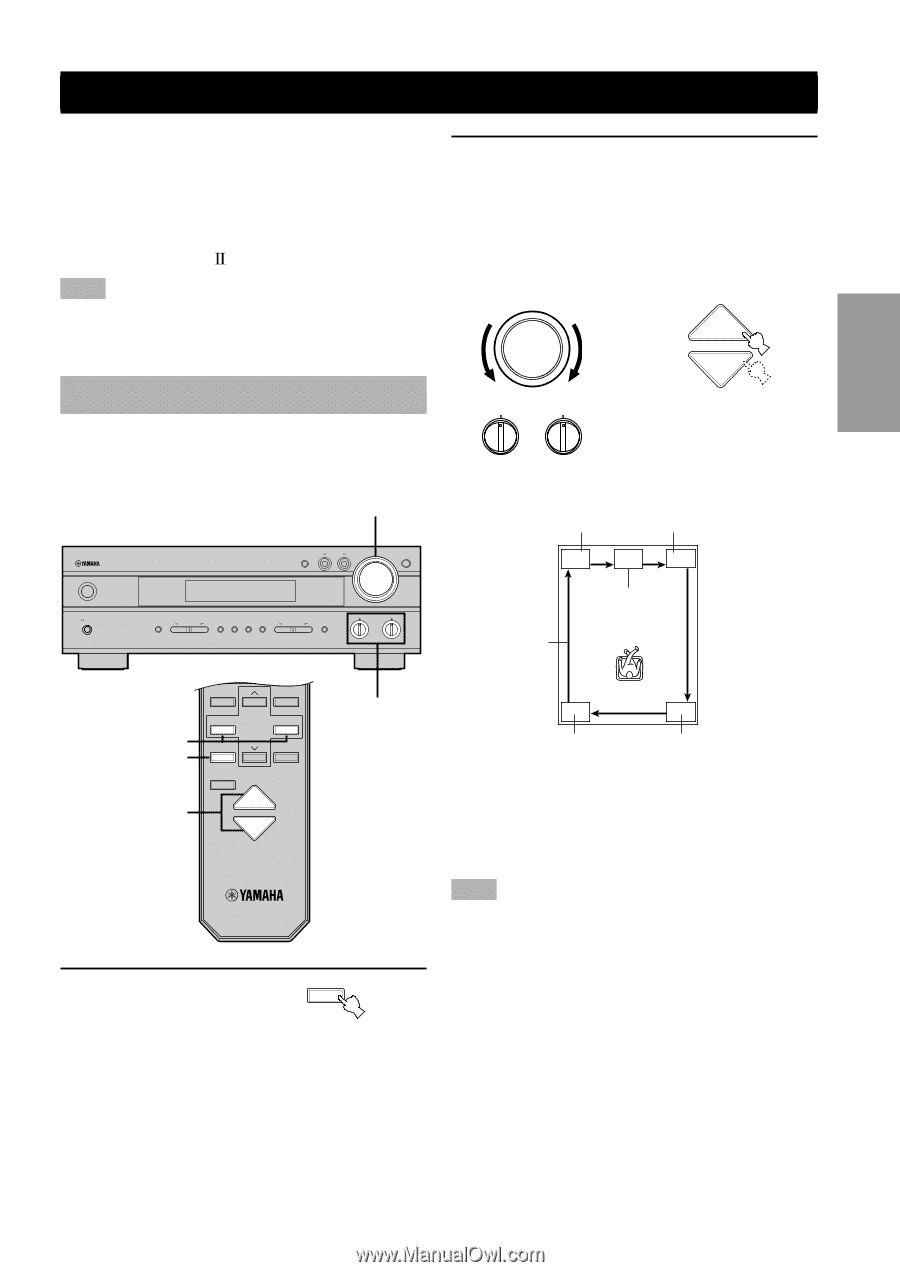
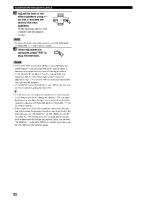
ADJUSTING SPEAKER OUTPUT LEVELS This section explains how to adjust speaker output levels using the test tone generator. When this adjustment is complete, the output level heard at the listening position should be the same from each speaker. This is important for best performance of the digital sound field processor, and the various decoders (Dolby Digital, Dolby Pro Logic, Dolby Pro Logic and DTS). 2 INTRODUCTION Note • Since this unit cannot enter the test mode while headphones are connected to this unit, be sure to unplug the headphones from the PHONES jack when using the test tone. Set the BASS and TREBLE controls on the front panel to the center position and adjust the volume of this unit so you can hear the test tone. The test tone is heard (in order) from the main left speaker, center speaker, main right speaker, rear right speaker, rear left speaker, and the subwoofer. The tone is produced for 2.5 seconds from each speaker. VOLUME PREPARATION or Using the test tone Use the test tone to balance the output levels of the speakers. The adjustment of each speaker output level should be made at your listening position using the remote control. - VOLUME BASS TREBLE Remote control + - + BASIC OPERATION Front panel 2 INPUT VOLUME 6CH INPUT LEFT RIGHT INPUT M0DE NATURAL SOUND AV RECEIVER STANDBY /ON CENTER BASS TREBLE STEREO PROGRAM MEMORY TUNING MODE SILENT FM/AM PRESET/TUNING PRESET/TUNING A/B/C/D/E ADVANCED OPERATION EFFECT PHONES MAN'L/AUTO FM AUTO/MAN'L MONO EDIT - + - + *SUBWOOFER LEVEL SET MENU - + DSP 2 L SUR. R SUR. 3 1,4 2 TEST STEREO EFFECT MUTE * Subwoofer test tone is output after the rear left speaker (LEFT SURROUND). VOLUME ADDITIONAL INFORMATION The front panel display shows which speaker is outputting the test tone. Note • If the test tone cannot be heard, turn down the volume, set this unit to standby mode and check the speaker connections. APPENDIX 1 Press TEST to output the test tone. TEST English 21
-
 1
1 -
2
-
3
-
4
-
5
-
6
-
7
-
8
-
9
-
10
-
11
-
12
-
13
-
14
-
15
-
16
-
17
-
18
-
19
-
 20
20 -
 21
21 -
 22
22 -
 23
23 -
 24
24 -
 25
25 -
 26
26 -
 27
27 -
 28
28 -
 29
29 -
 30
30 -
31
-
32
-
33
-
34
-
35
-
36
-
37
-
38
-
39
-
40
-
41
-
42
-
43
-
44
-
45
-
46
-
47
-
48
-
49
-
50
-
51
-
52
-
53
-
54
-
55
-
56
-
57
-
58
-
59
 |
 |