Yamaha HTR-5940 Owners Manual
Yamaha HTR-5940 Manual
 |
View all Yamaha HTR-5940 manuals
Add to My Manuals
Save this manual to your list of manuals |
Yamaha HTR-5940 manual content summary:
- Yamaha HTR-5940 | Owners Manual - Page 1
U HTR-5940 AV Receiver OWNER'S MANUAL - Yamaha HTR-5940 | Owners Manual - Page 2
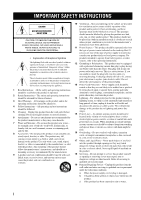
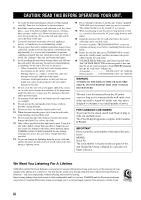
IMPORTANT SAFETY INSTRUCTIONS IMPORTANT SAFETY INSTRUCTIONS CAUTION RISK OF ELECTRIC SHOCK DO NOT OPEN CAUTION: TO REDUCE THE RISK OF ELECTRIC SHOCK, DO NOT REMOVE COVER (OR BACK). NO USER-SERVICEABLE PARTS INSIDE. REFER SERVICING TO QUALIFIED SERVICE PERSONNEL. • Explanation of Graphical Symbols - Yamaha HTR-5940 | Owners Manual - Page 3
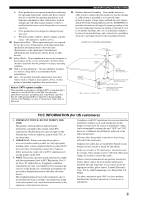
SERVICE EQUIPMENT NEC - NATIONAL ELECTRICAL CODE ANTENNA LEAD IN WIRE ANTENNA DISCHARGE UNIT (NEC SECTION 810-20) GROUNDING CONDUCTORS (NEC SECTION 810-21) GROUND CLAMPS POWER SERVICE GROUNDING ELECTRODE SYSTEM (NEC ART 250. PART according to the instructions found in the users manual, may cause - Yamaha HTR-5940 | Owners Manual - Page 4
reached easily. 17 Be sure to read the "TROUBLESHOOTING" section on common operating errors before concluding that this unit is faulty. 18 Before moving this unit, press STANDBY/ON to set this unit in the standby mode, and then disconnect the power cable from the AC wall outlet. 19 VOLTAGE SELECTOR - Yamaha HTR-5940 | Owners Manual - Page 5
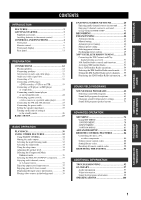
, or other components 86 Setting remote control codes 88 Setting library codes 89 Resetting all remote control codes 90 RESETTING THE SYSTEM 91 ADDITIONAL INFORMATION TROUBLESHOOTING 92 GLOSSARY 97 Audio information 97 Video information 98 Sound field program information 99 SPECIFICATIONS - Yamaha HTR-5940 | Owners Manual - Page 6
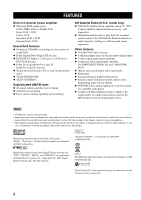
FEATURES FEATURES Built-in 6-channel power amplifier ◆ Minimum RMS output power (0.06% THD, 20 Hz to 20 kHz, 8 Ω) Front: 90 W + 90 W Center: 90 W Surround: 90 W + 90 W Surround back: 90 W Sound field features ◆ Proprietary YAMAHA technology for the creation of sound fields ◆ Dolby Digital/Dolby - Yamaha HTR-5940 | Owners Manual - Page 7
GETTING STARTED GETTING STARTED Supplied accessories Check that you received all of the following parts. Remote control CODE SET TRANSMIT POWER TV POWER AV STANDBY POWER CD DVD MD CD-R CBL DTV SLEEP XM TUNER MULTI CH IN V-AUX DVR TV VOL TV CH AMP VOLUME SOURCE TV TV MUTE TV - Yamaha HTR-5940 | Owners Manual - Page 8
or set it to the standby mode (see page 26). Notes • In the standby mode, this unit consumes a small amount of power in order to receive infrared signals from the remote control. • When you turn on this unit, there will be a 4 to 5-second delay before this unit can reproduce sound. 2 Remote control - Yamaha HTR-5940 | Owners Manual - Page 9
channels. B SPEAKERS A/B buttons Turns on or off the set of front speakers sound field programs off or on. When "STRAIGHT" is selected, 2-channel or multi-channel input signals are output directly from their respective speakers without effect processing (see page 37). D TONE CONTROL remote control). - Yamaha HTR-5940 | Owners Manual - Page 10
STANDBY POWER A unit. 1 Infrared window TV AV B Outputs infrared control signals. Aim this window at the 3 CD DVD MD CD-R CBL DTV SLEEP XM TUNER MULTI CH IN C D component you want to operate (see page 8). 2 CODE SET Use to set up remote control codes (see page 88). V-AUX DVR AMP - Yamaha HTR-5940 | Owners Manual - Page 11
sound field program parameters or the "SET MENU" parameters. 9 RETURN Returns to the previous menu level when adjusting the "SET MENU" parameters. 0 TRANSMIT indicator Flashes while the remote control is sending infrared signals. A STANDBY Sets this unit to the standby mode (see page 26). B POWER - Yamaha HTR-5940 | Owners Manual - Page 12
VOLUME VIDEO AUX VIDEO L AUDIO R PORTABLE Approximately 6 m (20 ft) 30 30 CODE SET TRANSMIT POWER TV POWER AV STANDBY POWER MD SLEEP CD CD-R XM CBL MULTI CH IN DVD DTV TUNER V-AUX DVR TV VOL TV CH AMP VOLUME SOURCE TV TV MUTE TV INPUT MUTE STEREO 1 MUSIC ENTERTAIN - Yamaha HTR-5940 | Owners Manual - Page 13
C PCM indicator Lights up when this unit is reproducing PCM (Pulse Code Modulation) digital audio signals. D STANDARD indicator Lights up when the "SUR. STANDARD" or "SUR. ENHANCED" programs are selected (see page 41). E SP A B indicators Light up according to the set of front speakers selected. 9 - Yamaha HTR-5940 | Owners Manual - Page 14
contains the LFE signal. O Radio Data System indicators (U.K. and Europe models only) Lights up when the Radio Data System data is being received. EON Lights up when the EON data service is being received. PTY HOLD Lights up while searching for the Radio Data System stations in the PTY SEEK mode. 10 - Yamaha HTR-5940 | Owners Manual - Page 15
DTV/CBL IN DVR OUT S VIDEO FRONT MONITOR OUT SPEAKERS A SURROUND B CENTER SURROUND BACK CONTROLS AND FUNCTIONS 7 COMPONENT VIDEO DVD DVR Y PB PR connection information. 9 Speaker terminals See page 13 for connection information. 0 AC OUTLET(S) Use to supply power to your other - Yamaha HTR-5940 | Owners Manual - Page 16
and at the same height as the surround speakers. Subwoofer (SW) The use of a subwoofer with a built-in amplifier, such as the YAMAHA Active Servo Processing Subwoofer System, is effective not only for reinforcing bass frequencies from any or all channels, but also for hi-fi stereo reproduction - Yamaha HTR-5940 | Owners Manual - Page 17
any metal part of this unit. This could damage this unit and/or speakers. • Use magnetically shielded speakers. If this type of speakers still creates the interference with the monitor, place the speakers away from the monitor. • If you are to use 4 or 6 ohm speakers, be sure to set "SP IMP." to - Yamaha HTR-5940 | Owners Manual - Page 18
Connect a center speaker (3) to these terminals. SURROUND terminals Connect surround speakers (4, 5) to these terminals. SURROUND BACK terminals Connect a surround back speaker (6) to these terminals. SUBWOOFER jack Connect a subwoofer with a built-in amplifier (7) (such as the YAMAHA Active Servo - Yamaha HTR-5940 | Owners Manual - Page 19
cable 1 Remove approximately 10 mm (0.4 in) of insulation from the end of each speaker cable and then twist the exposed wires of the cable together to prevent short circuits. CONNECTIONS ■ Connecting the banana plug (except U.K., Europe and Asia models) The banana plug is a single-pole electrical - Yamaha HTR-5940 | Owners Manual - Page 20
composite video cables. S VIDEO jacks For S-video signals, separated into the luminance (Y) and chrominance (C) video signals transmitted on separate wires of S-video cables. COMPONENT VIDEO jacks For component video signals, separated into the luminance (Y) and chrominance (PB, PR) video signals - Yamaha HTR-5940 | Owners Manual - Page 21
PREPARATION P Audio and video signal flow ■ Audio signal flow for AUDIO OUT (REC) AUDIO Input L R PORTABLE CONNECTIONS Output AUDIO OUT (REC) L R Analog audio Analog output Note This unit handles digital and analog signals independently. Thus, audio signals input at the analog jacks are - Yamaha HTR-5940 | Owners Manual - Page 22
MONITOR OUT jack or the COMPONENT VIDEO MONITOR OUT jacks of this unit. CAUTION Do not connect this unit or other components to the AC power supply until all connections between components are complete. VIDEO MONITOR OUT S VIDEO MONITOR OUT COMPONENT VIDEO Y PB PR MONITOR OUT S S-video in - Yamaha HTR-5940 | Owners Manual - Page 23
player, VCR or STB (set-top box) using the same type of video connections as those made for your TV (see page 18). The cable TV receiver and the satellite receiver are examples of the STB. CAUTION Do not connect this unit or other components to the AC power supply until all connections between - Yamaha HTR-5940 | Owners Manual - Page 24
Y PB PR Video in Video out Audio out DVD recorder or VCR Component video out (U.S.A. model) ■ Connecting an STB RL V Cable TV receiver or satellite receiver Audio out Video out Component video out Optical audio out S-video out S O Y PB PR AUDIO DIGITAL INPUT DTV/CBL OPTICAL COMPONENT - Yamaha HTR-5940 | Owners Manual - Page 25
this unit or other components to the AC power supply until all connections between components are complete. Note To make a digital connection to a component other than the default component assigned to each DIGITAL INPUT jack, select the corresponding setting for "OPTICAL IN" or "COAXIAL IN" in - Yamaha HTR-5940 | Owners Manual - Page 26
SURROUND L/R and SUBWOOFER) for discrete multi-channel input from a multi-format player, external decoder, sound processor or pre-amplifier. STANDBY /ON PHONES SPEAKERS A B SILENT CINEMA PRESET/TUNING SEARCH MODE EDIT FM/AM A/B/C/D/E CATEGORY NEXT STRAIGHT EFFECT TONE CONTROL l PROGRAM h - Yamaha HTR-5940 | Owners Manual - Page 27
install an outdoor antenna. Consult the nearest authorized YAMAHA dealer or service center about outdoor antennas. AM loop antenna wire extended outdoors from a window. ■ Connecting the AM loop antenna 1 Set up the AM loop antenna. 5 Repeat steps 2 through 4 to connect the other lead wire - Yamaha HTR-5940 | Owners Manual - Page 28
(Asia and General models only) The VOLTAGE SELECTOR on the rear panel of this unit must be set for your local voltage BEFORE plugging the power cable into the AC wall outlet. Improper setting of the VOLTAGE SELECTOR may cause damage to this unit and create a potential fire hazard. Rotate the - Yamaha HTR-5940 | Owners Manual - Page 29
impedance CAUTION If you are to use 4 or 6 ohm speakers, set "SP IMP." to "6ΩMIN" as follows BEFORE using this unit. (U.S.A. model) 3 Press PROGRAM l / h buttons on the front panel to select "SP IMP.". The following display appears in the front panel display. l PROGRAM h STANDBY /ON PHONES - Yamaha HTR-5940 | Owners Manual - Page 30
(U.S.A. model) CODE SET TRANSMIT POWER TV POWER AV STANDBY POWER CD DVD MD CD-R CBL DTV SLEEP XM TUNER MULTI CH IN V-AUX DVR TV VOL TV CH AMP VOLUME SOURCE TV STANDBY POWER ■ Turning on the power Press STANDBY/ON on the front panel (or POWER on the remote control) to turn - Yamaha HTR-5940 | Owners Manual - Page 31
in "BASIC SETUP" resets all parameters manually adjusted in "SOUND MENU" (see page 78). • Initial settings are indicated in bold under each parameter. • Press RETURN on the remote control to return to the previous menu level. 1 CODE SET TRANSMIT POWER TV POWER AV STANDBY POWER CD DVD MD CD - Yamaha HTR-5940 | Owners Manual - Page 32
panel display. CHECK:TestTone y Check the speaker connections (see page 13) and adjust the "SPEAKERS" settings back in step 6, if necessary. 4spk L CR SL SB SR Front L/R, Surround L/R 5spk L CR SL SB SR Front L/R, Center, Surround L/R 6spk L C R Front L/R, Center, Surround L/R, SL SB SR - Yamaha HTR-5940 | Owners Manual - Page 33
" to adjust the balance between the surround left and surround back speakers. • Select "SR" to adjust the balance between the surround left and surround right speakers. • Select "SWFR" to adjust the balance between the front left speaker and the subwoofer. 12 Press SET MENU to exit from "BASIC SETUP - Yamaha HTR-5940 | Owners Manual - Page 34
damage your speakers. Check whether your CD player supports CDs encoded in DTS. Also, check the sound output level remote control) to select the desired input source. INPUT or CD DVD MD CD-R CBL DTV SLEEP XM TUNER MULTI CH IN 2 6 67 3 2 CODE SET TRANSMIT POWER TV POWER AV STANDBY POWER - Yamaha HTR-5940 | Owners Manual - Page 35
page 81), and "BASS" and "TREBLE" are set to 0 dB, audio output automatically bypasses the tone control circuitry of this unit. • If you increase or decrease the high-frequency or lowfrequency sound to an extreme level, the tonal quality of the surround speakers may not match that of the front left - Yamaha HTR-5940 | Owners Manual - Page 36
SILENT CINEMA allows you to enjoy multi-channel music or movie sound, including Dolby Digital and DTS sources, through are playing. 1 Set the component selector switch to AMP and then press NIGHT on the remote control repeatedly to select "NIGHT:CINEMA" or "NIGHT:MUSIC". AMP SOURCE TV NIGHT 10 - Yamaha HTR-5940 | Owners Manual - Page 37
in effectiveness depending on the input source and surround sound settings you use. Selecting the input mode This unit input signals you want to use. y You can adjust the default input mode of this unit by using the "INPUT MODE" pDVD MD/CD-R TUNER CD XM VOLUME SP A dB DVD AUTO L R Currently - Yamaha HTR-5940 | Owners Manual - Page 38
source component. See page 44 for details about tuning instructions. 4 To cancel the sleep timer, press SLEEP on the remote control repeatedly until "SLEEP OFF" appears in the front panel display. SLEEP 3 Press SLEEP on the remote control repeatedly to set the amount of time. Each time you press - Yamaha HTR-5940 | Owners Manual - Page 39
when you have completed your adjustment. PRESET/CH A-E/CAT. ENTER A-E/CAT. 1 Set the component selector switch to AMP and then press LEVEL on the remote control repeatedly to select the speaker you want to adjust. AMP SOURCE TV LEVEL TITLE BAND • Select "FRONT L" to adjust the front left - Yamaha HTR-5940 | Owners Manual - Page 40
input source is played back in 2-channel or 6-channel stereo. y The ENHANCER indicator lights up in the front panel display when one of the Compressed Music Enhancer modes is selected. 1 Set the component selector switch and then press ENHANCER on the remote control repeatedly to select the desired - Yamaha HTR-5940 | Owners Manual - Page 41
the front left and right speakers. Multi-channel sources are decoded straight into the appropriate channels without any additional effect processing. 1 Set the component selector switch to AMP and then press STRAIGHT on the remote control to select "STRAIGHT". AMP SOURCE TV STRAIGHT ENT. EFFECT - Yamaha HTR-5940 | Owners Manual - Page 42
DSP processors of this unit so that you can enjoy pure hi-fi sound from 2-channel PCM and analog sources. Set the component selector switch to AMP and then press DIRECT ST. on the remote control to select "DIRECT STEREO". AMP SOURCE TV DIRECT ST. 8 Displaying the input source information You can - Yamaha HTR-5940 | Owners Manual - Page 43
combine a video image from a video source with sound from an audio source. For example, you can enjoy listening to classical music while viewing beautiful scenery from the video source on the video monitor. Press the input selector buttons on the remote control to select a video source and then an - Yamaha HTR-5940 | Owners Manual - Page 44
in surround If you connected a surround back speaker, use this feature to enjoy 6.1-channel playback for multi-channel sources using the Dolby Pro Logic IIx, Dolby Digital EX or DTS-ES decoders. 1 Set the component selector switch to AMP and then press EXTD SUR. on the remote control repeatedly - Yamaha HTR-5940 | Owners Manual - Page 45
BASIC OPERATION ENJOYING SURROUND SOUND Enjoying 2-channel sources in surround Signals input from 2-channel sources can also be played back on multi-channels. 1 Set the component selector switch to AMP and then press STANDARD on the remote control repeatedly to switch between the "SUR. STANDARD" - Yamaha HTR-5940 | Owners Manual - Page 46
ENJOYING SURROUND SOUND Using Virtual CINEMA DSP Virtual CINEMA DSP allows you to enjoy the CINEMA DSP programs without surround speakers. It creates virtual speakers to reproduce the natural sound field. If you set "SUR. LR" to "NONE" (see page 78), Virtual CINEMA DSP activates automatically - Yamaha HTR-5940 | Owners Manual - Page 47
channel. • Check CODE SET TRANSMIT POWER TV POWER AV STANDBY POWER CD DVD MD CD-R CBL DTV SLEEP XM TUNER MULTI CH IN V-AUX DVR TV VOL TV CH AMP VOLUME SOURCE TV (U.S.A. model) INPUT or Front panel CD DVD MD CD-R CBL DTV SLEEP XM TUNER MULTI CH IN V-AUX DVR Remote control - Yamaha HTR-5940 | Owners Manual - Page 48
manually. You can also use the automatic and manual SPEAKERS A B SILENT CINEMA PRESET/TUNING SEARCH MODE EDIT FM/AM A/B/C/D/E CATEGORY NEXT STRAIGHT EFFECT TONE CONTROL pTUNER CD XM AUTO TUNED VOLUME SP A dB A AM 1440 kHz up and the frequency of the received station is shown in the front - Yamaha HTR-5940 | Owners Manual - Page 49
received from the station you want to select is weak, tune into it manually. Note Manually tuning into an FM station automatically switches the tuner to monaural reception to increase the signal quality. 2 (U.S.A. model) STANDBY /ON PHONES SPEAKERS CD XM TUNED VOLUME SP A dB A AM 1440 - Yamaha HTR-5940 | Owners Manual - Page 50
SPEAKERS A B SILENT CINEMA PRESET/TUNING SEARCH MODE EDIT FM/AM A/B/C/D/E CATEGORY NEXT STRAIGHT EFFECT TONE CONTROL MEMORY MAN'L/AUTO FM Flash DVR V-AUX SP A A1:FM DTV/CBL DVD MD/CD number. • If the number of received stations does not reach 40 (E8), manually and store it as described in - Yamaha HTR-5940 | Owners Manual - Page 51
manually. 3 2,5 (U.S.A. model) STANDBY /ON PHONES SPEAKERS A B SILENT CINEMA PRESET/TUNING SEARCH MODE EDIT FM/AM A/B/C/D/E CATEGORY NEXT STRAIGHT EFFECT TONE CONTROL or manually. See pages 44 and 45 for tuning instructions. DVR V-AUX DTV/CBL DVD MD/CD-R pTUNER CD XM TUNED VOLUME SP - Yamaha HTR-5940 | Owners Manual - Page 52
SPEAKERS A B SILENT CINEMA (U.S.A. model) VOLUME PRESET/TUNING SEARCH MODE EDIT FM/AM A/B/C/D/E CATEGORY NEXT STRAIGHT EFFECT TONE CONTROL . MEMORY MAN'L/AUTO FM DVR V-AUX SP A C3:AM DTV/CBL DVD MD/CD performing this operation with the remote control, set the component selector switch to - Yamaha HTR-5940 | Owners Manual - Page 53
VIDEO L AUDIO R PORTABLE 1,3 1,3 DVR V-AUX SP A E1:FM DTV/CBL DVD MD/CD-R pTUNER CD XM TUNED VOLUME dB 87.5 MHz L R y You can select the desired preset station number (1 to 8) directly by pressing the numeric buttons on the remote control. 1 Select preset station "E1" using A/B/C/D/E and - Yamaha HTR-5940 | Owners Manual - Page 54
indicator flash in the front panel display. See "Selecting preset stations" on page 48. A/B/C/D/E CATEGORY NEXT PRESET/TUNING SEARCH MODE EDIT Flashes DVR V-AUX SP A A5:FM DTV/CBL DVD MD/CD-R pTUNER CD XM TUNED MEMORY VOLUME dB 90.6 MHz L R Flashes 4 Press EDIT again. "EDIT E1-A5" appears - Yamaha HTR-5940 | Owners Manual - Page 55
decoder (U.S.A. and Canada models only) that plays back the surround sound content of the XM Satellite Radio broadcasts in multi-channels, resulting in a full surround sound experience. Notes • The XM Satellite Radio service is only available in the 48 contiguous United States (not available - Yamaha HTR-5940 | Owners Manual - Page 56
number, channel name, category, artist name, or song title displayed in the front panel display (see page 60). 1 CODE SET TRANSMIT POWER TV POWER AV STANDBY POWER CD DVD MD CD-R CBL DTV SLEEP XM TUNER MULTI CH IN V-AUX DVR TV VOL TV CH AMP VOLUME SOURCE TV 2 3 4 Set to SOURCE - Yamaha HTR-5940 | Owners Manual - Page 57
the input source. The cursor on the left of the XM indicator lights up in the front panel display. INPUT AMP SOURCE or XM TV Front panel Remote control 2 Check the XM Satellite Radio reception level and adjust the orientation of the XM Connectand-Play digital antenna accessory for a better - Yamaha HTR-5940 | Owners Manual - Page 58
, category, artist name, or song title) for the currently selected channel appears in the front panel display. AMP SOURCE TV XM Remote control Lights up DVR V-AUX DTV/CBL DVD MD/CD-R TUNER CD SP A [001] Preview VOLUME dB L R y When you select "XM" as the input source, this unit automatically - Yamaha HTR-5940 | Owners Manual - Page 59
Front panel SET MENU or MENU SRCH MODE Remote control DVR SP A ALL V-AUX DTV/CBL DVD MD/CD-R TUNER CD pXM VOLUME dB CH SEARCH L R 3 Press CATEGORY on the front panel (or A-E/CAT. j / i on the remote control) repeatedly to change the channel category. PRESET/CH 1 TV CD DVD AV MD CD - Yamaha HTR-5940 | Owners Manual - Page 60
remote control) repeatedly to change the channel category. PRESET/CH 1 Rotate the INPUT selector on the front panel (or set the component selector switch to SOURCE and then press XM on the remote control) to select "XM" as the input source. INPUT Front panel or AMP SOURCE TV XM Remote control - Yamaha HTR-5940 | Owners Manual - Page 61
the XM Satellite Radio preset channels" on page 59. y All preset channels (A1 to E8) recalls "001 Preview" by the initial factory setting. (U.S.A. model) XM® SATELLITE RADIO TUNING 2 Press SEARCH MODE on the front panel (or SRCH MODE on the remote control) repeatedly to select "PRESET SEARCH - Yamaha HTR-5940 | Owners Manual - Page 62
REC ENTER A-E/CAT. DISPLAY 3 2 1 Set the component selector switch to SOURCE and then press XM on the remote control to select "XM" as the input source. AMP SOURCE XM TV 3 Press the numeric buttons on the remote control to enter the desired three-digit channel number. For example, to enter - Yamaha HTR-5940 | Owners Manual - Page 63
SPEAKERS 9 LEVEL TITLE BAND ENHANCER 0 NIGHT 10 PRESET/CH STRAIGHT ENT. EFFECT SET MENU MENU SRCH MODE A-E/CAT. RETURN XM MEMORY REC ENTER A-E/CAT. DISPLAY (U.S.A. model) 3-4 3 Press CATEGORY on the front panel (or A-E/CAT. j / i on the remote control) repeatedly to select a preset channel - Yamaha HTR-5940 | Owners Manual - Page 64
CAT. A-E/CAT. Front panel Remote control Flashes DVR SP A V-AUX DTV/CBL DVD MD/CD-R TUNER CD pXM MEMORY VOLUME dB C5 [040] Deep L R Currently selected preset channel number 5 Press MEMORY on the front panel (or XM MEMORY on the remote control) to set the selected XM Satellite Radio - Yamaha HTR-5940 | Owners Manual - Page 65
Deep Tra L R When the channel category is displayed: DVR SP A V-AUX DTV/CBL DVD SP A dB Coldplay / Clo L R y • The front panel display can indicate up to 14 alphanumeric characters at once. You can set recognized by this unit, the character will be replaced with a space. Note If you press - Yamaha HTR-5940 | Owners Manual - Page 66
DIRECT ST. 5 6 7 8 SPEAKERS 9 ENHANCER 0 NIGHT 10 STRAIGHT ENT. PRESET/CH EFFECT (U.S.A. model) AMP sound field program selector buttons Set the component selector switch to AMP and then press one of the sound field program selector buttons on the remote control repeatedly. The name of - Yamaha HTR-5940 | Owners Manual - Page 67
be used with 2-channel stereo sources like TV programs, video tapes, etc. y Press the PROGRAM l / h buttons on the front panel (or set the component selector switch to AMP and then press one of the sound field program selector buttons on the remote control) to select the desired sound field program - Yamaha HTR-5940 | Owners Manual - Page 68
l / h buttons on the front panel (or set the component selector switch to AMP and then press one of the sound field program selector buttons on the remote control) to select the desired sound field program (see page 62). Remote control button Sound Field Program STEREO 2ch Stereo 1 STEREO 6ch - Yamaha HTR-5940 | Owners Manual - Page 69
hold j / i to change the sound field parameter value, the initial factory settings are shown momentarily in the front panel display. 1 CODE SET TRANSMIT POWER TV POWER AV STANDBY POWER CD DVD MD CD-R CBL DTV SLEEP XM TUNER MULTI CH IN V-AUX DVR TV VOL TV CH AMP VOLUME SOURCE TV - Yamaha HTR-5940 | Owners Manual - Page 70
effect level relative to the level of the direct sound. Control range: -6 dB to +3 dB Initial delay. Presence, surround, and surround back initial delay. Changes the apparent distance from the source sound by adjusting the delay between the direct sound and the first reflection heard by the listener - Yamaha HTR-5940 | Owners Manual - Page 71
size of the surround sound field. The larger the value, the larger the surround sound field becomes. As the sound is repeatedly reflected around a room, the larger the hall is, the longer the time between the original reflected sound and the subsequent reflections. By controlling the time between - Yamaha HTR-5940 | Owners Manual - Page 72
over an extremely wide range. Set a longer reverberation time for "dead" sources and listening room environments, and a shorter time for "live" sources and listening room environments. Control range: 1.0 to 5.0 s Reverberation 60 dB Source sound Reverberation Early reflections 60 dB 60 - Yamaha HTR-5940 | Owners Manual - Page 73
79). - "FRONT" is set to "SMALL" (see page 78) and "BASS OUT" is set to "SWFR" (see page 79). 6-channel stereo center, surround left, surround right, and surround back levels. Adjusts the volume level of each channel in the 6-channel stereo mode. Control range: 0 to 100% SOUND FIELD PROGRAMS 69 - Yamaha HTR-5940 | Owners Manual - Page 74
larger value moves the center channel output towards the front left and right speakers. Control range: 0 (center channel sound is output only from the center speaker) to 7 (center channel sound is output only from the front left and right speakers) Initial setting: 3 DTS Neo:6 Music C. IMAGE DTS - Yamaha HTR-5940 | Owners Manual - Page 75
SL Surround left speaker SR Surround right speaker SB Surround back speaker Speaker from which sound is being out Speaker from which no sound is being output * When the q EX / q PL IIx / ES indicators are turned off in the front panel display Sound field program STEREO 2ch Stereo 2-channel - Yamaha HTR-5940 | Owners Manual - Page 76
PROGRAMS Sound field program MOVIE THEATER Spectacle Sci-Fi Adventure General SUR. STANDARD DOLBY DIGITAL PRO LOGIC DTS SUR. STANDARD PLII Movie PLII Music PLII Game PLIIx Movie PLIIx Music PLIIx Game 2-channel audio (monaural) C L R SL SR SB C L R SL SR SB Pro Logic C L R SL SR - Yamaha HTR-5940 | Owners Manual - Page 77
Monaural playback 2-channel audio (stereo) C L R SL SR SB Pro Logic C L R SL SR SB Pro Logic II C L R SL SR SB Pro Logic IIx C L R SL SR SB SOUND FIELD PROGRAMS 5.1/6.1-channel audio * C L R SL SR SB C L R SL SR SB C L R SL SR SB C L R SL SR SB - Yamaha HTR-5940 | Owners Manual - Page 78
speaker and system parameters. Sound menu 1 SOUND MENU Use this menu to manually adjust any speaker settings, alter the quality and tone of the sound output by the system or compensate for video signal processing delays when using LCD monitors or projectors. Parameter A)SPEAKER SET B)SP LEVEL C)SP - Yamaha HTR-5940 | Owners Manual - Page 79
Features Adjusts the brightness of the display. Locks sound field program parameters and other "SET MENU" settings. Initializes the parameters of a group of sound field programs. Specifies the location of the speakers connected to the SPEAKERS B terminals. Displays the current reception level of the - Yamaha HTR-5940 | Owners Manual - Page 80
MENU Using SET MENU Use the remote control to access and adjust each parameter. TV CD DVD AV MD CD-R CBL DTV SLEEP XM TUNER MULTI CH IN V-AUX DVR TV VOL TV CH AMP VOLUME SOURCE TV 1 TV MUTE TV INPUT MUTE STEREO MUSIC ENTERTAIN MOVIE (U.S.A. model) STEREO 1 MUSIC ENTERTAIN MOVIE - Yamaha HTR-5940 | Owners Manual - Page 81
cable is disconnected from the AC wall outlet or if the power supply is cut off for more than one week. 6 Press u / d to select the desired parameter and then j / i to change the parameter settings. • Press i to increase the value. • Press j to decrease the value. PRESET/CH PRESET/CH A-E/CAT - Yamaha HTR-5940 | Owners Manual - Page 82
menu to manually adjust any speaker settings or compensate for video signal processing delays when using LCD monitors or projectors. ■ Speaker settings A)SPEAKER SET Use this feature to manually adjust any speaker settings. y If you are not satisfied with the bass sounds from your speakers, you can - Yamaha HTR-5940 | Owners Manual - Page 83
. SET MENU ■ Speaker level B) SP LEVEL Use this feature to manually balance the speaker levels between the front left or surround left speakers and each speaker selected in "SPEAKER SET" (see page 78). The selected speaker outputs test tone and the speaker indicator of the speaker flashes. Control - Yamaha HTR-5940 | Owners Manual - Page 84
or headphones. The LFE channel carries low-frequency special effects which are only added to certain scenes. This setting is effective only when this unit decodes Dolby Digital or DTS signals. Control range: -20 to 0 dB Control step: 1 dB Speaker SP LFE Adjusts the speaker LFE level. Headphone HP - Yamaha HTR-5940 | Owners Manual - Page 85
speakers or headphones. This setting is effective only when this unit is decoding Dolby Digital and DTS signals. Speaker SP D.R Adjusts the speaker selector on the front panel (or the input selector buttons on the remote control). For COMPONENT VIDEO jacks A, B and C C.V[A] C.V[B] C.V[C] Choices: - Yamaha HTR-5940 | Owners Manual - Page 86
L CR SL SR 1 Press one of the input selector buttons on the remote control to select the input source you want to change the name of. CD DVD MD CD-R CBL DTV SLEEP XM TUNER MULTI CH IN V-AUX DVR 2 Set the component selector switch to AMP and then press j / i on the remote control to place - Yamaha HTR-5940 | Owners Manual - Page 87
group, all of the parameter values within that group revert to their initial factory settings. Press the corresponding sound field program selector buttons on the remote control to select the sound field program that you want to initialize. Choices: STEREO, MUSIC, ENTERTAINMENT, MOVIE THEATER - Yamaha HTR-5940 | Owners Manual - Page 88
• The settings you make are reflected next time you turn on this unit by pressing STANDBY/ON on the front panel (or POWER on the remote control) (see SPEAKERS A B SILENT CINEMA (U.S.A. model) VOLUME PRESET/TUNING SEARCH MODE EDIT FM/AM A/B/C/D/E CATEGORY NEXT STRAIGHT EFFECT TONE CONTROL - Yamaha HTR-5940 | Owners Manual - Page 89
initial factory settings are activated next time you turn on this unit. ADVANCED SETUP ■ Remote control AMP ID REMOTE AMP Use this feature to set the AMP ID of this unit for remote control recognition (see page 89). Choices: ID1, ID2 • Select "ID1" when the remote control AMP ID library code is set - Yamaha HTR-5940 | Owners Manual - Page 90
(see page 88). When you set the remote control codes for both DTV/ CBL and , priority is given to the one set for DTV/ CBL. CODE SET TRANSMIT POWER TV POWER AV STANDBY POWER CD DVD MD CD-R CBL DTV SLEEP XM TUNER MULTI CH IN V-AUX DVR TV VOL TV CH AMP VOLUME SOURCE TV TV MUTE TV - Yamaha HTR-5940 | Owners Manual - Page 91
assigned to each input selector button, , and . Be advised that some buttons may not correctly operate the selected component. REMOTE CONTROL FEATURES 1 CODE SET TRANSMIT POWER TV POWER AV STANDBY POWER CD DVD MD CD-R CBL DTV SLEEP XM TUNER MULTI CH IN V-AUX DVR TV VOL TV CH - Yamaha HTR-5940 | Owners Manual - Page 92
remote control code for each input source. Remote Control Code Default Settings Input source Library (component category) Manufacturer CD CD YAMAHA MD/CD-R MD YAMAHA XM TUNER YAMAHA DVD DVD YAMAHA DTV/CBL - - TUNER TUNER YAMAHA V-AUX - - DVR DVR YAMAHA - - - - Default - Yamaha HTR-5940 | Owners Manual - Page 93
Notes • You need to set the corresponding remote control AMP ID of this unit in the advanced setup (see page 85). • When using multiple YAMAHA receivers/amplifiers, you may be able to operate the other components simultaneously with the default code setting. In this case, set one of the alternative - Yamaha HTR-5940 | Owners Manual - Page 94
) Notes • You need to set the corresponding remote control XM ID of this unit in the advanced setup(see page 85). • When using multiple YAMAHA receivers/amplifiers, you may be able to operate the other components simultaneously with the default code setting. In this case, set one of the alternative - Yamaha HTR-5940 | Owners Manual - Page 95
, press STANDBY/ON on the front panel (or STANDBY on the remote control) to set this unit to the standby mode. (U.S.A. model) 3 Press the PROGRAM l / h buttons on the VOLUME front panel to select "PRESET". STANDBY /ON PHONES SPEAKERS A B SILENT CINEMA PRESET/TUNING SEARCH MODE EDIT FM/AM - Yamaha HTR-5940 | Owners Manual - Page 96
authorized YAMAHA dealer or service center. ■ General Problem Cause Remedy This unit fails to turn on or enters the standby mode soon after the power is turned on. No sound No picture The power cable is not connected or the plug is not completely inserted. The speaker impedance setting is - Yamaha HTR-5940 | Owners Manual - Page 97
Check that the speaker impedance setting is correct. Check that the speaker wires are not touching each other and then turn this unit back on. The sleep timer has turned off this unit. Turn on this unit, and play the source again. The sound is muted. Press MUTE or VOLUME +/- on the remote control - Yamaha HTR-5940 | Owners Manual - Page 98
(such as lightning or excessive static electricity) or by a power supply with low voltage. Disconnect the power cable from the AC wall outlet and then plug it in again after about 30 seconds. "CHECK SP WIRES" appears in the front panel display. Speaker cables are short-circuited. Make sure all - Yamaha HTR-5940 | Owners Manual - Page 99
The XM user encryption code is being updated. Wait until the encryption code is updated. The signal is too weak. Check the XM channels are available for the selected category. Select another channel category by pressing CATEGORY on the front panel (or A-E/CAT. j / i on the remote control) - Yamaha HTR-5940 | Owners Manual - Page 100
The batteries are weak. Replace all batteries. The remote control code is not correctly set. Set the remote control code correctly using "LIST OF REMOTE CONTROL CODES" at the end of this manual. Try setting another code for the same manufacturer using "LIST OF REMOTE CONTROL CODES" at the end of - Yamaha HTR-5940 | Owners Manual - Page 101
(Low Frequency Effect), the system has a total of 5.1-channels (LFE is counted as 0.1 channel). By using 2-channel stereo for the surround speakers, more accurate moving sound effects and surround sound environment are possible than with Dolby Surround. The wide dynamic range from maximum to minimum - Yamaha HTR-5940 | Owners Manual - Page 102
surround recordings and live events in surround sound. Neural Surround™ employs psychoacoustic frequency domain processing which allows delivery of a more detailed sound stage with superior channel very small unit of time. Standing for "Pulse Code Modulation", the analog signal is encoded as pulses - Yamaha HTR-5940 | Owners Manual - Page 103
have been set for each sound field so that accurate representations of all the sound field programs can be enjoyed on headphones. ■ Virtual CINEMA DSP YAMAHA has developed a Virtual CINEMA DSP algorithm that allows you to enjoy DSP sound field surround effects even without any surround speakers by - Yamaha HTR-5940 | Owners Manual - Page 104
SPECIFICATIONS SPECIFICATIONS AUDIO SECTION • Minimum RMS Output Power for Front, Center, Surround, Surround back 20 Hz to 20 kHz, 0.06% THD, 8 90 W • Maximum Power (EIAJ) [Asia, China, Korea and General models] 1 kHz, 10% THD, 8 130 W • Dynamic Power (IHF) 8/6/4/2 120/155/190/235 W • Maximum - Yamaha HTR-5940 | Owners Manual - Page 105
LIST OF REMOTE CONTROL CODES CABLE TV RECEIVER ABC 10003, 10008, 10014, 10017, 10033 AMERICAST PROSCAN 10392 RCA 11392 SAMSUNG 11442 SONY 10639, 11640 STAR CHOICE 10869 SATELLITE RECEIVER ALPHASTAR 10772 CHAPARRAL 10053, 10216 CROSSDIGITAL 11109 DIRECTV 10099, 10247, 10392, 10566 - Yamaha HTR-5940 | Owners Manual - Page 106
ROKU 11486 SAMSUNG 11190, 11490 SASEM 11641 SENSORY SCIENCE 11126 SHARP 11010 SMC 11456 SONY 11272, 11324, 11364 STACK 9 11272 STREAMZAP 11309 SYLVANIA 11563 SYSTEMAX 11272 TAGAR SYSTEMS 11272 TELEMANN 11604 TOSHIBA 11272 TOUCH 11272 VIEWSONIC 11272, 11329 VIZIO 11126 - Yamaha HTR-5940 | Owners Manual - Page 107
20864, 20885, 21756 WARDS 20030, 20054, 20080, 20111, 20178, 20866, 21156 WAYCON 20156 WESTINGHOUSE 20451, 20889 WHITE WESTINGHOUSE 20463, 20623 YAMAHA 20030, 20650, 20769, 20833, 20839, 21405, 21406, 21407 ZENITH 20017, 20092, 20178, 20463, 21145, 21904, 21929 PVR ABS 31972 - Yamaha HTR-5940 | Owners Manual - Page 108
31972 VOODOO 31972 WARDS 30035, 30042, 30047, 30048, 30060, 30072, 30081, 30149, 30240 WHITE WESTINGHOUSE 30072, 30209 XR-1000 30035, 30072 YAMAHA 30038 ZENITH 30033, 30039, 30209, 30479, 31139 ZT GROUP 31972 DVD PLAYER ADCOM 41094 ADVENT 41016 AIWA 40641 AKAI 40899, 41089 - Yamaha HTR-5940 | Owners Manual - Page 109
70029 SONY 70170, 70243, 70291 TECHNICS 70229 VICTOR 70273 WARDS 70027 YAMAHA 70094, 70097, 70524 TUNER ADC 80531 ADCOM 80616, 81616, 81617 AIWA 80121, 80158, 80189, 81405 AMC 81077 AMPLIFIER TECHNOLOGIES 81584 ANAM 81074, 81609 ARCAM 81189 ATLANTIC TECHNOLOGY 81487 - Yamaha HTR-5940 | Owners Manual - Page 110
TECHNICS 80039, 80309, 81308, 81518 THORENS 81189 TOSHIBA 80135 VICTOR 80074 WARDS 80014, 80054, 80158, 80189 XM 81406, 81414 YAMAHA 80176, 81176, 81276, 81331, 81375, 81908, (TUNER ID1) 81916 (TUNER ID2) 81917 (XM ID1) 81918 (XM ID 2) 81919 APPENDIX-vi - Yamaha HTR-5940 | Owners Manual - Page 111
ELECTRONIQUE FRANCE S.A. RUE AMBROISE CROIZAT BP70 CROISSY-BEAUBOURG 77312 MARNE-LA-VALLEE CEDEX02, FRANCE YAMAHA ELECTRONICS (UK) LTD. YAMAHA HOUSE, 200 RICKMANSWORTH ROAD WATFORD, HERTS WD18 7GQ, ENGLAND YAMAHA SCANDINAVIA A.B. J A WETTERGRENS GATA 1, BOX 30053, 400 43 VÄSTRA FRÖLUNDA, SWEDEN
-
 1
1 -
 2
2 -
 3
3 -
 4
4 -
 5
5 -
 6
6 -
 7
7 -
8
-
9
-
10
-
11
-
12
-
13
-
14
-
15
-
16
-
17
-
18
-
19
-
20
-
21
-
22
-
23
-
24
-
25
-
26
-
27
-
28
-
29
-
30
-
31
-
32
-
33
-
34
-
35
-
36
-
37
-
38
-
39
-
40
-
41
-
42
-
43
-
44
-
45
-
46
-
47
-
48
-
49
-
50
-
51
-
52
-
53
-
54
-
55
-
56
-
57
-
58
-
59
-
60
-
61
-
62
-
63
-
64
-
65
-
66
-
67
-
68
-
69
-
70
-
71
-
72
-
73
-
74
-
75
-
76
-
77
-
78
-
79
-
80
-
81
-
82
-
83
-
84
-
85
-
86
-
87
-
88
-
89
-
90
-
91
-
92
-
93
-
94
-
95
-
96
-
97
-
98
-
99
-
100
-
101
-
102
-
103
-
104
-
105
-
106
-
107
-
108
-
109
-
110
-
111
 |
 |

HTR-5940
HTR-5940
AV Receiver
OWNER’S MANUAL
U