Yamaha PR7 Reference Manual - Page 20
Overdubbing (Layered Recordings), Overdubbing mode screen, Overdubbing
 |
View all Yamaha PR7 manuals
Add to My Manuals
Save this manual to your list of manuals |
Page 20 highlights
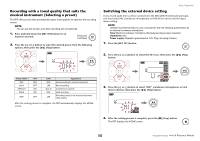
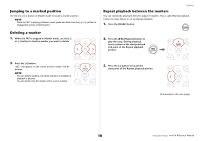
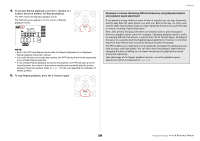
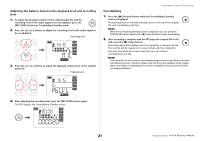
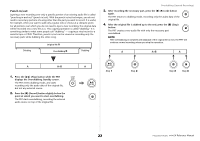
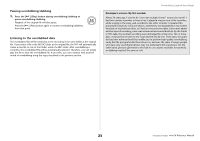
Overdubbing (Layered Recordings) Layering recording over an existing audio file is called "overdubbing." Using the Overdubbing function enables you to add a recording [B] of a chorus and/or a guitar solo to an existing audio file [A] that contains only vocal and rhythm guitar performances to create a combined audio file [A+B]. Recording B A Playback A A + B Overdubbing mode screen In Overdubbing mode, the playback icon and recording icons appear at the same time. Other information on the screen includes the number and time duration of the currently-selected file. Folder name/ File number Time Overdubbing Overdubbing (Layered Recordings) Preparing for overdubbing The following inputs and outputs are available for overdubbing: Input: Built-in microphones, or MIC/LINE IN (external input) jack Output: Headphones jack (Listen to audio playback only through the headphones so that the playback sound will not be recorded again.) Original audio files that you wish to use for overdubbing must be in an audio format supported by the PR7 (except MP3: 64kbps/32kbps). Supported formats ➔ page 11 1. Select an audio file for overdubbing. To select an audio file in the current folder, use the [] buttons. Folder name/ File number NOTE To select an audio file from another location, refer to the section below. Selecting another folder ➔ page 11 Selecting a file on a microSD card ➔ page 10 Copying an audio file from the computer ➔ page 33 2. Press the [OVERDUB] button. The PR7 enters Overdubbing Standby mode, and starts playing back the selected audio file automatically. At this point you can still select a file for playback or to fast reverse or fast forward the audio file using the [] button. Also, you can switch to Marker mode and add a marker using the [+] button. If you select a file in the MUSIC folder as the original file, the PR7 will automatically create a new file to one of the folders inside the REC folder. 20 Reference Manual
-
 1
1 -
2
-
3
-
4
-
5
-
6
-
7
-
8
-
9
-
10
-
11
-
12
-
13
-
14
-
 15
15 -
 16
16 -
 17
17 -
 18
18 -
 19
19 -
 20
20 -
 21
21 -
 22
22 -
 23
23 -
 24
24 -
 25
25 -
26
-
27
-
28
-
29
-
30
-
31
-
32
-
33
-
34
-
35
-
36
-
37
-
38
-
39
-
40
-
41
 |
 |