Yamaha PR7 Reference Manual - Page 22
Punch in/out, point at which you want to start overdubbing.
 |
View all Yamaha PR7 manuals
Add to My Manuals
Save this manual to your list of manuals |
Page 22 highlights
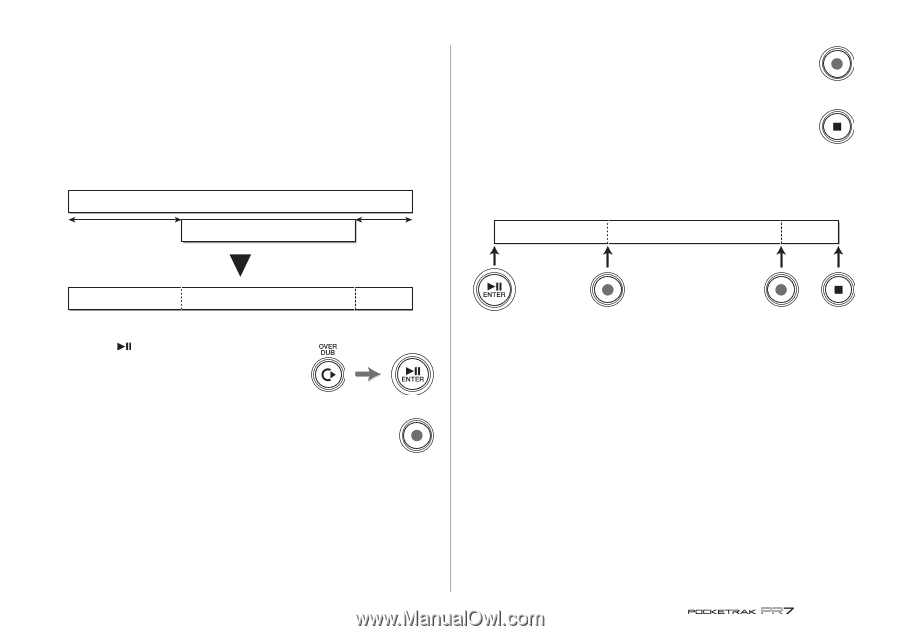
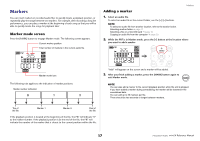
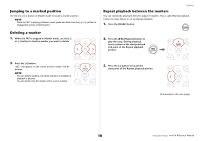
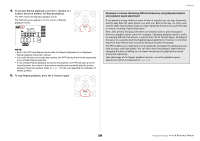
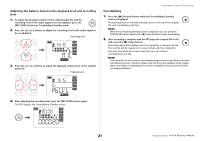
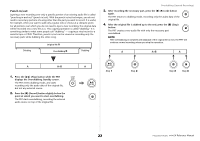
Punch in/out Layering a new recording over only a specific portion of an existing audio file is called "punching in and out" (punch in/out). With the punch in/out technique, you do not need to record any portions of a song other than the part you want to record. It is useful, for example, when you want to add only a guitar solo or chorus at a climactic point. For all portions over which you do not need to layer a new recording, the original data will be recorded into a new file as is. This copying operation is called "dubbing." It is something similar to what some people call "dubbing" - copying a vinyl record to a cassette tape or CD-R. Therefore, punch in/out can be viewed as recording only the necessary parts while dubbing the entire song. Dubbing Original file A Overdubbing B Dubbing Overdubbing (Layered Recordings) 3. After recording the necessary part, press the [●] (Record) button again. The PR7 returns to dubbing mode, recording only the audio data of the original file. 4. After the original file is dubbed up to the end, press the [■] (Stop) button. The PR7 creates a new audio file with only the necessary part overdubbed. NOTE After overdubbing is complete and playback of the original file is over, the PR7 will continue normal recording unless you stop the operation. A A+B A A A+B A 1. Press the [ ] (Play) button while the PR7 displays the Overdubbing Standby screen. The PR7 enters dubbing mode, and starts recording only the audio data of the original file, but not any external source. 2. Press the [●] (Record) button slightly before the point at which you want to start overdubbing. The PR7 starts overdubbing, recording the external audio source on top of the original file. Step 1 Step 2 Step 3 Step 4 22 Reference Manual
-
 1
1 -
2
-
3
-
4
-
5
-
6
-
7
-
8
-
9
-
10
-
11
-
12
-
13
-
14
-
15
-
16
-
 17
17 -
 18
18 -
 19
19 -
 20
20 -
 21
21 -
 22
22 -
 23
23 -
 24
24 -
 25
25 -
 26
26 -
 27
27 -
28
-
29
-
30
-
31
-
32
-
33
-
34
-
35
-
36
-
37
-
38
-
39
-
40
-
41
 |
 |