Yamaha PSR-A350 PSR-A350 Owners Manual - Page 35
Listening, Timing and Waiting, Press the [1 LISTENING 2 TIMING
 |
View all Yamaha PSR-A350 manuals
Add to My Manuals
Save this manual to your list of manuals |
Page 35 highlights
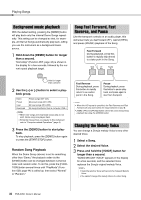
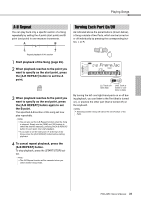
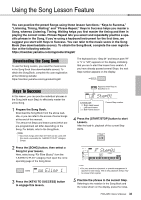
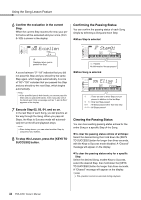
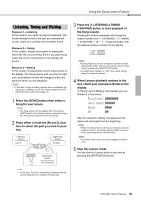
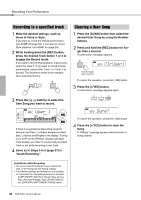
Using the Song Lesson Feature Listening, Timing and Waiting Lesson 1-Listening In this Lesson, you need not play the keyboard. The model melody/chords of the part you selected will sound. Listen to it carefully and remember it well. Lesson 2-Timing In this Lesson, simply concentrate on playing the notes with the correct timing. Even if you play wrong notes, the correct notes shown in the display will sound. Lesson 3-Waiting In this Lesson, try playing the correct notes shown on the display. The Song pauses until you play the right note, and playback tempo will change to match the speed at which you are playing at. NOTE • If you want to keep a steady playback tempo maintained dur- ing Lesson 3: Waiting, set the Your Tempo parameter to OFF via the Function number 056 (page 44). 1 Press the [SONG] button then select a Song for your lesson. NOTE • The Song Lesson can be applied also to the Songs (SMF format 0 only) transferred from a computer (page 46), but cannot be applied to the User Songs. 2 Press either or both the [R] and [L] buttons to select the part you want to practice. Left-hand lesson Left Right-hand lesson Right Both-hands lesson BothHand NOTE • In this step, "No LPart" may appear, indicating that the current Song does not contain a left-hand part. 3 Press the [1 LISTENING 2 TIMING 3 WAITING] button to start playback of the Song Lesson. Pressing this button repeatedly will change the Lesson number from 1: LISTENING 2: TIMING 3: WAITING off 1.... Press this button until the desired number is shown on the display. NOTE • During playback, you can change the Lesson mode by pressing this button, and you can stop the Lesson at any time by pressing the [START/STOP] button. • The Main Voice changes to "000" (One Touch Setting; page 16) during the Lesson. 4 When Lesson playback reaches to the end, check your evaluation Grade on the display. "2 Timing" and "3 Waiting" will evaluate your performance in four levels. Excellent!~~~~~~~~ Very Good!~~~~~~ Good ~~~~ OK ~~ After the evaluation display has appeared, the lesson will start again from the beginning. NOTE • When the melody Voice of the Song is changed, the key position shown in the display may be shifted (in octave units), depending on the selected Voice. NOTE • The Dual or Split mode cannot be engaged during les- sons. 5 Stop the Lesson mode. You can stop the Lesson mode at any time by pressing the [START/STOP] button. PSR-A350 Owner's Manual 35
-
 1
1 -
2
-
3
-
4
-
5
-
6
-
7
-
8
-
9
-
10
-
11
-
12
-
13
-
14
-
15
-
16
-
17
-
18
-
19
-
20
-
21
-
22
-
23
-
24
-
25
-
26
-
27
-
28
-
29
-
 30
30 -
 31
31 -
 32
32 -
 33
33 -
 34
34 -
 35
35 -
 36
36 -
 37
37 -
 38
38 -
 39
39 -
 40
40 -
41
-
42
-
43
-
44
-
45
-
46
-
47
-
48
-
49
-
50
-
51
-
52
-
53
-
54
-
55
-
56
-
57
-
58
-
59
-
60
-
61
-
62
-
63
-
64
-
65
-
66
-
67
-
68
-
69
-
70
-
71
-
72
-
73
-
74
-
75
-
76
-
77
-
78
-
79
-
80
 |
 |
