Yamaha PSR-S550 Owner's Manual - Page 69
Clear the recorded drum Voices, Bass, Chord, Pad and Phrase Part record
 |
View all Yamaha PSR-S550 manuals
Add to My Manuals
Save this manual to your list of manuals |
Page 69 highlights
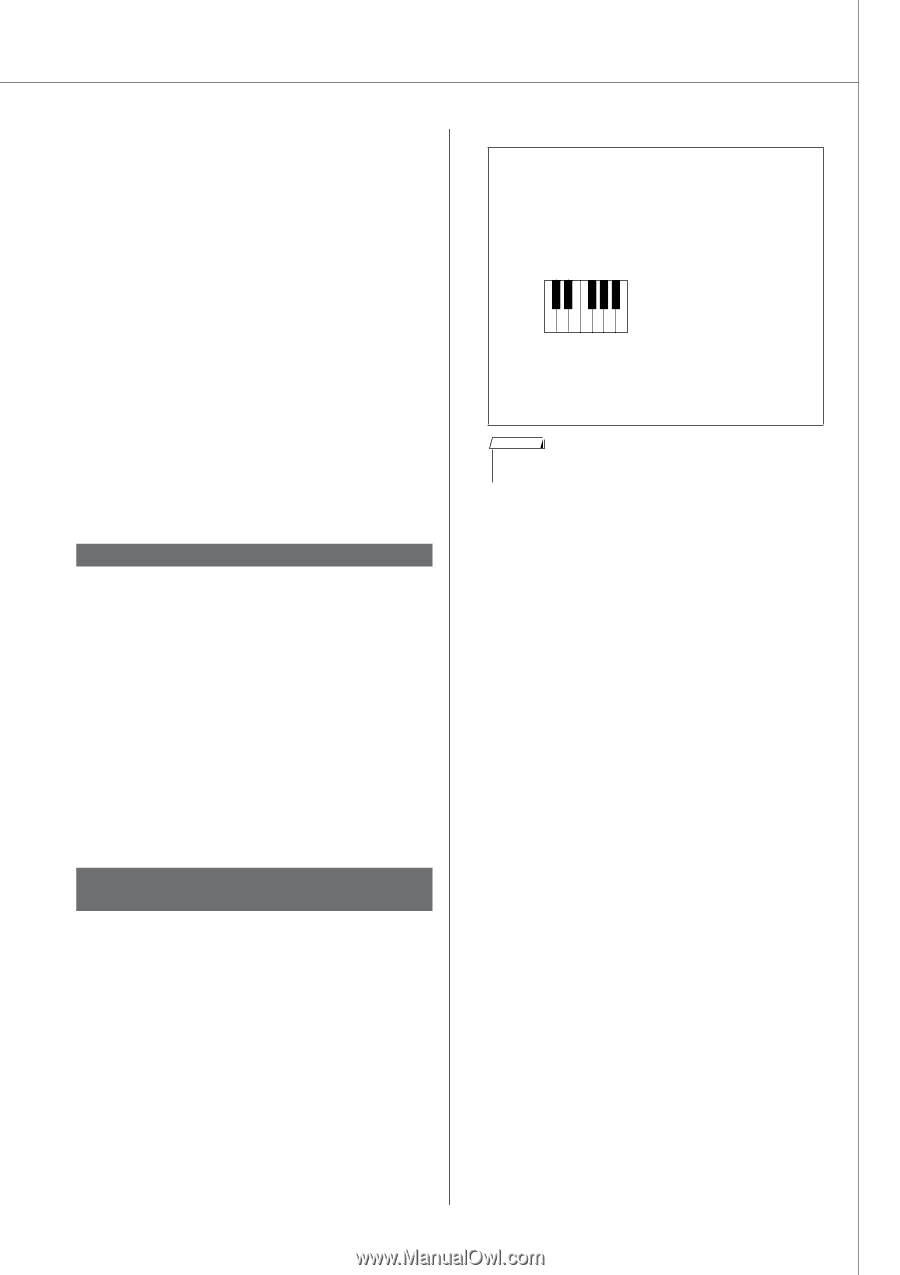
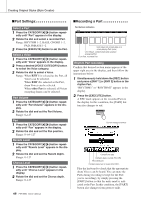
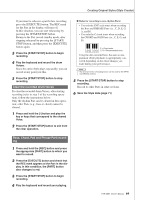
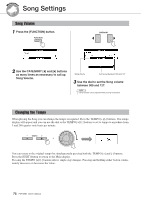
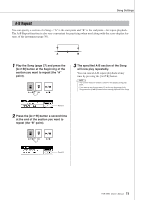
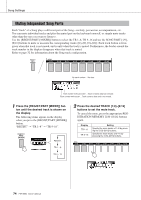
Creating Original Styles (Style Creator) If you want to rehearse a part before recording, press the [EXECUTE] button. The REC mark for the Part in the display will turn off. In this situation, you can start rehearsing by pressing the [START/STOP] button. Return to the Part record standby mode, after stopping rehearsal by pressing the [START/ STOP] button, and then press the [EXECUTE] button again. 3 Press the [START/STOP] button to begin recording. 4 Play the keyboard and record the drum Voices. Since the entire Style plays repeatedly, you can record at any point you like. 5 Press the [START/STOP] button to stop recording. Clear the recorded drum Voices To clear the recorded drum Voices, after starting recording (refer to step 3 of the recording operation), follow the instructions below. Only the rhythm Part can be cleared in this operation; other Parts (e.g., bass or chord) cannot be cleared. 1 Press and hold the [-] button and play the key or keys that correspond to the cleared Voice. 2 Press the [START/STOP] button to exit from the clear operation. ● Rules for recording to non-rhythm Parts: • Use only the CM7 scale tones when recording the Bass and PHRASE Parts (i.e., C, D, E, G, A, and B). • Use only the C chord tones when recording the CHORD and PAD Parts (i.e., C, E, G, and B). C = Chord notes C R C C R C C, R = Recommended notes Using the data recorded here, the auto accompaniment (Style playback) is appropriately converted depending on the chord changes you make during your performance. NOTE • Any desired chord or chord progression can be used for the INTRO and ENDING sections. 5 Press the [START/STOP] button to stop recording. Record to other Parts in other sections. 6 Save the Style data (page 71) Bass, Chord, Pad and Phrase Part recording 1 Press and hold the [REC] button and press the appropriate [PART] button to which you want to record. 2 Press the [EXECUTE] button and check that the REC mark appears at the Part in the display. In this condition, the [PART] button also changes to red. 3 Press the [START/STOP] button to begin recording. 4 Play the keyboard and record your playing. PSR-S550 Owner's Manual 69
-
 1
1 -
2
-
3
-
4
-
5
-
6
-
7
-
8
-
9
-
10
-
11
-
12
-
13
-
14
-
15
-
16
-
17
-
18
-
19
-
20
-
21
-
22
-
23
-
24
-
25
-
26
-
27
-
28
-
29
-
30
-
31
-
32
-
33
-
34
-
35
-
36
-
37
-
38
-
39
-
40
-
41
-
42
-
43
-
44
-
45
-
46
-
47
-
48
-
49
-
50
-
51
-
52
-
53
-
54
-
55
-
56
-
57
-
58
-
59
-
60
-
61
-
62
-
63
-
 64
64 -
 65
65 -
 66
66 -
 67
67 -
 68
68 -
 69
69 -
 70
70 -
 71
71 -
 72
72 -
 73
73 -
 74
74 -
75
-
76
-
77
-
78
-
79
-
80
-
81
-
82
-
83
-
84
-
85
-
86
-
87
-
88
-
89
-
90
-
91
-
92
-
93
-
94
-
95
-
96
-
97
-
98
-
99
-
100
-
101
-
102
-
103
-
104
-
105
-
106
-
107
-
108
-
109
-
110
-
111
-
112
-
113
-
114
-
115
-
116
-
117
-
118
-
119
-
120
-
121
-
122
-
123
-
124
-
125
-
126
-
127
-
128
-
129
-
130
-
131
-
132
-
133
-
134
-
135
-
136
-
137
-
138
-
139
-
140
-
141
-
142
 |
 |