Zanussi ZOD35561XK Product Manaul
Zanussi ZOD35561XK Manual
 |
View all Zanussi ZOD35561XK manuals
Add to My Manuals
Save this manual to your list of manuals |
Zanussi ZOD35561XK manual content summary:
- Zanussi ZOD35561XK | Product Manaul - Page 1
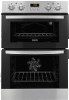
EN User manual Oven ZOD35561 - Zanussi ZOD35561XK | Product Manaul - Page 2
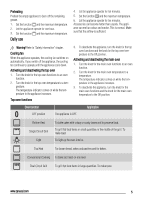
Accessible parts are hot. • If the appliance has a child safety device, we recommend that you activate it. Installation Warning! Only a qualified person must install this appliance. • Remove all the packaging. • Do not install or use a damaged appliance. • Obey the installation instruction supplied - Zanussi ZOD35561XK | Product Manaul - Page 3
after each use. • Internally the appliance becomes hot when in operation. Do not touch the heating elements that are in the appliance. Always use oven gloves to remove or put in accessories or ovenware. • Be careful, when you open the appliance door while the appliance is in operation. Hot air can - Zanussi ZOD35561XK | Product Manaul - Page 4
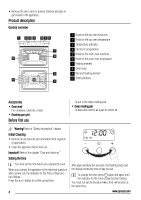
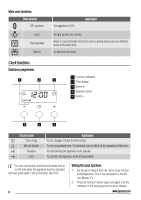
all accessories and removable shelf supports (if applicable). • Clean the appliance before first use. Important! Refer to the chapter "Care and cleaning". Setting the time You must set the time before you operate the oven. When you connect the appliance to the electrical supply or after a power cut - Zanussi ZOD35561XK | Product Manaul - Page 5
on while the temperature in the appliance increases. 3. To deactivate the appliance, turn the knob for the main oven functions and the knob for the main oven temperature to the Off position. Oven function OFF position The appliance is OFF. Application Bottom Heat Single Circuit Grill Light To - Zanussi ZOD35561XK | Product Manaul - Page 6
of the oven. To set how long the appliance must operate. To set when the appliance must be deactivated oven function and temperature. This is not necessary for the Minute Minder . 2. Press the Selection button again and again until the indicator for the necessary clock function flashes. www.zanussi - Zanussi ZOD35561XK | Product Manaul - Page 7
the slide-in accessories between the guidebars of one of the oven levels. The deep roasting pan and the oven shelf have double side edges. These edges and the shape of the guide-bars causes the anti-tilt safety for the oven accessories. Put the oven shelf on the deep roasting pan. Push the deep - Zanussi ZOD35561XK | Product Manaul - Page 8
oven The top oven is the smaller of the two ovens oven The main oven is particularly suitable for cooking larger quantities of food. Baking General instructions • Your new oven heat. When you use frozen food, the trays in the oven oven level Oven Oven temperature too low Baking time too long Oven temperature - Zanussi ZOD35561XK | Product Manaul - Page 9
slightly higher oven temperature setting Top oven Baking Shelf Positions are not critical but ensure that oven shelves are 190 - 200 190 - 200 150 - 170 170 - 180 150 - 180 75 - 90 Follow manufacturer´s instructions. 20 - 30 20 - 30 30 - 50 90 - 120 40 - 50 180 - 190 30 - 40 Shelf Position 1 1 1 1 1 1 1 - Zanussi ZOD35561XK | Product Manaul - Page 10
25 See roasting chart. Shelf Position 1 1 1 1 1 1 1 1 1 1 1 1 Main oven Baking Shelf Positions are not critical but ensure that oven shelves are evenly spaced when more than one is used (e.g. shelf positions 1 and 3) Food Biscuits Bread - 25 60 - 75 120 - 150 180 - 270 20 - 30 10 www.zanussi.com - Zanussi ZOD35561XK | Product Manaul - Page 11
Roasting dishes • Use heat-resistant ovenware to roast (please read the instructions of the manufacturer). • Large roasting joints can be roasted directly in the deep roasting pan or on the oven shelf above the deep over 35-40 minutes per ½ kg (1lb) and 35-40 minutes over www.zanussi.com 11 - Zanussi ZOD35561XK | Product Manaul - Page 12
the oven door closed Always pre-heat the empty oven only flat pieces of meat or fish. Top oven Grilling Adjust shelf position and grill pan grid the packaging and set it on a plate on the oven shelf. • Do not cover with a plate or bowl. This can extend the time to 12 • Put the oven shelf in the first - Zanussi ZOD35561XK | Product Manaul - Page 13
the heating element 1. Install the heating element in opposite sequence. Important! Install the heating element correctly on the two sides above the support on the inner wall of the oven. 2. Insert shelf support rails. Oven door and glass panels To clean the oven door remove it. www.zanussi.com - Zanussi ZOD35561XK | Product Manaul - Page 14
them upwards out of the guide 4. Clean the door glass panels. To install panels follow the procedure in reverse. Insert the smaller panel first, then the larger. Oven lamp Warning! There is a danger of electrical shock! Before you change the oven lamp: • Switch off the oven. • Remove the fuses in - Zanussi ZOD35561XK | Product Manaul - Page 15
What to do if... Warning! Refer to "Safety information" chapter. Problem The oven does not heat up. The oven does not heat up. The oven does not heat up. The oven does not heat up. Possible cause The appliance is deactivated. The clock is not set. The necessary settings are not set. The fuse in - Zanussi ZOD35561XK | Product Manaul - Page 16
600 min 550 min 538 907 min 560 min 570 max 2000 min 888 866 20 300 min 16 www.zanussi.com - Zanussi ZOD35561XK | Product Manaul - Page 17
5 16 866 874-879 888 11 548 90° www.zanussi.com 17 - Zanussi ZOD35561XK | Product Manaul - Page 18
on condition that: • Appliance has been correctly installed and used only on the electricity supply stated on the rating plate. • Appliance has been used for normal domestic purposes only, in accordance with manufacturer's instructions. • Appliance hasn't been serviced, maintained, repaired, taken - Zanussi ZOD35561XK | Product Manaul - Page 19
appliance which is improperly installed, calls to appliances outside United Kingdom. • Appliances found to be in use within a commercial environment, plus those which are subject to rental agreements. • Products of Electrolux manufacturer that are not marketed by Electrolux Service and Spare Parts - Zanussi ZOD35561XK | Product Manaul - Page 20
www.zanussi.com/shop 892950115-B-522011
-
 1
1 -
 2
2 -
 3
3 -
 4
4 -
 5
5 -
 6
6 -
 7
7 -
8
-
9
-
10
-
11
-
12
-
13
-
14
-
15
-
16
-
17
-
18
-
19
-
20
 |
 |

EN
User manual
Oven
ZOD35561