Zanussi ZOD35561XK Product Manaul - Page 7
Using the accessories - double oven
 |
View all Zanussi ZOD35561XK manuals
Add to My Manuals
Save this manual to your list of manuals |
Page 7 highlights
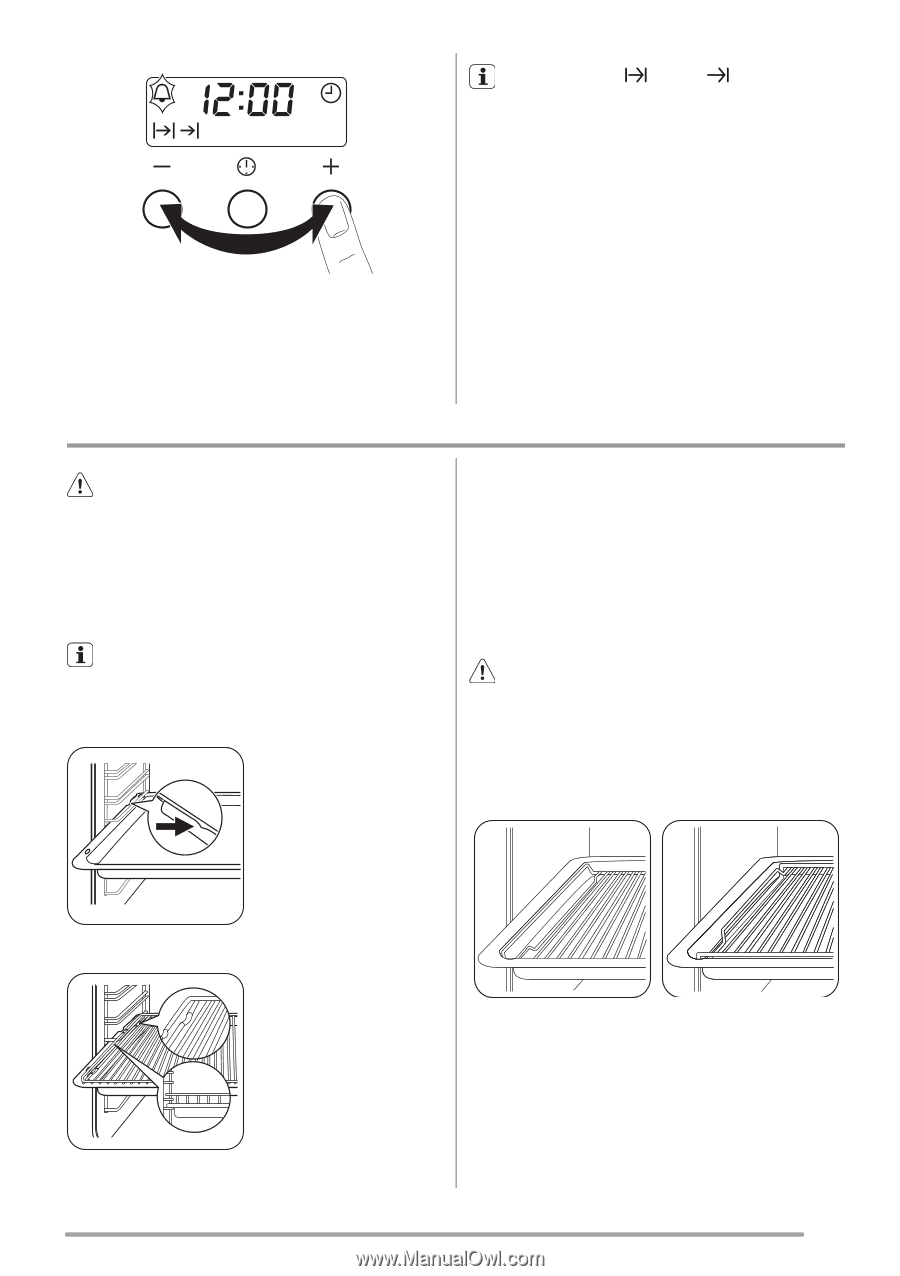
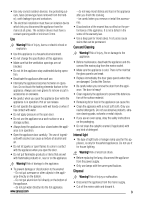
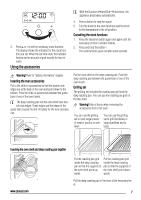
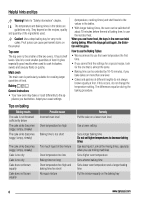
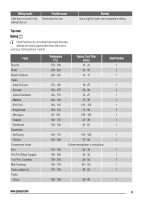
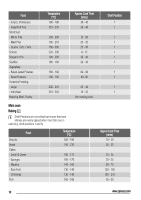
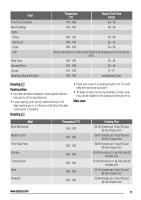
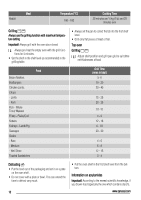
3. Press + or - to set the necessary clock function. The display shows the indicator for the clock function you set. When the set time ends, the indicator flashes and an acoustic signal sounds for two minutes. Using the accessories With the Duration and End functions, the appliance deactivates automatically. 4. Press a button to stop the signal. 5. Turn the knob for the oven functions and the knob for the temperature to the off position. Cancelling the clock functions 1. Press the Selection button again and again until the necessary function indicator flashes. 2. Press and hold the button -. The clock function goes out after some seconds. Warning! Refer to "Safety information" chapter. Inserting the oven accessories Put in the slide-in accessories so that the double side edges are at the back of the oven and point down to the bottom. Push the slide-in accessories between the guidebars of one of the oven levels. The deep roasting pan and the oven shelf have double side edges. These edges and the shape of the guide-bars causes the anti-tilt safety for the oven accessories. Put the oven shelf on the deep roasting pan. Push the deep roasting pan between the guide-bars of one of the oven levels. Grilling set The grilling set includes the roasting pan grid and the deep roasting pan. You can use the roasting pan grid on the two sides. Warning! Risk of burns when removing the accessories from a hot oven. You can use the grilling set to roast larger pieces of meat or poultry on one level: You can use the grilling set to grill flat dishes in large quantities and to toast: Inserting the oven shelf and deep roasting pan together www.zanussi.com Put the roasting pan grid Put the roasting pan grid inside the deep roasting inside the deep roasting pan so that the supports of pan so that the supports of the oven shelf point up- the oven shelf point down- wards. wards. Put the deep roasting pan in the oven at the necessary level. 7
-
 1
1 -
 2
2 -
 3
3 -
 4
4 -
 5
5 -
 6
6 -
 7
7 -
 8
8 -
 9
9 -
 10
10 -
 11
11 -
 12
12 -
13
-
14
-
15
-
16
-
17
-
18
-
19
-
20
 |
 |