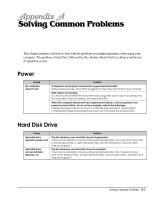
eMachines S1940 User Guide - Page 39
After the restoration process is completed, remove the Restore CD from your optical drive.
 |
View all eMachines S1940 manuals
Add to My Manuals
Save this manual to your list of manuals |
Page 39 highlights
7. The restoration process will start. All data in the Restore CD #1 will be copied to your hard disk. 8. When the "Insert next media and press enter to continue..." message appears, replace the Restore CD #1 with #2 in the optical drive. And press Enter to continue. 9. All data in the Restore CD #2 will be copied to your hard disk. 10. If the "Insert next media and press enter to continue..." message appears, replace the Restore CD #2 with #3 (if there is) in the optical drive. And press Enter to continue. NOTE Depending on the model, your system has two or three Restore CDs. 11. After the restoration process is completed, remove the Restore CD from your optical drive. 12. Press Enter to restart your computer. NOTE If the Restore CD is in the optical drive while your computer is booting, the computer will be booted with the Restore CD. In this case, the "Microsoft Windows Startup Menu" menu will appear. To continue the restoration, remove the Restore CD from your optical drive and restart the computer. 13. Windows XP starts and the registration program runs. 14. To register with Microsoft for using your computer, follow the displayed messages. Enter your personal information. NOTE The drivers for your system are in the Drivers folder of you Restore CDs. If you lose drivers, install these by using the Restore CDs. You can update drivers in the Device Manager window if there is no executable installation file. If there is the executable file for installation, use it to install a driver. Using the Restore CDs 5-3
-
 1
1 -
2
-
3
-
4
-
5
-
6
-
7
-
8
-
9
-
10
-
11
-
12
-
13
-
14
-
15
-
16
-
17
-
18
-
19
-
20
-
21
-
22
-
23
-
24
-
25
-
26
-
27
-
28
-
29
-
30
-
31
-
32
-
33
-
 34
34 -
 35
35 -
 36
36 -
 37
37 -
 38
38 -
 39
39 -
 40
40 -
 41
41 -
 42
42 -
 43
43 -
 44
44 -
45
-
46
-
47
-
48
-
49
-
50
 |
 |