2009 Ford E150 Cargo Diesel Supplement 2nd Printing - Page 44
2009 Ford E150 Cargo Manual

Page 44 highlights
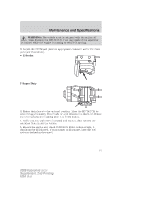
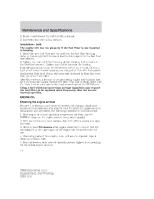
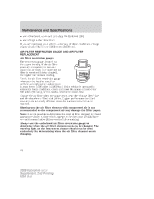
Maintenance and Specifications 2. Remove and discard the old fuel filter element. 3. Carefully clean the mating surfaces. Installation - both The engine will not run properly if the fuel filter is not installed in housing. 1. Install the new fuel filter and cap seal into the fuel filter housing. Refer to Motorcraft Part Numbers later in this chapter for the fuel filter part number. 2. Tighten cap onto fuel filter housing slowly, allowing fuel to soak into the fuel filter element. Tighten cap until it contacts the housing. Turn the ignition key to on for 30 seconds, then turn it to off. Do this a total of six times in a row to purge any trapped air from the fuel system. Replace the filter bowl O-ring with new seal (included in filter kit) every time you service the filter. After filter service, a no start or rough running engine may indicate that air is entering the system through the filter bowl seal or drain. Make sure the drain lever is pointing rearward and stowed against the HFCM case. Using a fuel which has more than average impurities may require the fuel filter to be replaced more frequently than the service interval specifies. ENGINE OIL Checking the engine oil level Because it is normal to add some oil between oil changes, check your engine oil level each time you stop for fuel. To check the engine oil level consistently and accurately, the following procedure is recommended: 1. Have engine at normal operating temperature (at least into the NORMAL range on the engine coolant temperature gauge). 2. Park the vehicle on a level surface, then turn off the engine and open the hood. 3. Allow at least 20 minutes after engine shutdown to ensure that the oil contained in the upper parts of the engine has returned to the oil pan. 4. Protecting yourself from engine heat, pull out the dipstick, wipe it clean and reinsert fully. 5. Read oil level on both sides of dipstick and use highest level (reading) for the actual engine oil level. 44 2009 Econoline (eco) Supplement, 2nd Printing USA (fus)
-
 1
1 -
2
-
3
-
4
-
5
-
6
-
7
-
8
-
9
-
10
-
11
-
12
-
13
-
14
-
15
-
16
-
17
-
18
-
19
-
20
-
21
-
22
-
23
-
24
-
25
-
26
-
27
-
28
-
29
-
30
-
31
-
32
-
33
-
34
-
35
-
36
-
37
-
38
-
 39
39 -
 40
40 -
 41
41 -
 42
42 -
 43
43 -
 44
44 -
 45
45 -
 46
46 -
 47
47 -
 48
48 -
 49
49 -
50
-
51
-
52
-
53
-
54
-
55
-
56
-
57
-
58
-
59
-
60
-
61
-
62
-
63
-
64
-
65
-
66
-
67
-
68
-
69
-
70
-
71
-
72
-
73
-
74
-
75
-
76
-
77
-
78
-
79
-
80
-
81
-
82
-
83
-
84
-
85
-
86
-
87
-
88
-
89
-
90
-
91
-
92
-
93
-
94
-
95
-
96
-
97
-
98
-
99
-
100
-
101
-
102
-
103
-
104
 |
 |