2003 Mazda Protege Owner's Manual - Page 229
2003 Mazda Protege Manual
Page 229 highlights
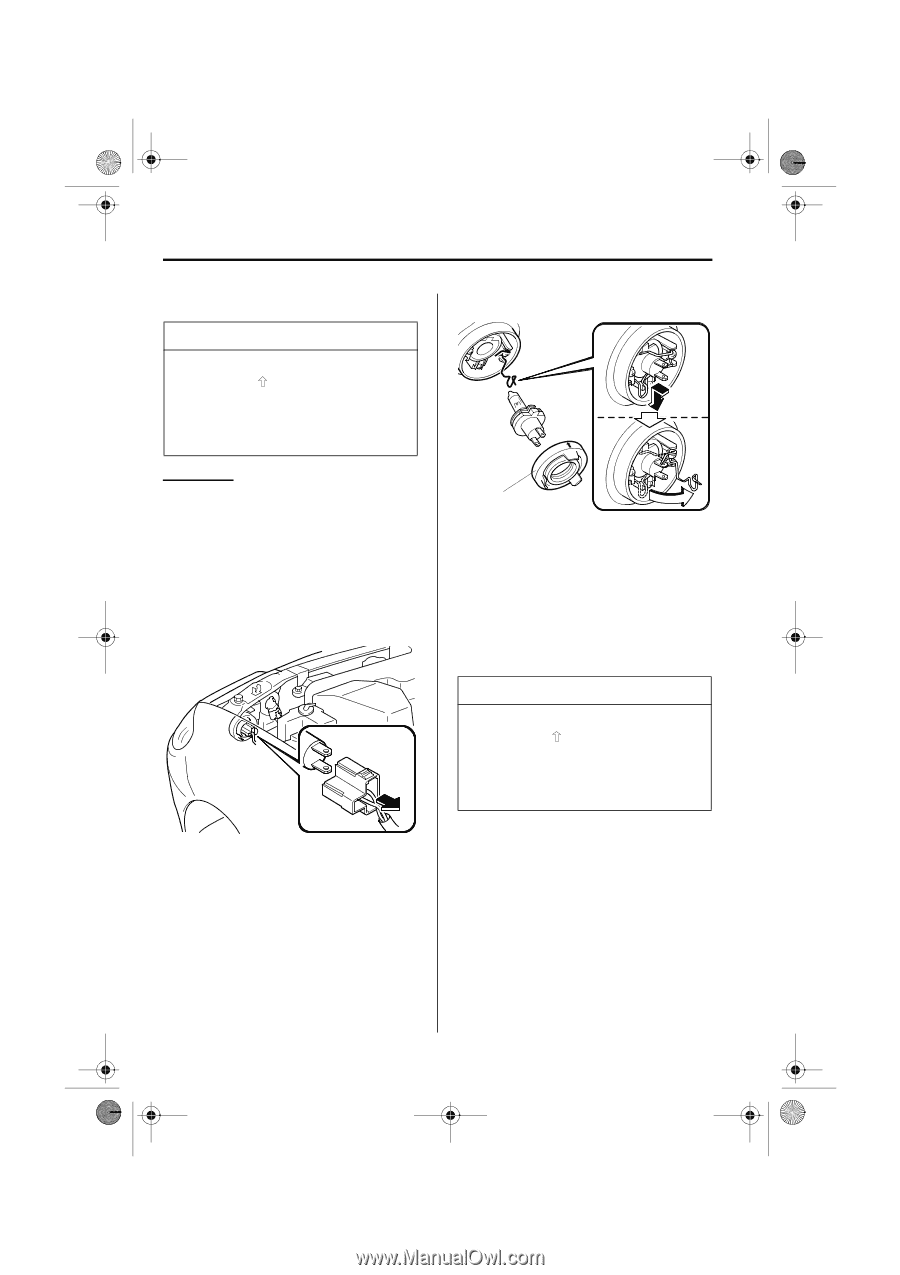
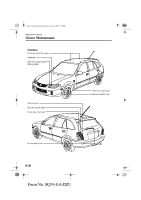
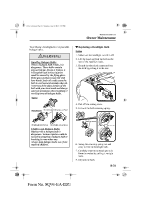
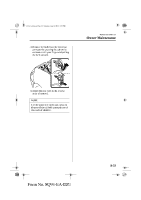
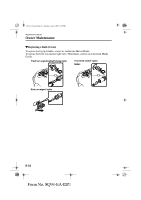
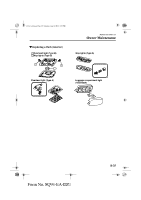
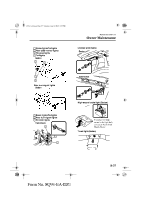
J39L_EA.book Page 32 Saturday, June 8, 2002 5:35 PM Maintenance and Care Owner Maintenance 9. Install in the reverse order of removal. NOTE 5. Unhook the bulb retaining spring. • When reinstalling the sealing cover, make sure faces up. • Use the protective cover and carton to dispose of the old bulb promptly out of the reach of children. Hatchback 1. Make sure the headlight switch is off. 2. Lift the hood and find the bulbs in the rear of the headlight body. (Low beam bulb) 3. Detach the electrical connector from the bulb by pulling it to the rear. Sealing cover 6. Swing the retaining spring out and away to free the headlight bulb. 7. Carefully remove the headlight bulb from the socket by pulling it straight back. 8. Replace the bulb. 9. Install in the reverse order of removal. NOTE • When reinstalling the sealing cover, make sure faces up. • Use the protective cover and carton to dispose of the old bulb promptly out of the reach of children. (High beam bulb) 4. Pull off the sealing cover. 10.Turn the socket and bulb assembly counterclockwise and remove it. Carefully remove the headlight bulb from its socket in the reflector by gently pulling it straight backward out of the socket. 8-32 Form No. 8Q94-EA-02G
-
 1
1 -
2
-
3
-
4
-
5
-
6
-
7
-
8
-
9
-
10
-
11
-
12
-
13
-
14
-
15
-
16
-
17
-
18
-
19
-
20
-
21
-
22
-
23
-
24
-
25
-
26
-
27
-
28
-
29
-
30
-
31
-
32
-
33
-
34
-
35
-
36
-
37
-
38
-
39
-
40
-
41
-
42
-
43
-
44
-
45
-
46
-
47
-
48
-
49
-
50
-
51
-
52
-
53
-
54
-
55
-
56
-
57
-
58
-
59
-
60
-
61
-
62
-
63
-
64
-
65
-
66
-
67
-
68
-
69
-
70
-
71
-
72
-
73
-
74
-
75
-
76
-
77
-
78
-
79
-
80
-
81
-
82
-
83
-
84
-
85
-
86
-
87
-
88
-
89
-
90
-
91
-
92
-
93
-
94
-
95
-
96
-
97
-
98
-
99
-
100
-
101
-
102
-
103
-
104
-
105
-
106
-
107
-
108
-
109
-
110
-
111
-
112
-
113
-
114
-
115
-
116
-
117
-
118
-
119
-
120
-
121
-
122
-
123
-
124
-
125
-
126
-
127
-
128
-
129
-
130
-
131
-
132
-
133
-
134
-
135
-
136
-
137
-
138
-
139
-
140
-
141
-
142
-
143
-
144
-
145
-
146
-
147
-
148
-
149
-
150
-
151
-
152
-
153
-
154
-
155
-
156
-
157
-
158
-
159
-
160
-
161
-
162
-
163
-
164
-
165
-
166
-
167
-
168
-
169
-
170
-
171
-
172
-
173
-
174
-
175
-
176
-
177
-
178
-
179
-
180
-
181
-
182
-
183
-
184
-
185
-
186
-
187
-
188
-
189
-
190
-
191
-
192
-
193
-
194
-
195
-
196
-
197
-
198
-
199
-
200
-
201
-
202
-
203
-
204
-
205
-
206
-
207
-
208
-
209
-
210
-
211
-
212
-
213
-
214
-
215
-
216
-
217
-
218
-
219
-
220
-
221
-
222
-
223
-
 224
224 -
 225
225 -
 226
226 -
 227
227 -
 228
228 -
 229
229 -
 230
230 -
 231
231 -
 232
232 -
 233
233 -
 234
234 -
235
-
236
-
237
-
238
-
239
-
240
-
241
-
242
-
243
-
244
-
245
-
246
-
247
-
248
-
249
-
250
-
251
-
252
-
253
-
254
-
255
-
256
-
257
-
258
-
259
-
260
-
261
-
262
-
263
-
264
-
265
-
266
-
267
-
268
-
269
-
270
-
271
-
272
-
273
-
274
-
275
 |
 |