2002 Mercury Villager Owner's Manual - Page 97
2002 Mercury Villager Manual
Page 97 highlights
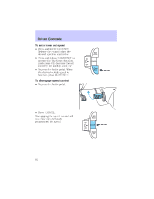
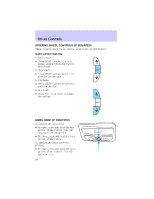
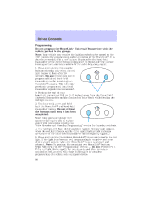
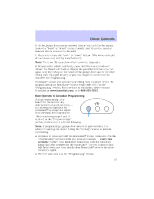
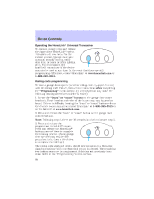
Driver Controls 6. At the garage door opener receiver (motor-head unit) in the garage, locate the "learn" or "smart" button (usually near where the hanging antenna wire is attached to the unit). 7. Press and release the "learn" or "smart" button. (The name and color of the button may vary by manufacturer.) Note: There are 30 seconds in which to initiate step eight. 8. Return to the vehicle and firmly press, hold for two seconds and release the HomeLink button. Repeat the press/hold/release sequence again, and, depending on the brand of the garage door opener (or other rolling code equipped device), repeat this sequence a third time to complete the programming. HomeLink should now activate your rolling code equipped device. To program additional HomeLink buttons begin with step 2 in the "Programming" section. For questions or comments, please contact HomeLink at www.homelink.com. or 1-800-355-3515. Gate Operator & Canadian Programming During programming, your hand-held transmitter may automatically stop transmitting - not allowing enough time for HomeLink to accept the signal from the hand-held transmitter. After completing steps 1 and 2 outlined in the "Programming" section, replace step 3 with the following: Note: If programming a garage door opener or gate operator, it is advised to unplug the device during the "cycling" process to prevent overheating. • Continue to press and hold the HomeLink button (note step 3 in the "Programming" section) while you press and release - every two seconds ("cycle") your hand-held transmitter until the frequency signal has been accepted by the HomeLink . The red indicator light will flash slowly and then rapidly after HomeLink accepts the radio frequency signal. • Proceed with step 4 in the "Programming" section. 97
-
 1
1 -
2
-
3
-
4
-
5
-
6
-
7
-
8
-
9
-
10
-
11
-
12
-
13
-
14
-
15
-
16
-
17
-
18
-
19
-
20
-
21
-
22
-
23
-
24
-
25
-
26
-
27
-
28
-
29
-
30
-
31
-
32
-
33
-
34
-
35
-
36
-
37
-
38
-
39
-
40
-
41
-
42
-
43
-
44
-
45
-
46
-
47
-
48
-
49
-
50
-
51
-
52
-
53
-
54
-
55
-
56
-
57
-
58
-
59
-
60
-
61
-
62
-
63
-
64
-
65
-
66
-
67
-
68
-
69
-
70
-
71
-
72
-
73
-
74
-
75
-
76
-
77
-
78
-
79
-
80
-
81
-
82
-
83
-
84
-
85
-
86
-
87
-
88
-
89
-
90
-
91
-
 92
92 -
 93
93 -
 94
94 -
 95
95 -
 96
96 -
 97
97 -
 98
98 -
 99
99 -
 100
100 -
 101
101 -
 102
102 -
103
-
104
-
105
-
106
-
107
-
108
-
109
-
110
-
111
-
112
-
113
-
114
-
115
-
116
-
117
-
118
-
119
-
120
-
121
-
122
-
123
-
124
-
125
-
126
-
127
-
128
-
129
-
130
-
131
-
132
-
133
-
134
-
135
-
136
-
137
-
138
-
139
-
140
-
141
-
142
-
143
-
144
-
145
-
146
-
147
-
148
-
149
-
150
-
151
-
152
-
153
-
154
-
155
-
156
-
157
-
158
-
159
-
160
-
161
-
162
-
163
-
164
-
165
-
166
-
167
-
168
-
169
-
170
-
171
-
172
-
173
-
174
-
175
-
176
-
177
-
178
-
179
-
180
-
181
-
182
-
183
-
184
-
185
-
186
-
187
-
188
-
189
-
190
-
191
-
192
-
193
-
194
-
195
-
196
-
197
-
198
-
199
-
200
-
201
-
202
-
203
-
204
-
205
-
206
-
207
-
208
-
209
-
210
-
211
-
212
-
213
-
214
-
215
-
216
-
217
-
218
-
219
-
220
-
221
-
222
-
223
-
224
-
225
-
226
-
227
-
228
-
229
-
230
-
231
-
232
-
233
-
234
-
235
-
236
-
237
-
238
-
239
-
240
-
241
-
242
-
243
-
244
-
245
-
246
-
247
-
248
-
249
-
250
-
251
-
252
-
253
-
254
-
255
-
256
 |
 |