Adobe 13102498 User Guide - Page 215
Sharpen using Smart Sharpen, Amount, Radius, Remove, Angle, More Accurate, Fade Amount, Tonal Width
 |
UPC - 883919080192
View all Adobe 13102498 manuals
Add to My Manuals
Save this manual to your list of manuals |
Page 215 highlights
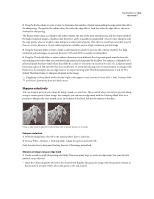
PHOTOSHOP CS3 208 User Guide • Sharpening increases image contrast. If you find that highlights or shadows are clipped after you sharpen, use the layer blending controls (if you sharpen a separate layer) to prevent sharpening in highlights and shadows. See "Specify a tonal range for blending layers" on page 296. • If you need to reduce image noise, do so before sharpening so that you don't intensify the noise. • Sharpen your image multiple times in small amounts. Sharpen the first time to correct blur caused by capturing your image (scanning it or taking it with your digital camera). After you've color corrected and sized your image, sharpen it again (or a copy of it) to add the appropriate amount of sharpening for your output medium. • If possible, judge your sharpening by outputting it to the final medium. The amount of sharpening needed varies among output media. For greatest control use the Unsharp Mask (USM) filter or the Smart Sharpen filter to sharpen your images. Although Photoshop also has the Sharpen, Sharpen Edges, and Sharpen More filter options, these filters are automatic and do not provide controls and options. You can sharpen your entire image or just a portion defined by a selection or mask. Because the Unsharp Mask and Smart Sharpen filters can be applied to only one layer at a time, you might need to merge layers or flatten your file to sharpen all image layers in a multilayered file. Note: Don't be misled by the name Unsharp Mask, which comes from a darkroom technique used in traditional film-based photography. The filter sharpens images rather than the opposite. Sharpen using Smart Sharpen The Smart Sharpen filter has sharpening controls not available with the Unsharp Mask filter. You can set the sharpening algorithm or control the amount of sharpening that occurs in shadow and highlight areas. 1 Zoom the document window to 100% to get an accurate view of the sharpening. 2 Choose Filter > Sharpen > Smart Sharpen. 3 Set the controls in the Sharpen tabs: Amount Sets the amount of sharpening. A higher value increases the contrast between edge pixels, giving the appearance of greater sharpness. Radius Determines the number of pixels surrounding the edge pixels affected by the sharpening. The greater the radius value, the wider the edge effects and the more obvious the sharpening. Remove Sets the sharpening algorithm used to sharpen the image. Gaussian Blur is the method used by the Unsharp Mask filter. Lens Blur detects the edges and detail in an image, and provides finer sharpening of detail and reduced sharpening halos. Motion Blur attempts to reduce the effects of blur due to camera or subject movement. Set the Angle control if you choose Motion Blur. Angle Sets the direction of motion for the Motion Blur option of the Remove control. More Accurate Processes the file more slowly for a more accurate removal of blurring. 4 Adjust sharpening of dark and light areas using in the Shadow and Highlight tabs. (Click the Advanced button to display the tabs). If the dark or light sharpening halos appear too strong you can reduce them with these controls, which are only available for 8-bits and 16-bits-per-channel images: Fade Amount Adjusts the amount of sharpening in the highlights or shadows. Tonal Width Controls the range of tones in the shadows or highlights that are modified. Move the slider to the left or right to decrease or increase the Tonal Width value. Smaller values restrict the adjustments to only the darker regions for shadow correction and only the lighter regions for highlight correction.
-
 1
1 -
2
-
3
-
4
-
5
-
6
-
7
-
8
-
9
-
10
-
11
-
12
-
13
-
14
-
15
-
16
-
17
-
18
-
19
-
20
-
21
-
22
-
23
-
24
-
25
-
26
-
27
-
28
-
29
-
30
-
31
-
32
-
33
-
34
-
35
-
36
-
37
-
38
-
39
-
40
-
41
-
42
-
43
-
44
-
45
-
46
-
47
-
48
-
49
-
50
-
51
-
52
-
53
-
54
-
55
-
56
-
57
-
58
-
59
-
60
-
61
-
62
-
63
-
64
-
65
-
66
-
67
-
68
-
69
-
70
-
71
-
72
-
73
-
74
-
75
-
76
-
77
-
78
-
79
-
80
-
81
-
82
-
83
-
84
-
85
-
86
-
87
-
88
-
89
-
90
-
91
-
92
-
93
-
94
-
95
-
96
-
97
-
98
-
99
-
100
-
101
-
102
-
103
-
104
-
105
-
106
-
107
-
108
-
109
-
110
-
111
-
112
-
113
-
114
-
115
-
116
-
117
-
118
-
119
-
120
-
121
-
122
-
123
-
124
-
125
-
126
-
127
-
128
-
129
-
130
-
131
-
132
-
133
-
134
-
135
-
136
-
137
-
138
-
139
-
140
-
141
-
142
-
143
-
144
-
145
-
146
-
147
-
148
-
149
-
150
-
151
-
152
-
153
-
154
-
155
-
156
-
157
-
158
-
159
-
160
-
161
-
162
-
163
-
164
-
165
-
166
-
167
-
168
-
169
-
170
-
171
-
172
-
173
-
174
-
175
-
176
-
177
-
178
-
179
-
180
-
181
-
182
-
183
-
184
-
185
-
186
-
187
-
188
-
189
-
190
-
191
-
192
-
193
-
194
-
195
-
196
-
197
-
198
-
199
-
200
-
201
-
202
-
203
-
204
-
205
-
206
-
207
-
208
-
209
-
 210
210 -
 211
211 -
 212
212 -
 213
213 -
 214
214 -
 215
215 -
 216
216 -
 217
217 -
 218
218 -
 219
219 -
 220
220 -
221
-
222
-
223
-
224
-
225
-
226
-
227
-
228
-
229
-
230
-
231
-
232
-
233
-
234
-
235
-
236
-
237
-
238
-
239
-
240
-
241
-
242
-
243
-
244
-
245
-
246
-
247
-
248
-
249
-
250
-
251
-
252
-
253
-
254
-
255
-
256
-
257
-
258
-
259
-
260
-
261
-
262
-
263
-
264
-
265
-
266
-
267
-
268
-
269
-
270
-
271
-
272
-
273
-
274
-
275
-
276
-
277
-
278
-
279
-
280
-
281
-
282
-
283
-
284
-
285
-
286
-
287
-
288
-
289
-
290
-
291
-
292
-
293
-
294
-
295
-
296
-
297
-
298
-
299
-
300
-
301
-
302
-
303
-
304
-
305
-
306
-
307
-
308
-
309
-
310
-
311
-
312
-
313
-
314
-
315
-
316
-
317
-
318
-
319
-
320
-
321
-
322
-
323
-
324
-
325
-
326
-
327
-
328
-
329
-
330
-
331
-
332
-
333
-
334
-
335
-
336
-
337
-
338
-
339
-
340
-
341
-
342
-
343
-
344
-
345
-
346
-
347
-
348
-
349
-
350
-
351
-
352
-
353
-
354
-
355
-
356
-
357
-
358
-
359
-
360
-
361
-
362
-
363
-
364
-
365
-
366
-
367
-
368
-
369
-
370
-
371
-
372
-
373
-
374
-
375
-
376
-
377
-
378
-
379
-
380
-
381
-
382
-
383
-
384
-
385
-
386
-
387
-
388
-
389
-
390
-
391
-
392
-
393
-
394
-
395
-
396
-
397
-
398
-
399
-
400
-
401
-
402
-
403
-
404
-
405
-
406
-
407
-
408
-
409
-
410
-
411
-
412
-
413
-
414
-
415
-
416
-
417
-
418
-
419
-
420
-
421
-
422
-
423
-
424
-
425
-
426
-
427
-
428
-
429
-
430
-
431
-
432
-
433
-
434
-
435
-
436
-
437
-
438
-
439
-
440
-
441
-
442
-
443
-
444
-
445
-
446
-
447
-
448
-
449
-
450
-
451
-
452
-
453
-
454
-
455
-
456
-
457
-
458
-
459
-
460
-
461
-
462
-
463
-
464
-
465
-
466
-
467
-
468
-
469
-
470
-
471
-
472
-
473
-
474
-
475
-
476
-
477
-
478
-
479
-
480
-
481
-
482
-
483
-
484
-
485
-
486
-
487
-
488
-
489
-
490
-
491
-
492
-
493
-
494
-
495
-
496
-
497
-
498
-
499
-
500
-
501
-
502
-
503
-
504
-
505
-
506
-
507
-
508
-
509
-
510
-
511
-
512
-
513
-
514
-
515
-
516
-
517
-
518
-
519
-
520
-
521
-
522
-
523
-
524
-
525
-
526
-
527
-
528
-
529
-
530
-
531
-
532
-
533
-
534
-
535
-
536
-
537
-
538
-
539
-
540
-
541
-
542
-
543
-
544
-
545
-
546
-
547
-
548
-
549
-
550
-
551
-
552
-
553
-
554
-
555
-
556
-
557
-
558
-
559
-
560
-
561
-
562
-
563
-
564
-
565
-
566
-
567
-
568
-
569
-
570
-
571
-
572
-
573
-
574
-
575
-
576
-
577
-
578
-
579
-
580
-
581
-
582
-
583
-
584
-
585
-
586
-
587
-
588
-
589
-
590
-
591
-
592
-
593
-
594
-
595
-
596
-
597
-
598
-
599
-
600
-
601
-
602
-
603
-
604
-
605
-
606
-
607
-
608
-
609
-
610
-
611
-
612
-
613
-
614
-
615
-
616
-
617
-
618
-
619
-
620
-
621
-
622
-
623
-
624
-
625
-
626
-
627
-
628
-
629
-
630
-
631
-
632
-
633
-
634
-
635
-
636
-
637
-
638
-
639
-
640
-
641
-
642
-
643
-
644
-
645
-
646
-
647
-
648
-
649
-
650
-
651
-
652
-
653
-
654
-
655
-
656
-
657
-
658
-
659
-
660
-
661
-
662
-
663
-
664
-
665
-
666
-
667
-
668
-
669
-
670
-
671
-
672
-
673
-
674
-
675
-
676
-
677
-
678
-
679
-
680
-
681
 |
 |
