Alpine CDA-9855 Owners Manual - Page 27
Setting Amplifier Link, Displaying the External Amplifier Information - remove
 |
View all Alpine CDA-9855 manuals
Add to My Manuals
Save this manual to your list of manuals |
Page 27 highlights
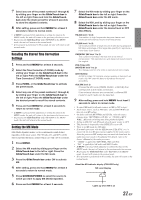
Setting Amplifier Link When an Amplifier Link compatible amplifier (MRD-M1005 or MRD-M605, etc.) is connected, the amplifier settings are adjustable from the head unit. A maximum of 8 external amplifiers can be adjusted. 1 Press and hold MENU for at least 2 seconds. 2 Select the Amplifier Link (A-LINK) mode by sliding your finger on the GlideTouch bar to the left or right. Press the GlideTouch bar under the Amplifier Link (A-LINK) mode. 3 Select the AMP-ID (AMP-1 to AMP-8) to be adjusted by sliding your finger on the GlideTouch bar to the left or right. Press the GlideTouch bar under the desired AMP-ID. The input level mode to be adjusted is activated. If a Mono Amplifier is Connected 4 Adjust the input level by sliding your finger on the GlideTouch bar to the left or right. Press the GlideTouch bar under the desired level. If a 4ch Amplifier is Connected 4 Adjust the input level of CH 1/2 by sliding your finger on the GlideTouch bar to the left or right. Press the GlideTouch bar under the desired level. 5 Adjust the input level of CH 3/4 by sliding your finger on the GlideTouch bar to the left or right. Press the GlideTouch bar under the desired level. 6 When adjustment has been completed, press and hold MENU for at least 2 seconds to return to normal mode. • For details of each of the settings, refer to the Owner's Manual of the external amplifier. • If amplifier settings are made on the unit, do not then change the setting with the amplifier buttons as the amplifier display may not match the operations of the unit. • "No Link" is displayed if the amplifier is removed or its power cannot be turned on, etc. • If multiple amplifiers are connected to this unit, set a different ID on each amplifier. Otherwise the display may flicker. • External amplifier information display can be changed by pressing TITLE while adjusting the input level. • If the GlideTouch bar is pressed and held while adjusting the input level, the amplifier link mode can be switched between lock and unlock. • If MENU is pressed while adjusting or setting the itmes in the MENU mode, the unit will return to the previous selection secreen. • By pressing the GlideTouch bar under RETURN in the MENU mode, the unit will return to the normal mode. • If no peration is performed in 60 seconds, the unit will return to the normal mode. Displaying the External Amplifier Information When an Amplifier Link compatible amplifier is connected, the amplifier's status (voltage, temperature and fan status) can be shown in the head unit's display. 1 Press TITLE in the Radio or CD mode to switch the display of the external amplifier information. • For switching the display, refer to the section "Displaying the Title/ Text" (page 22). • For changing the XM display, refer to the section "Changing the Display" (page 32). • For changing the iPod display, refer to the section "Displaying the Text" (page 36). CDA-9855 VOLTAGE:10.1V Voltage Display 75.0˚F Temperature Display The temperature display and the fan status display are alternately displayed. VOLTAGE:10.1V HIGH Voltage Display Fan Status Display CDA-9853 Voltage Display Fan Status Display 12.4V HIGH 42.0°C Temperature Display • To switch the display between Celsius and Fahrenheit, refer to page 30. 25-EN
-
 1
1 -
2
-
3
-
4
-
5
-
6
-
7
-
8
-
9
-
10
-
11
-
12
-
13
-
14
-
15
-
16
-
17
-
18
-
19
-
20
-
21
-
 22
22 -
 23
23 -
 24
24 -
 25
25 -
 26
26 -
 27
27 -
 28
28 -
 29
29 -
 30
30 -
 31
31 -
 32
32 -
33
-
34
-
35
-
36
-
37
-
38
-
39
-
40
-
41
-
42
-
43
-
44
-
45
-
46
-
47
-
48
-
49
-
50
 |
 |
