Asus WL-566gM User Manual - Page 4
Status indicators, Wall mount option - firmware
 |
UPC - 610839730711
View all Asus WL-566gM manuals
Add to My Manuals
Save this manual to your list of manuals |
Page 4 highlights
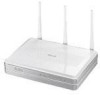
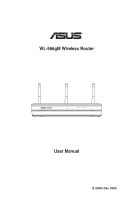
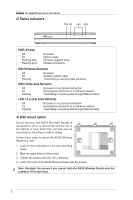
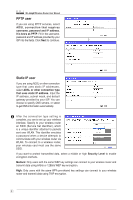
WL-566gM Wireless Router User Manual 2) Status indicators PWR AIR LAN WAN PWR (Power) Off On Flashing-slow Flashing-quick No power System ready Firmware upgrade failed EZsetup processing AIR (Wireless Network) Off On Flashing No power Wireless system ready Transmitting or receiving data (wireless) WAN (Wide Area Network) Off On Flashing No power or no physical connection Has physical connection to an Ethernet network Transmitting or receiving data (through Ethernet cable) LAN 1-4 (Local Area Network) Off On Flashing No power or no physical connection Has physical connection to an Ethernet network Transmitting or receiving data (through Ethernet cable) 3) Wall mount option Out of the box, the ASUS Wireless Router is designed to sit on a raised flat surface like a file cabinet or book shelf. The unit may also be converted for mounting to a wall or ceiling. Follow these steps to mount the ASUS Wireless Router to a wall: 1. Look on the underside for the two mounting hooks. 2. Mark two upper holes in a flat surface. 3. Tighten two screws until only 1/4'' is showing. 4. Latch the hooks of the ASUS Wireless Router onto the screws. Note: Re-adjust the screws if you cannot latch the ASUS Wireless Router onto the screws or if it is too loose. 4
-
 1
1 -
 2
2 -
 3
3 -
 4
4 -
 5
5 -
 6
6 -
 7
7 -
 8
8 -
 9
9 -
 10
10 -
11
-
12
-
13
-
14
-
15
-
16
-
17
-
18
-
19
-
20
-
21
-
22
-
23
-
24
-
25
 |
 |
