Asus WL520GC User Manual - Page 10
Medium, Finish, Save&Restart, Start, Programes, ASUS Utility, WLAN Card, One Touch Wizard - configuration
 |
UPC - 610839732623
View all Asus WL520GC manuals
Add to My Manuals
Save this manual to your list of manuals |
Page 10 highlights
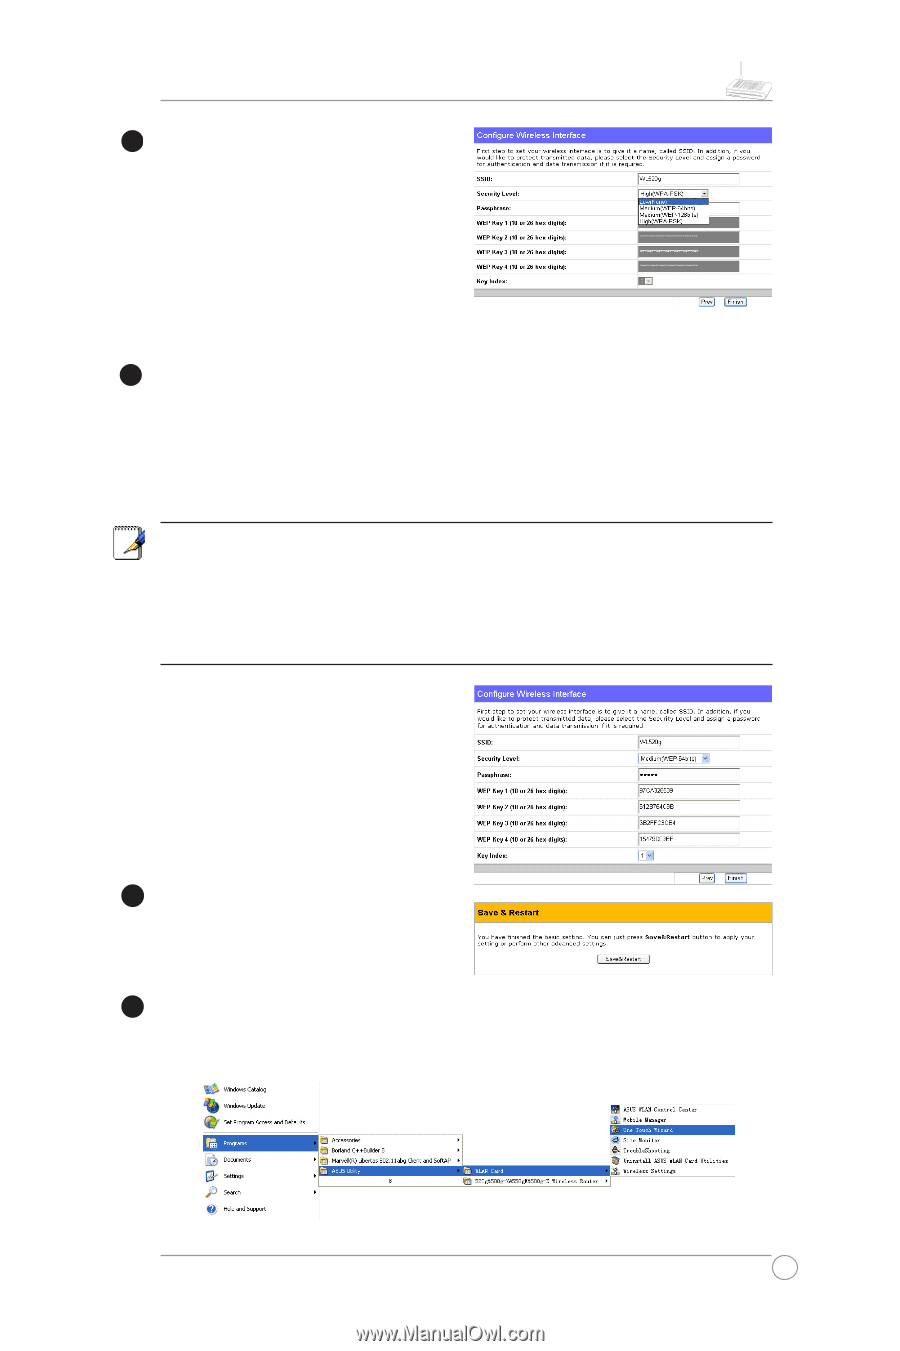
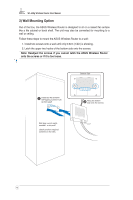
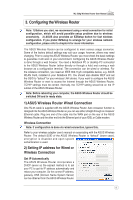
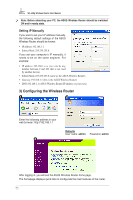
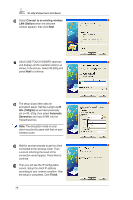
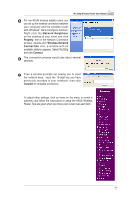
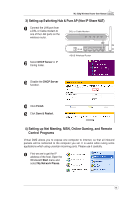
WL-520g Wireless Router User Manual 2 After setting the connection type, you are to set up your wireless interface,. First, give an SSID (Service Set Identifier), which is a unique identifier attached to packets sent over WLANs. This identifier emulates a password when a wireless device attempts communication on the WLAN. Because an SSID distinguishes WLANs from each other, access points and wireless devices trying to connect to a WLAN must use the same SSID. 3 Also, if you want to protect transmitted data, select a middle or high Security Level. Medium : only users with the same WEP key are to connect to this access point and to transmit data using 64bits or 128bits WEP key encryption. High: only users with the same WPA pre-shared key are to connect to this access point and to transmit data using TKIP encryption. The ASUS wireless router configuration page features a convienient approach to setup the WEP Keys: with only a few taps on your keyboard to define the Passphrase, the system will automatically generate four strings of WEP Keys. For ASUS wireless adaptor users, it is no longer necessary to input long and complicated WEP Keys when connecting the router with the wireless client; the Passphrase provides an easy way for setting up your wireless environment! For example, if we input select WEP64bits encryption mode, input 11111 as Passphrase, then the following WEP Keys are generated as shown in the right picture. Record the Passphrase and the WEP keys on your notebook, then click Save. 4 Click Finish to continue. You are prompted to save the settings. Click Save&Restart to save the settings to the ASUS Wireless Router and enable the new settings. 5 Next we are to setup encrypted wireless connection for wireless router and wireless client. If you have installed ASUS wireless adaptor as well as the utility, click Start -> Programes -> ASUS Utility -> WLAN Card -> One Touch Wizard to open the connection setup utility on the client end. 9
-
 1
1 -
2
-
3
-
4
-
 5
5 -
 6
6 -
 7
7 -
 8
8 -
 9
9 -
 10
10 -
 11
11 -
 12
12 -
 13
13 -
 14
14 -
 15
15 -
16
-
17
-
18
-
19
-
20
-
21
-
22
-
23
-
24
-
25
-
26
-
27
-
28
-
29
-
30
-
31
 |
 |