Bernina 125 Manual - Page 7
Special, Instruction, Oiling, Motor, Removable, Cover
 |
View all Bernina 125 manuals
Add to My Manuals
Save this manual to your list of manuals |
Page 7 highlights
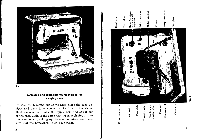
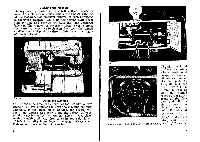
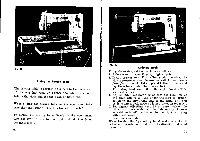
If the sewing machine has been standing in a cold room, it should be opened and brought in a warm room about an hour before use so that it can warm up to room temperature and the oil in the hearings will again become fluid. Special Instruction for Oiling Ole Motor 1. Oiling the motor too heavily will lead to trouble. 2. When the speed of the machine has diminished considerably, it is generally due to excessive oiling of the motor. 3. In every new machine the motor is ready-oiled and should not be lubricated again during the first year. 4. After the first year, the motor should be oiled once only every six months if used daily. Do not introduce more than 4-5 drops of oil at the two lubrication points marked in red, inside of the motor casing. If the machine is used only once a week, the motor does not need oiling more than once a year. 5. If the motor is insufficiently lubricated, an excessive noise will be noticed. 6. To oil the motor, take off its casing. For this purpose, remove on the bottom side of the base plate the two small nickel-plated screws. Remove also the screw of the casing on the right above the motor axle, No 9, Fig. 14. Introduce 4 or 5 drops of clear sewing machine oil into the two bearings at the points marked in red. 7. Make absolutely sure that no oil is applied to any other part of the motor. 8. These instructions for oiling apply to the motor only. 10 Fig. 6 Removable Open Arm Cover To remove the free arm cover, open the hinged shuttle cover and with the forefinger of the right hand press on the releasing lever as per Fig. 6. It is not necessary to take off the presser foot, but the needle should be brought in its highest position. To reset the cover, push it towards the frame and bring the tongue of the cover into the guide inside the frame. Then press down the cover at its front side, as per Fig. 6a, and the latch will lock the cover. Fig. 6a 11
-
 1
1 -
 2
2 -
 3
3 -
 4
4 -
 5
5 -
 6
6 -
 7
7 -
 8
8 -
 9
9 -
 10
10 -
 11
11 -
 12
12 -
13
-
14
-
15
-
16
-
17
-
18
-
19
-
20
-
21
-
22
-
23
-
24
-
25
-
26
-
27
-
28
-
29
-
30
 |
 |
