Bernina 125 Manual - Page 9
Bobbin, Winder, Winding, Bottom, Thread, insert, thread
 |
View all Bernina 125 manuals
Add to My Manuals
Save this manual to your list of manuals |
Page 9 highlights
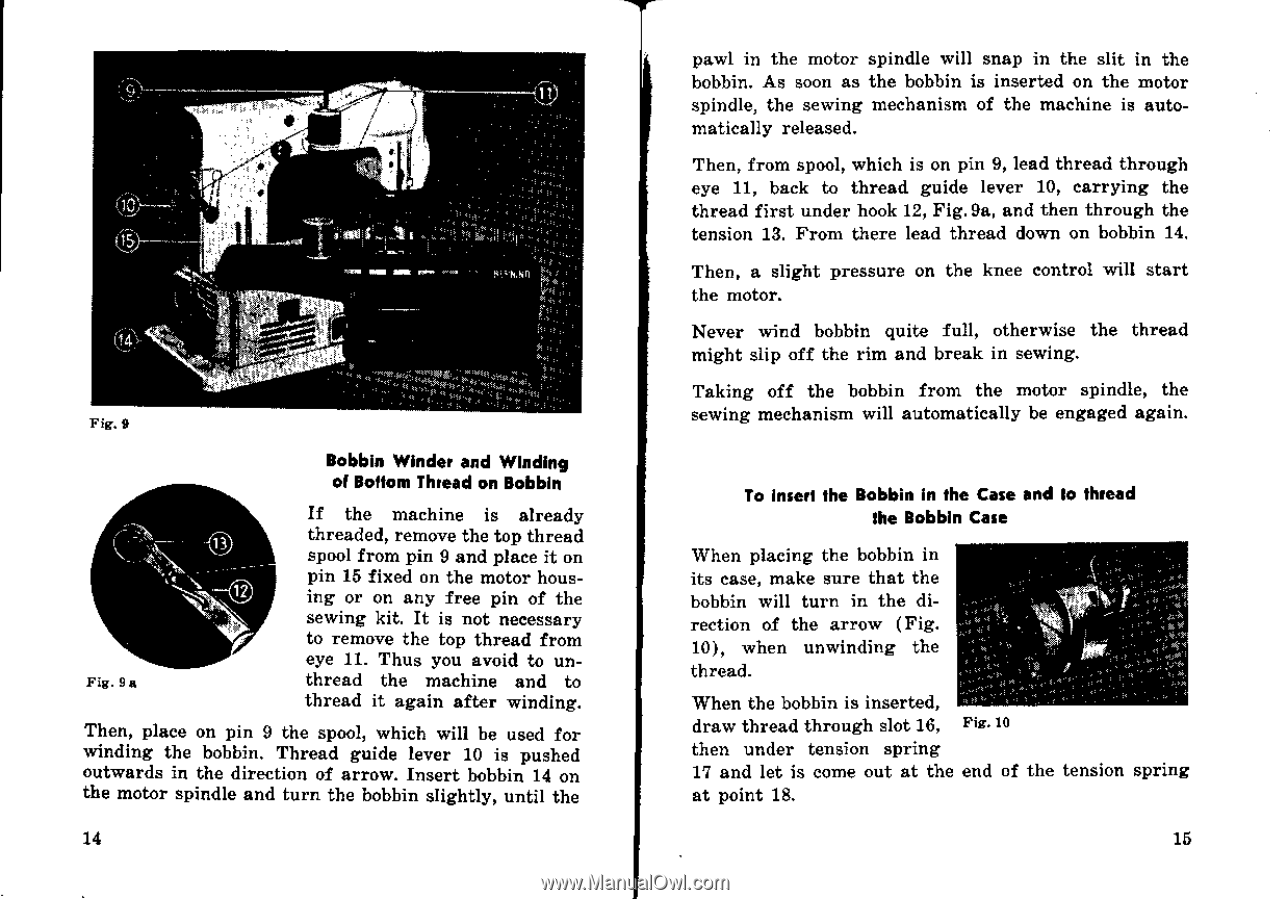
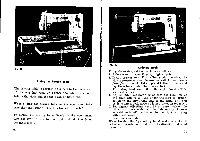
11) Fig. 9 Bobbin Winder and Winding of Bottom Thread on Bobbin Fig. 9 a If the machine is already threaded, remove the top thread spool from pin 9 and place it on pin 15 fixed on the motor hous- 12 ing or on any free pin of the sewing kit. It is not necessary to remove the top thread from eye 11. Thus you avoid to un- thread the machine and to thread it again after winding. Then, place on pin 9 the spool, which will be used for winding the bobbin. Thread guide lever 10 is pushed outwards in the direction of arrow. Insert bobbin 14 on the motor spindle and turn the bobbin slightly, until the 14 pawl in the motor spindle will snap in the slit in the bobbin. As soon as the bobbin is inserted on the motor spindle, the sewing mechanism of the machine is automatically released. Then, from spool, which is on pin 9, lead thread through eye 11, back to thread guide lever 10, carrying the thread first under hook 12, Fig. 9a, and then through the tension 13. From there lead thread down on bobbin 14, Then, a slight pressure on the knee control will start the motor. Never wind bobbin quite full, otherwise the thread might slip off the rim and break in sewing. Taking off the bobbin from the motor spindle, the sewing mechanism will automatically be engaged again. To insert the Bobbin in the Case and to thread the Bobbin Case When placing the bobbin in its case, make sure that the bobbin will turn in the direction of the arrow (Fig. 10), when unwinding the thread. When the bobbin is inserted, draw thread through slot 16, Fig. 10 then under tension spring 17 and let is come out at the end of the tension spring at point 18. 15
-
 1
1 -
2
-
3
-
 4
4 -
 5
5 -
 6
6 -
 7
7 -
 8
8 -
 9
9 -
 10
10 -
 11
11 -
 12
12 -
 13
13 -
 14
14 -
15
-
16
-
17
-
18
-
19
-
20
-
21
-
22
-
23
-
24
-
25
-
26
-
27
-
28
-
29
-
30
 |
 |