Biostar M7VIP M7VIP user's manual - Page 30
Serial ATA Chip - FastTrak 376 - motherboard manual
 |
View all Biostar M7VIP manuals
Add to My Manuals
Save this manual to your list of manuals |
Page 30 highlights
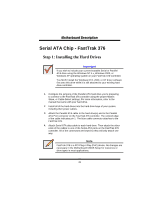
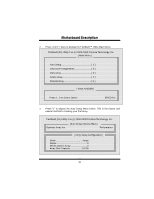
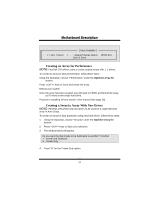
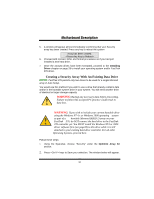
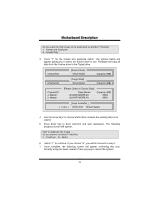
MMootthheerrbbooaarrdd DDeessccrriippttiioonn Serial ATA Chip - FastTrak 376 Step 1: Installing the Hard Drives Important If you wish to include your current bootable Serial or Parallel ATA drive using the Windows NT 4.x, Windows 2000, or Windows XP operating system on your FastTrak 376 Controller. You MUST install the Windows NT4, 2000, or XP driver software first onto this drive while it is still attached to your existing hard drive controller. 1. Configure the jumpers of the Parallel ATA hard drive you're preparing to connect to the FastTrak 376 controller using the proper Master, Slave, or Cable-Select settings. For more information, refer to the manual that came with your hard drive. 2. Install all of the hard drives into the hard drive bays of your system, including their power cables. 3. Attach the Parallel ATA cable to the hard drive(s) and to the Parallel ATA Port connector on the FastTrak 376 controller. The colored edge of the cable indicates pin 1. The blue cable connector attaches to the FastTrak 376. 4. Attach Serial ATA data cable to each hard drive. Then attach the other ends of the cables to one of the Serial ATA ports on the FastTrak 376 controller. All of the connectors are keyed so they will only attach one way. Note FastTrak 376 is a PCI Plug-n-Play (PnP) device. No changes are necessary in the Motherboard CMOS Setup for resources or drive types in most applications. 28
-
 1
1 -
2
-
3
-
4
-
5
-
6
-
7
-
8
-
9
-
10
-
11
-
12
-
13
-
14
-
15
-
16
-
17
-
18
-
19
-
20
-
21
-
22
-
23
-
24
-
 25
25 -
 26
26 -
 27
27 -
 28
28 -
 29
29 -
 30
30 -
 31
31 -
 32
32 -
 33
33 -
 34
34 -
 35
35 -
36
-
37
-
38
-
39
-
40
-
41
-
42
-
43
-
44
-
45
-
46
-
47
-
48
-
49
-
50
-
51
-
52
-
53
-
54
-
55
-
56
-
57
-
58
-
59
-
60
-
61
-
62
-
63
-
64
-
65
-
66
-
67
-
68
-
69
-
70
-
71
-
72
 |
 |