Bosch HMV9302 Service Manual
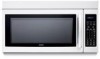
Bosch HMV9302 - 1.8 cu. Ft. Microwave Manual
 |
UPC - 825225830412
View all Bosch HMV9302 manuals
Add to My Manuals
Save this manual to your list of manuals |
Bosch HMV9302 manual content summary:
- Bosch HMV9302 | Service Manual - Page 1
MICROWAVE OVEN SERVICE MANUAL MODEL: HMV9302 HMV9303 HMV9305 HMV9306 HMV9307 CAUTION BEFORE SERVICING THE UNIT, READ THE SAFETY PRECAUTIONS IN THIS MANUAL. - Bosch HMV9302 | Service Manual - Page 2
of the microwave ovens requires that the magnetron be assembled to the wave guide and cavity. Never operate the magnetron unless it is properly installed. • Be sure that the magnetron gasket is properly installed around the dome of the tube whenever installing the magnetron. • Routine service safety - Bosch HMV9302 | Service Manual - Page 3
the information in this Manual may result in exposing yourself to the Microwave Energy normally contained within the oven cavity. TABLE OF CONTENTS (Page) SAFETY PRECAUTIONS ...Inside front page SPECIFICATIONS...1-1 CAUTIONS ...2-1 INSTALLATION ...3-1 OPERATING INSTRUCTIONS...4-1 CONTROL PANEL - Bosch HMV9302 | Service Manual - Page 4
(Microwave oven+Cook Glass Overall Dimensions 2915/16"(W)x167/16"(D)x155/8"(H) Oven Cavity Size 223/8"(W)x10"(D)x1419/32"(H) Effective Capacity of Oven Cavity 1.8 Cu.ft. Accessories Owner's Manual & Cooking Guide, Installation Manual, Exhaust Adapter, Exhaust Damper, Mounting Kit and Two Filters - Bosch HMV9302 | Service Manual - Page 5
while the device is energized. • Proper operation of the microwave oven requires that the magnetron be assembled to the waveguide and cavity. Never operate the magnetron unless it is properly installed. • Be sure that the magnetron gasket is properly installed around the dome of the tube whenever - Bosch HMV9302 | Service Manual - Page 6
unit in a location where there is direct heat or splashing water. C. Install the unit on the mounting plate firmly. D. Place the unit as far away as possible from TV, radio, etc. to prevent interference. GROUNDING INSTRUCTIONS For personal safety, this appliance must be fully grounded at all times - Bosch HMV9302 | Service Manual - Page 7
OPERATING INSTRUCTIONS CONTROL PANEL 1 3 2 4 5 7 6 8 9 10 12 11 14 13 15 16 17 19 18 20 21 25 23 22 24 27 28 26 4-1 - Bosch HMV9302 | Service Manual - Page 8
time, power level, quantities, or weights. 14. Kitchen Timer: Touch this pad to set the kitchen timer. See page 10 for more information. 15. Clock: Touch this pad to enter the time of day. See page 10 for more information. 16. Light Timer: Touch this pad to set the light timer. See page 11 for more - Bosch HMV9302 | Service Manual - Page 9
OVERALL CIRCUIT DIAGRAM SCHEMATIC DIAGRAM 5-1 - Bosch HMV9302 | Service Manual - Page 10
CONTROL N.C HI/LO/OFF SET-UP N.C AUTO DEFROST 6 1 9 LESS CLOCK EASY COOK N.C KITCHEN TIMER 7 2 10 FAVORITE LIGHT TIME RECIPE TIMER DEFROST N.C POWER LEVEL 8 3 11 T/TABLE STOP ON/OFF CLEAR START QUICK HOLD DEFROST WARM 9 4 12 MORE 13 SENSOR SENSOR SENSOR SENSOR SENSOR SENSOR - Bosch HMV9302 | Service Manual - Page 11
and may cause arcing. However, small pieces may be used to cover some parts of food to slow the cooking. Any aluminum foil used should never be closer than 2.5 cm to any side wall of the oven. TRIAL OPERATION After installation, the following sequences and results should be checked carefully. A. Put - Bosch HMV9302 | Service Manual - Page 12
(All service adjustments should be made for minimum microwave energy leakage readings). (3) Do not operate the unit until it is completely repaired, if any are no defective parts in the interlock mechanism. (f) Make sure that there are no detective parts in the microwave generating and transmission - Bosch HMV9302 | Service Manual - Page 13
of any certified oven unit found to have a microwave emission level in excess of 5 mW/cm2 and should repair any unit found to have excessive emission levels, at no cost to the owner, and should ascertain the cause of the excessive leakage. The service personnel should instruct the owner not - Bosch HMV9302 | Service Manual - Page 14
reference. Also enter the information on the service invoice. (2) Should the microwave energy leakage not be more than 2 mW/cm2 after determining that all parts are in good condition, functioning properly and genuine replacement parts which are listed in this manual have been used. (3) At least once - Bosch HMV9302 | Service Manual - Page 15
INSTRUCTIONS IMPORTANT NOTES: UNIT MUST BE DISCONNECTED FROM ELECTRICAL OUTLET WHEN MAKING REPAIRS THE WIRE LEADS TO ANY PART, MAKE SURE THE WIRING securing the control panel assembly to the oven cavity. (2) Remove the control panel with (CN5)-For the sensor model only (CN2) Relay 2 (Relay 2) Control - Bosch HMV9302 | Service Manual - Page 16
the plastic fastener with thumb and forefinger. (Figure 4) (2) Lift up the lever of the plastic fastener from the terminal socket by lightly pressing the lever end with forefinger. (Figure 5) (3) Remove the F.P.C. connector from the terminal socket. Plastic fastener F.P.C. Connector Terminal socket - Bosch HMV9302 | Service Manual - Page 17
B. REMOVING THE OUT CASE(Figure 8) (1) Remove the vent grille by removing two screws securing it to the out case. (2) Remove two screws securing it to the air duct. (3) Remove the mounting plate by turning the screws (1 or 2 screws) securing it to the out case. (4) Remove two screws on the left - Bosch HMV9302 | Service Manual - Page 18
(1) Disconnect the wire leads from the interlock switches. (2) Remove two screws securing the Latch Board. (3) Make necessary replacements and check microwave energy leakage according to "ADJUSTMENT PROCEDURE" on page 7-12. Latch Board Secondary Interlock Switch WH(from H.V.Transformer) YL(from Fan - Bosch HMV9302 | Service Manual - Page 19
dome does not hit any adjacent parts, or it may be damaged. • When replacing the magnetron, be sure to install the magnetron gasket in the correct position and be sure that the gasket is in good condition. • After replacing the magnetron, check for microwave energy leakage with a survey meter Check - Bosch HMV9302 | Service Manual - Page 20
rivet ASS'Y securing it to the oven upper plate by using knife blade. (2) Rotate slightly and pull out the stirrer fan cover. (3) Remove the stirrer fan. F. . • After replacing the door, check for microwave energy leakage with a survey meter. Microwave energy leakage must be below the limit of - Bosch HMV9302 | Service Manual - Page 21
microwaves may leak from the clearance between the door and the oven. Space (3) Carefully pull the ventilation motor ASS'Y out of the microwave oven. See Figure 19-a) Figure 19-b J. REPLACING THE HUMIDITY SENSOR (For sensor model only) (1) Remove the sensor by removing two screws securing it to the - Bosch HMV9302 | Service Manual - Page 22
(2) Remove the turntable shaft VERY CAREFULLY with a slotted screwdriver. (Figure 20) (3) Remove the base plate by removing 7 screws securing it to the oven cavity. (Figure 21) (4) Disconnect the leadwire from the turntable motor terminals. (5) Remove the 2 screws securing the turntable motor to the - Bosch HMV9302 | Service Manual - Page 23
the primary/monitor/secondary switches to the latch board. Latch Board CHECK THE DOOR LATCH AND SWITCH CLOSING. NOTE: The outer cover of the microwave oven is removed. (1) Set the microwave oven on its side so that you can see the latch board and the switches, as shown in Figure 23-a. (2) Close the - Bosch HMV9302 | Service Manual - Page 24
Interlock Switches. If the Primary and Secondary Interlock Switches allow the oven to operate with the door open, the Monitor Switch will 6, tighten the latch board screws at that point. TEST THE MICROWAVE ENERGY LEAKAGE Make sure the microwave energy leakage is below the limit of 1mW/cm2 (with a - Bosch HMV9302 | Service Manual - Page 25
NOTE: After repairing the door or the interlock system, it is necessary to do this continuity test before operating the oven. COMPONENTS : FOR CONTINUED PROTECTION AGAINST EXCESSIVE RADIATION EMISSION, REPLACE ONLY WITH IDENTICAL REPLACEMENT PARTS. TYPE NO. SZM-V16-FA-63 OR VP-533A-OF OR V-5230Q - Bosch HMV9302 | Service Manual - Page 26
PROCEDURES, AND TROUBLE SHOOTING - CAUTIONS CHECKS WITH MICROWAVE ENERGY MUST BE DONE WITH A LOAD (1 LITER OF WATER IN CONTAINER) IN THE OVEN. Secondary Infinite ohms. Infinite ohms. NOTE: A MICROWAVE ENERGY LEAKAGE TEST MUST ALWAYS BE PERFORMED WHEN THE UNIT IS SERVICED FOR ANY REASON. 7-15 - Bosch HMV9302 | Service Manual - Page 27
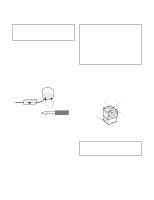
COMPONENTS TEST PROCEDURES Measure the resistance: (1) Terminal to terminal Ohmmeter HIGH-VOLTAGE CAPACITOR Figure 25-a (2) Terminal to case Ohmmeter Figure 25-b Measure the continuity: (1) Forward Ohmmeter HIGH-VOLTAGE DIODE Figure 26-a (1) Reverse Ohmmeter Figure 26-b 7-16 RESULTS Normal - Bosch HMV9302 | Service Manual - Page 28
DEFROST 6 1 9 LESS CLOCK EASY COOK N.C KITCHEN TIMER 7 2 10 FAVORITE LIGHT TIME RECIPE TIMER DEFROST N.C POWER LEVEL 8 3 11 T/TABLE 2 3 4 5 6 7 8 9 10 11 12 13 Figure 28 SENSOR (For sensor model only) 1 BK 2 RD 3 WH Figure 29 Normal: Approximately BK~RD: 4.5~6.2 Kohm RD~ - Bosch HMV9302 | Service Manual - Page 29
2 sec 0 NOTES: • A MICROWAVE ENERGY TEST MUST ALWAYS BE PERFORMED WHEN THE UNIT IS SERVICED FOR ANY REASON. • MAKE SURE PARTS, BE SURE TO GRASP THE CONNECTOR, NOT THE WIRES. B. CHECKOUT PROCEDURES (1) CHECKOUT PROCEDURES FOR FUSE BLOWING CAUTION: REPLACE BLOWN FUSE WITH 20 AMPERE FUSE. PROBLEMS - Bosch HMV9302 | Service Manual - Page 30
mate connector of I/O CON from the circuit board. Does the unit still operate? NO YES Replace the circuit board Defective RELAY1 Replace RELAY1 - PROBLEM (B) FAN motor and oven lamp turn on When the door is closed and START key is touched. YES NO GOOD Measure the voltage at pin NO. 35 of - Bosch HMV9302 | Service Manual - Page 31
to light up, or segments light when they should not. 6) Wrong figures appear. 7) The figures of all digits. 8) Some of the indicators do no flicker light up. 9) The clock does not keep time properly. NOTE: A MICROWAVE ENERGY LEAKAGE TEST MUST ALWAYS BE PERFORMED WHEN THE UNIT IS SERVICED FOR - Bosch HMV9302 | Service Manual - Page 32
C. TROUBLE SHOOTING Before following this troubleshooting read TRIAL OPERATION on page 6-1. ¥ DISPLAY Problems, A thru C ¥ HELP UP Problems, D thru E ¥ BUZZER Problems, F PROBLEM - A: PLEASE SET TIME OF DAY does not appear in display window when power supply cord is plugged into wall outlet. 1 - Bosch HMV9302 | Service Manual - Page 33
of connector CN2 between Pin 1(PK) and pin 3(BL) when the door is closed No continuity PROBLEM - D: Unit operation seems to be normal but little or no heating is produced in oven load. 1 Check: 1. AIR VENTS Normal operation Check contact of connector S1 Contact OK Poor contact Adjust - Bosch HMV9302 | Service Manual - Page 34
PROBLEM - E: Unit does not heat up even if display counts down when START key is touched for HIGH POWER cooking. 1 Check: 1. PRIMARY AND SECONDARY INTERLOCK SWITCHES 2. - Bosch HMV9302 | Service Manual - Page 35
PROBLEM - F: No buzzing when touching the key, between stages or at end of cooking 1 Check normal Replace Normal Runs operation circuit board circuit board circuit board 7-24 - Bosch HMV9302 | Service Manual - Page 36
PROBLEM - G: Ventilation fan does not operate when FAN HIGH/LOW key is touched. 1 Check: 1. POWER SUPPLY 2. FUSE NO Replace Runs contact magnetron thermal fuse and oven thermostat Check the contact of magnetron thermal Poor contact Correct seating Normal contact Runs fuse and oven - Bosch HMV9302 | Service Manual - Page 37
#EV# MODEL : HMV9302 HMV9303 HMV9305 HMV9306 HMV9307 EXPLODED VIEW DOOR 1005 1000 1002 1381 1004 W200 1701 1009 W201 1007 1702 1006 8-1 - Bosch HMV9302 | Service Manual - Page 38
#EV# CONTROL PANEL For Model HMV9306 HMV9305 W138 For Model HMV9302 HMV9303 HMV9307 W142 2004 2381 2008 2006 W105 * 07 8-2 - Bosch HMV9302 | Service Manual - Page 39
#EV# 3038 OVEN CAVITY For Model HMV9306 HMV9305 W138 For Model HMV9302 HMV9303 HMV9307 W142 W138 W142 W108 3010 3031 W109 3018 3036 3032 W121 5036 3026 3029 3001 W121 6001 3014 5038 3028 6000 3033 W121 8-3 - Bosch HMV9302 | Service Manual - Page 40
#EV# LATCH BOARD 4001 W102 W111 4000 4002 4003 4002 4004 8-4 - Bosch HMV9302 | Service Manual - Page 41
#EV# INTERIOR (I) 3002 3012 3008 5046 5009 W101 W108 5000 5018 5002 5049 3034 5024 5058 5043 5044 3004 W108 3009 3037 5019 W108 W104 W101 5020 W101 5008 5035 W101 8-5 - Bosch HMV9302 | Service Manual - Page 42
#EV# INTERIOR (II) W136 W101 5015 5045 3027 W105 W146 5038 5022 5012 W109 W140 5001 5041 5011 5037 5016 5006 W109 5010 5007 5014 W109 8-6 - Bosch HMV9302 | Service Manual - Page 43
#EV# INSTALLATION 6008 6011 6010 6009 OWNERS MANUAL *01 SERVICE MANUAL *02 INSTALLATION *04 MANUAL COOKING GUIDE LABEL *05 TEMPLATE *06 8-7 - Bosch HMV9302 | Service Manual - Page 44
P/NO : 3828W5S3298 February, 2004 Printed in Korea
-
 1
1 -
 2
2 -
 3
3 -
 4
4 -
 5
5 -
 6
6 -
 7
7 -
8
-
9
-
10
-
11
-
12
-
13
-
14
-
15
-
16
-
17
-
18
-
19
-
20
-
21
-
22
-
23
-
24
-
25
-
26
-
27
-
28
-
29
-
30
-
31
-
32
-
33
-
34
-
35
-
36
-
37
-
38
-
39
-
40
-
41
-
42
-
43
-
44
 |
 |

MICROWAVE OVEN
SERVICE MANUAL
MODEL: HMV9302
BEFORE SERVICING THE UNIT, READ THE
SAFETY PRECAUTIONS
IN THIS MANUAL.
HMV9305
HMV9303
HMV9306
HMV9307
CAUTION