Brother International BAS-300G Basic Instruction Manual - English
Brother International BAS-300G Manual
 |
View all Brother International BAS-300G manuals
Add to My Manuals
Save this manual to your list of manuals |
Brother International BAS-300G manual content summary:
- Brother International BAS-300G | Basic Instruction Manual - English - Page 1
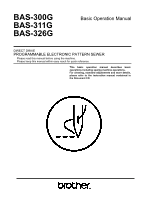
BAS-300G BAS-311G BAS-326G Basic Operation Manual DIRECT DRIVE PROGRAMMABLE ELECTRONIC PATTERN SEWER Please read this manual before using the machine. Please keep this manual within easy reach for quick reference. This basic operation manual describes basic operations including sewing machine - Brother International BAS-300G | Basic Instruction Manual - English - Page 2
lever, and consequently there is always a danger of injury that can be caused by these parts. Follow the instructions from training personnel and instructors regarding safe and correct operation before operating the machine so that you will know how to use it correctly. BAS-300G, BAS-311G, BAS-326G - Brother International BAS-300G | Basic Instruction Manual - English - Page 3
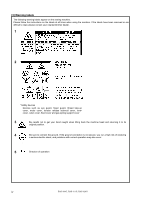
[1] Safety indications and their meanings This instruction manual and the indications and symbols that are used on the machine itself are provided in order to ensure that must be done. (For example, the symbol at left means "you must make the ground connection".) BAS-300G, BAS-311G, BAS-326G i - Brother International BAS-300G | Basic Instruction Manual - English - Page 4
get into your eyes or onto your skin. If the oil and grease get into your eyes or onto your skin, inflammation can result. Furthermore, do not drink or eat the lubricating oil or grease. They may cause diarrhea or vomiting. Keep the oil out of the reach of children. ii BAS-300G, BAS-311G, BAS-326G - Brother International BAS-300G | Basic Instruction Manual - English - Page 5
oil or grease. They may cause diarrhea or vomiting. Keep the oil and repair of any parts which use the pneumatic problems, do not modify the machine yourself. Brother will not be held responsible for any accidents or problems resulting from modifications made to the machine. BAS-300G, BAS-311G, BAS - Brother International BAS-300G | Basic Instruction Manual - English - Page 6
instructions on the labels at all times when using the machine. If the labels have been removed or are difficult to read, please contact your nearest Brother a serious electric shock, and problems with correct operation may also occur. 5 Direction of operation iv BAS-300G, BAS-311G, BAS-326G - Brother International BAS-300G | Basic Instruction Manual - English - Page 7
Motor cover Tension release solenoid cover Inner cover L Outer cover Fixed cover L Motor cover L Eye guard Finger guard Thread take-up cover Inner cover R Outer cover Fixed cover R Motor cover R Gas spring support cover 2960B BAS-300G, BAS-311G, BAS-326G 2961B v - Brother International BAS-300G | Basic Instruction Manual - English - Page 8
sewing speed 28 5-6. Checking the sewing pattern 29 5-7. Setting the work clamp lift amount 30 5-8. Notes on handling CF cards (sold separately) ...32 6. SEWING 33 6-1. Sewing 33 6-2. Using the STOP switch 34 6-3. Using the thread wiper switch 34 Document CD 36 BAS-300G, BAS-311G, BAS-326G - Brother International BAS-300G | Basic Instruction Manual - English - Page 9
1. NAMES OF MAJOR PARTS 1. NAMES OF MAJOR PARTS Two-pedal foot switch (1) Power switch (2) Control box (3) CF slot (4) Operation panel (5) Foot switch (motor-driven work clamp specifications) (6) Work clamp switch (pneumatic work clamp specifications) (7) Start - Brother International BAS-300G | Basic Instruction Manual - English - Page 10
foot switch is depressed. Presser foot height can be set easily using the panel Page 30 INSTRUCTION MANUAL CD 6-7. Using user programs The height of the presser foot can be set simply by entering intermediate position B, then drops to the lowest position C. 5029Q 2 BAS-300G, BAS-311G, BAS-326G - Brother International BAS-300G | Basic Instruction Manual - English - Page 11
qualified technician. Contact your Brother dealer or a qualified at least 25 mm away from any moving parts. Furthermore, do not excessively bend the cords problems with correct operation may also occur. Install the safety covers to the machine head and motor. BAS-300G, BAS-311G, BAS-326G - Brother International BAS-300G | Basic Instruction Manual - English - Page 12
from the leg. If the control box and the leg are too close together, it may result in incorrect sewing machine operation. Only the holes for installing the operation panel and the hole for the cord differ from the above diagram. Refer to the diagram - Brother International BAS-300G | Basic Instruction Manual - English - Page 13
Nuts [8 pcs.] Operator 3-3. Installing the oil pan 1840B (8) Power switch (9) Wood oil pan. (Refer to "3-7. Installing the treadle unit (motor-driven work clamp specifications)".) (1) Oil pan (2) Nails [7 pcs.] (3) Rubber cushions [4 pcs.] (4) Waste oil tank 4911Q BAS-300G, BAS-311G, BAS - Brother International BAS-300G | Basic Instruction Manual - English - Page 14
oil pan. • When holding the machine head, do not hold it by the pulse motor. This may cause problems with operation of the pulse motor. 2966B (4) Hinge holders [2 pcs.] (5) Bolts [4 pcs.] (6) Plain washers [4 pcs.] (7) Nuts [4 pcs.] (8) Head rest (9) Bolts with washer [4 pcs.] 4913Q 6 BAS-300G - Brother International BAS-300G | Basic Instruction Manual - English - Page 15
> Needle plate 3. INSTALLATION 2698B (10) Auxiliary plate (11) Bolts with washer [4 pcs.] Loosen the four bolts with washer (11), and adjust so that the tilt back the machine head, and it should be tilted gently while being held with both hands. 2969B BAS-300G, BAS-311G, BAS-326G 7 - Brother International BAS-300G | Basic Instruction Manual - English - Page 16
places marked with * are also used to install the treadle unit. (Refer to "3-7. Installing the treadle unit (motor-driven work clamp specifications)".) (29) Gas spring support cover (30) Bolts with washer [6 pcs.] 4916Q 8 BAS-300G, BAS-311G, BAS-326G - Brother International BAS-300G | Basic Instruction Manual - English - Page 17
3. INSTALLATION Figure 1 Oil pan 2365B • Gently return the machine head to its original position. • Loosen the screw (31). Move the machine head switch (32 the machine head while the work clamp arm (1) is still on the left side, it may damage the outer cover L (2). BAS-300G, BAS-311G, BAS-326G 9 - Brother International BAS-300G | Basic Instruction Manual - English - Page 18
3. INSTALLATION 3-6. Installing the operation panel 2971B (1) Operation panel set (2) Panel rubber (3) Plain washers [6 pcs.] (4) Bolts [3 pcs.] (5) Nuts [6 pcs.] • Insert the the hole in the side of the control box. (13) Staples [3 pcs.] 4920Q BAS-300G, BAS-311G, BAS-326G - Brother International BAS-300G | Basic Instruction Manual - English - Page 19
hole A before installing the oil pan. (Refer to "3-3. Installing the oil pan.") • Mounting hole B is used to install the gas spring supports with the bolt, plain washer settings" in the instruction manual CD.) 2972B Work clamp switch (2-step) Start switch 4923Q BAS-300G, BAS-311G, BAS-326G 11 - Brother International BAS-300G | Basic Instruction Manual - English - Page 20
) P5 (P-ENC) P6 (FOOT) P1 (PANEL) P9 (HEAD-SW) P8 (SENSOR1) P13 (HEAD) P12 (AIR1) Cord clamp (3) (3) (3) (3) (3) (4) (4) (4) (4) P7 (PRG) (3) P3(CUTTER) - (Continued on next page) BAS-300G, BAS-311G, BAS-326G - Brother International BAS-300G | Basic Instruction Manual - English - Page 21
) Connection location on PMD PCB P3 (PPM) P6 (SOL1) P7 (SOL2) P8 (YPM) P10 (XPM) Cord clamp/cable tie (4) (5) (5), (6) Cable tie (5), (6) (5), (6) (5), (6) (5), (6) (5), (6) (Continued on next page) BAS-300G, BAS-311G, BAS-326G 13 - Brother International BAS-300G | Basic Instruction Manual - English - Page 22
ground connection is not secure, you run a high risk of receiving a serious electric shock, and problems with correct operation may also occur. (1) Ground wire from upper shaft motor harness (2) Ground wire from are secure in order to ensure safety. 2973B 14 BAS-300G, BAS-311G, BAS-326G - Brother International BAS-300G | Basic Instruction Manual - English - Page 23
phase power. NOTE: Do not use an extension cord. If this is not observed, it may cause problems with correct operation. Green and yellow wire (ground wire) Green and yellow wire nut (3) so that the cotton stand does not move. 2974B BAS-300G, BAS-311G, BAS-326G 15 - Brother International BAS-300G | Basic Instruction Manual - English - Page 24
unit, adjust the air pressure. (Refer to "10-16. Adjusting the air pressure" in the instruction manual CD.) NOTE: Make sure that the pneumatic unit does not touch the control box or the work the power is turned off by pressing the manual button. 5220Q 1905B 16 BAS-300G, BAS-311G, BAS-326G - Brother International BAS-300G | Basic Instruction Manual - English - Page 25
cover R (2) Screws [4 pcs.] (3) Motor cover L (4) Screws [4 pcs.] (5) Motor cover (6) Screws [4 pcs.] NOTE: Be careful not to clamp the cords when installing the motor cover. 2976B BAS-300G, BAS-311G, BAS-326G 17 - Brother International BAS-300G | Basic Instruction Manual - English - Page 26
oil specified by Brother. * If this type of lubricating oil is difficult to obtain, the recommended oil ・ BAS-300G-03[] ・ BAS-311G ・ BAS-326G ・ BAS-300G-01[] ・ BAS-300G-02[] 1845B 4940Q 3. Pour oil in - Brother International BAS-300G | Basic Instruction Manual - English - Page 27
easily. (Refer to following page.) 2977B [If using cotton thread or spun thread] [If using synthetic thread] BAS-300G-03[], BAS-311G, BAS-326G BAS-300G-01[], 02[] Thread the upper thread 2370B Needle cooler 2978B • Turn the machine pulley (2) and raise the thread - Brother International BAS-300G | Basic Instruction Manual - English - Page 28
Press the THREAD/CLAMP key. • The work clamp will return to where it was before threading mode was started. THREAD/CLAMP indicator switches off 20 BAS-300G, BAS-311G, BAS-326G - Brother International BAS-300G | Basic Instruction Manual - English - Page 29
BEFORE SEWING 4-3. Winding the lower thread CAUTION Do not touch any of the moving parts or press any objects against the machine while winding the lower thread. Injury or move the bobbin winder tension assembly (8) down, and for case B, move it upward. For case B BAS-300G, BAS-311G, BAS-326G 21 - Brother International BAS-300G | Basic Instruction Manual - English - Page 30
pull out approximately 30 mm of thread. 6. Hold the latch on the bobbin case and insert the bobbin case into the rotary hook. 2535Q 22 BAS-300G, BAS-311G, BAS-326G - Brother International BAS-300G | Basic Instruction Manual - English - Page 31
#4 or similar #4 or similar 1.2 − 2.0 1.0 − 1.5 0.3 − 0.6 DP x 17 #25 1,300 sti/min 4-5-1. Lower thread tension Stronger Weaker Adjust the thread tension to the weakest possible tension by turning the length to about 40 mm. Stronger Weaker Stronger Weaker 2153B BAS-300G, BAS-311G, BAS-326G 23 - Brother International BAS-300G | Basic Instruction Manual - English - Page 32
start position. NOTE: If error "E110" appears when the foot switch is depressed, turn the pulley (1) in the direction of operation to clear the error. BAS-300G, BAS-311G, BAS-326G - Brother International BAS-300G | Basic Instruction Manual - English - Page 33
shown the X-scale setting. (11) Y-SCALE indicator Illuminates when the SELECT key (15) is pressed to shown the Y-scale setting. 4435Q (Continued on next page) BAS-300G, BAS-311G, BAS-326G 25 - Brother International BAS-300G | Basic Instruction Manual - English - Page 34
to change the value which is displayed in the PROGRAM No. display (18). (20) CF media indicator Illuminates when a CF card (external media) is inserted while the power is turned on. (21) FD media indicator external media. CFTM is a trademark of SanDisk Corporation. 26 BAS-300G, BAS-311G, BAS-326G - Brother International BAS-300G | Basic Instruction Manual - English - Page 35
be sure to keep the cover closed except when inserting and removing the CF card. If this is not done, dust may get inside and cause problems with operation. 4453Q 2 Turn on the power switch. Press the or " to check that the needle drop position is correct. BAS-300G, BAS-311G, BAS-326G 27 - Brother International BAS-300G | Basic Instruction Manual - English - Page 36
value (sti/min) will appear in the menu display (3). 2. Press the or key (4) to set the sewing speed. (Sewing speed setting: 400 − 2700) 4956Q 28 BAS-300G, BAS-311G, BAS-326G - Brother International BAS-300G | Basic Instruction Manual - English - Page 37
, depress the start switch.) 4441Q 4 If test feeding continues to the final stitch, it will then stop. Press the TEST key. TEST indicator switches off BAS-300G, BAS-311G, BAS-326G 29 - Brother International BAS-300G | Basic Instruction Manual - English - Page 38
clamp height and the intermediate presser foot work clamp height, check that the slider (1) is touching the work clamp lifter plate assembly (2). 4959Q 5254Q 30 BAS-300G, BAS-311G, BAS-326G - Brother International BAS-300G | Basic Instruction Manual - English - Page 39
foot will come into contact with the needle plate. 3 Intermittent stroke When making the adjustment, refer to "10-14. Changing the intermittent stroke" in the instruction manual CD. 5033Q BAS-300G, BAS-311G, BAS-326G 31 - Brother International BAS-300G | Basic Instruction Manual - English - Page 40
128, 256, 512 MB, 1GB or 2GB. (CF cards with a capacity of more than 2GB are not supported.) • Do not disassemble or modify the CF card. • Do not bend, drop or scratch CF cards or place heavy objects on top of them. • Avoid contact with liquids such as water, oil, solvents or drinks. • Use and store - Brother International BAS-300G | Basic Instruction Manual - English - Page 41
fire, electric shocks or operating problems may occur. If any liquid unattended Do not touch any of the moving parts or press any objects against the machine while data" for details on reading sewing data from a CF card. 1st step 2nd step 4441Q 3. Depress the foot BAS-300G, BAS-311G, BAS-326G 33 - Brother International BAS-300G | Basic Instruction Manual - English - Page 42
will start. 4441Q 6-3. Using the thread wiper switch The thread wiper switch (1) can be used to turn the thread wiper (2) on and off. 4983Q 34 BAS-300G, BAS-311G, BAS-326G - Brother International BAS-300G | Basic Instruction Manual - English - Page 43
MEMO BAS-300G, BAS-311G, BAS-326G 35 - Brother International BAS-300G | Basic Instruction Manual - English - Page 44
countries. * Please note that the contents of this manual may differ slightly from the actual product purchased as a result of product improvements. © 2005, 2008, 2010, 2011 Brother Industries, Ltd. All Rights Reserved. This is the original instructions. BAS-300G, 311G, 326G SA6235-401 E 2011.03
-
 1
1 -
 2
2 -
 3
3 -
 4
4 -
 5
5 -
 6
6 -
 7
7 -
8
-
9
-
10
-
11
-
12
-
13
-
14
-
15
-
16
-
17
-
18
-
19
-
20
-
21
-
22
-
23
-
24
-
25
-
26
-
27
-
28
-
29
-
30
-
31
-
32
-
33
-
34
-
35
-
36
-
37
-
38
-
39
-
40
-
41
-
42
-
43
-
44
 |
 |
BAS-300G
BAS-311G
BAS-326G
DIRECT DRIVE
PROGRAMMABLE ELECTRONIC PATTERN SEWER
Please read this manual before using the machine.
Please keep this manual within easy reach for quick reference.
This
basic
operation
manual
describes
basic
operations including sewing machine operations.
For cleaning, standard adjustments and more details,
please refer to the instruction manual contained in
the Document CD.
Basic Operation Manual