Brother International DCP-J140W Quick Setup Guide - English - Page 5
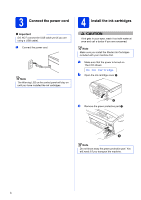
Install each ink cartridge in the direction of - close ink cover
 |
View all Brother International DCP-J140W manuals
Add to My Manuals
Save this manual to your list of manuals |
Page 5 highlights
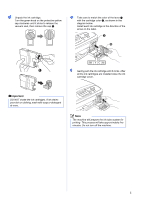
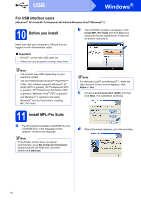
d Unpack the ink cartridge. Turn the green knob on the protective yellow cap clockwise until it clicks to release the vacuum seal, then remove the cap a. e Take care to match the color of the lever a with the cartridge color b, as shown in the diagram below. Install each ink cartridge in the direction of the arrow on the label. 1 2 1 f Gently push the ink cartridge until it clicks. After all the ink cartridges are installed close the ink cartridge cover. Important DO NOT shake the ink cartridges. If ink stains your skin or clothing, wash with soap or detergent at once. Note The machine will prepare the ink tube system for printing. This process will take approximately five minutes. Do not turn off the machine. 5
-
 1
1 -
 2
2 -
 3
3 -
 4
4 -
 5
5 -
 6
6 -
 7
7 -
 8
8 -
 9
9 -
 10
10 -
 11
11 -
12
-
13
-
14
-
15
-
16
-
17
-
18
-
19
-
20
-
21
-
22
-
23
-
24
-
25
-
26
-
27
-
28
-
29
-
30
-
31
-
32
 |
 |
5
d
Unpack the ink cartridge.
Turn the green knob on the protective yellow
cap clockwise until it clicks to release the
vacuum seal, then remove the cap
a
.
e
Take care to match the color of the lever
a
with the cartridge color
b
, as shown in the
diagram below.
Install each ink cartridge in the direction of the
arrow on the label.
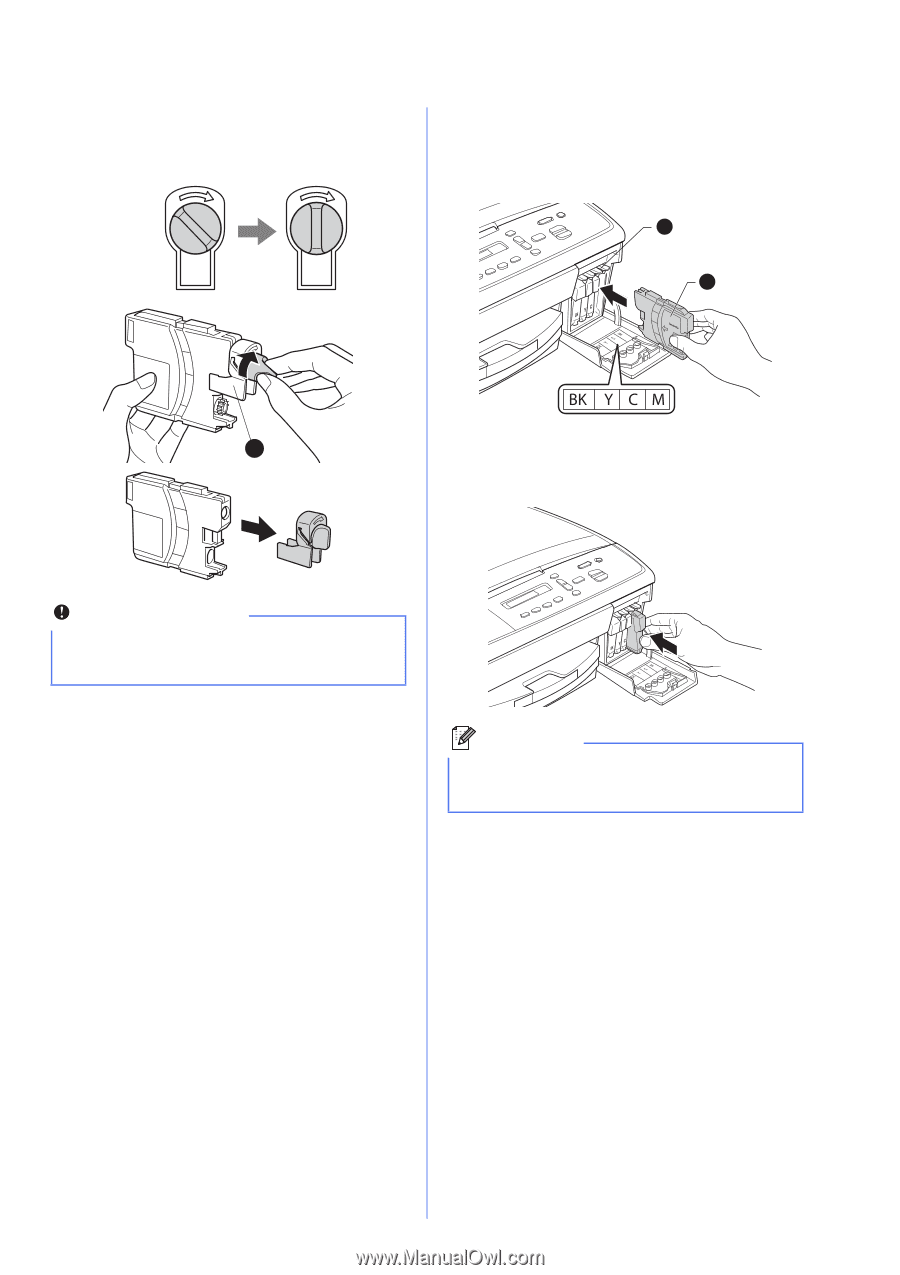
f
Gently push the ink cartridge until it clicks. After
all the ink cartridges are installed close the ink
cartridge cover.
Important
DO NOT shake the ink cartridges. If ink stains
your skin or clothing, wash with soap or detergent
at once.
1
Note
The machine will prepare the ink tube system for
printing. This process will take approximately five
minutes. Do not turn off the machine.
1
2