Brother International MFC-7460DN Network Users Manual - English - Page 25
Using the Brother installer application on the CD-ROM to con your machine for a wireless network, Using the PIN Method of Wi-Fi Protected Setup - user guide
 |
UPC - 012502627012
View all Brother International MFC-7460DN manuals
Add to My Manuals
Save this manual to your list of manuals |
Page 25 highlights
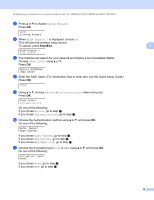
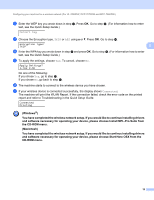
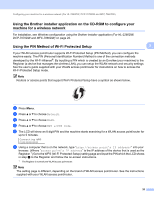
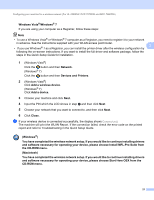
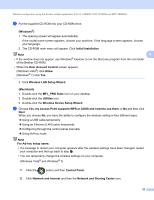
Configuring your machine for a wireless network (For HL-2280DW, DCP-7070DW and MFC-7860DW) Using the Brother installer application on the CD-ROM to configure your machine for a wireless network 3 For installation, see Wireless configuration using the Brother installer application (For HL-2280DW, DCP-7070DW and MFC-7860DW) on page 22. Using the PIN Method of Wi-Fi Protected Setup 3 3 If your WLAN access point/router supports Wi-Fi Protected Setup (PIN Method), you can configure the machine easily. The PIN (Personal Identification Number) Method is one of the connection methods developed by the Wi-Fi Alliance®. By inputting a PIN which is created by an Enrollee (your machine) to the Registrar (a device that manages the wireless LAN), you can setup the WLAN network and security settings. See the user's guide supplied with your WLAN access point/router for instructions on how to access the Wi-Fi Protected Setup mode. Note Routers or access points that support Wi-Fi Protected Setup have a symbol as shown below. a Press Menu. b Press a or b to choose Network. c Press a or b to choose WLAN. d Press a or b to choose WPS w/PIN Code. e The LCD will show an 8 digit PIN and the machine starts searching for a WLAN access point/router for up to 5 minutes. Connecting WPS PIN:XXXXXXXX f Using a computer that is on the network, type "http://access point's IP address/" into your browser. (Where "access point's IP address" is the IP address of the device that is used as the Registrar 1) Go to the WPS (Wi-Fi Protected Setup) setting page and input the PIN which the LCD shows in step e to the Registrar and follow the on-screen instructions. 1 The Registrar is normally the WLAN access point/router. Note The setting page is different, depending on the brand of WLAN access point/router. See the instructions supplied with your WLAN access point/router. 20
-
 1
1 -
2
-
3
-
4
-
5
-
6
-
7
-
8
-
9
-
10
-
11
-
12
-
13
-
14
-
15
-
16
-
17
-
18
-
19
-
 20
20 -
 21
21 -
 22
22 -
 23
23 -
 24
24 -
 25
25 -
 26
26 -
 27
27 -
 28
28 -
 29
29 -
 30
30 -
31
-
32
-
33
-
34
-
35
-
36
-
37
-
38
-
39
-
40
-
41
-
42
-
43
-
44
-
45
-
46
-
47
-
48
-
49
-
50
-
51
-
52
-
53
-
54
-
55
-
56
-
57
-
58
-
59
-
60
-
61
-
62
-
63
-
64
-
65
-
66
-
67
-
68
-
69
-
70
-
71
-
72
-
73
-
74
-
75
-
76
-
77
-
78
-
79
-
80
 |
 |
