Brother International MFC-J430w Software Users Manual - English - Page 233
Adjust the print position, Color Start
 |
View all Brother International MFC-J430w manuals
Add to My Manuals
Save this manual to your list of manuals |
Page 233 highlights
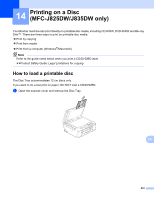
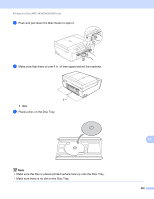
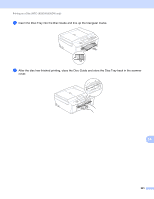
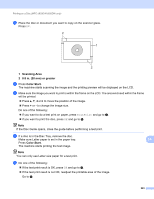
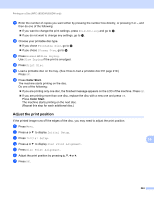
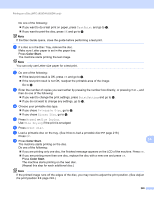
Printing on a Disc (MFC-J825DW/J835DW only) k Enter the number of copies you want either by pressing the number box directly, or pressing + or -, and then do one of the following: If you want to change the print settings, press PrintSetting and go to l. If you do not want to change any settings, go to n. l Choose your printable disc type. If you chose Printable Disc, go to m. If you chose Glossy Disc, go to n. m Press Normal or Slow Drying. Use Slow Drying if the print is smudged. n Press Print Disc. o Load a printable disc on the tray. (See How to load a printable disc uu page 219.) Press OK. p Press Color Start. The machine starts printing on the disc. Do one of the following: If you are printing only one disc, the finished message appears on the LCD of the machine. Press OK. If you are printing more than one disc, replace the disc with a new one and press OK. Press Color Start. The machine starts printing on the next disc. (Repeat this step for each additional disc.) Adjust the print position If the printed image runs off the edges of the disc, you may need to adjust the print position. a Press Menu. b Press a or b to display Initial Setup. c Press Initial Setup. d Press a or b to display Disc Print Alignment. e Press Disc Print Alignment. f Adjust the print position by pressing a, b, d or c. g Press OK. 14 14 224
-
 1
1 -
2
-
3
-
4
-
5
-
6
-
7
-
8
-
9
-
10
-
11
-
12
-
13
-
14
-
15
-
16
-
17
-
18
-
19
-
20
-
21
-
22
-
23
-
24
-
25
-
26
-
27
-
28
-
29
-
30
-
31
-
32
-
33
-
34
-
35
-
36
-
37
-
38
-
39
-
40
-
41
-
42
-
43
-
44
-
45
-
46
-
47
-
48
-
49
-
50
-
51
-
52
-
53
-
54
-
55
-
56
-
57
-
58
-
59
-
60
-
61
-
62
-
63
-
64
-
65
-
66
-
67
-
68
-
69
-
70
-
71
-
72
-
73
-
74
-
75
-
76
-
77
-
78
-
79
-
80
-
81
-
82
-
83
-
84
-
85
-
86
-
87
-
88
-
89
-
90
-
91
-
92
-
93
-
94
-
95
-
96
-
97
-
98
-
99
-
100
-
101
-
102
-
103
-
104
-
105
-
106
-
107
-
108
-
109
-
110
-
111
-
112
-
113
-
114
-
115
-
116
-
117
-
118
-
119
-
120
-
121
-
122
-
123
-
124
-
125
-
126
-
127
-
128
-
129
-
130
-
131
-
132
-
133
-
134
-
135
-
136
-
137
-
138
-
139
-
140
-
141
-
142
-
143
-
144
-
145
-
146
-
147
-
148
-
149
-
150
-
151
-
152
-
153
-
154
-
155
-
156
-
157
-
158
-
159
-
160
-
161
-
162
-
163
-
164
-
165
-
166
-
167
-
168
-
169
-
170
-
171
-
172
-
173
-
174
-
175
-
176
-
177
-
178
-
179
-
180
-
181
-
182
-
183
-
184
-
185
-
186
-
187
-
188
-
189
-
190
-
191
-
192
-
193
-
194
-
195
-
196
-
197
-
198
-
199
-
200
-
201
-
202
-
203
-
204
-
205
-
206
-
207
-
208
-
209
-
210
-
211
-
212
-
213
-
214
-
215
-
216
-
217
-
218
-
219
-
220
-
221
-
222
-
223
-
224
-
225
-
226
-
227
-
 228
228 -
 229
229 -
 230
230 -
 231
231 -
 232
232 -
 233
233 -
 234
234 -
 235
235 -
 236
236 -
 237
237 -
 238
238 -
239
-
240
-
241
 |
 |
