Brother International XL-2121 Users Manual - English
Brother International XL-2121 Manual
 |
View all Brother International XL-2121 manuals
Add to My Manuals
Save this manual to your list of manuals |
Brother International XL-2121 manual content summary:
- Brother International XL-2121 | Users Manual - English - Page 1
Operation Manual - Brother International XL-2121 | Users Manual - English - Page 2
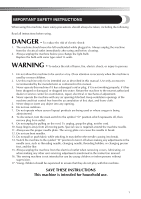
plug, not the cord. 10. Keep fingers away from all moving parts. Special care is required around the machine needle. 11. Always use the proper needle plate. The wrong or when making any other user servicing adjustments mentioned in the instruction manual. 16. This sewing machine is not intended for - Brother International XL-2121 | Users Manual - English - Page 3
FOR USERS IN THE UK, EIRE, MALTA AND CYPRUS ONLY If this machine is fitted with a three-pin non-rewireable BS plug then please read the following. IMPORTANT (in the United Kingdom) Main supply (AC 230/240V~, 50Hz) - Brother International XL-2121 | Users Manual - English - Page 4
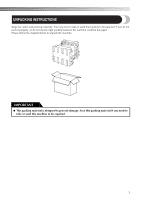
UNPACKING INSTRUCTIONS Keep the carton and packing materials. You may have to take or send the machine to be repaired. If you do not pack it properly, or do not use the right packing material, the machine could be damaged. Please follow the diagram below to unpack the machine. IMPORTANT ● This - Brother International XL-2121 | Users Manual - English - Page 5
, or any other parts to make sure you fit them correctly. To repair or adjust the machine If the machine breaks down, or you need to adjust it, first follow the troubleshooting table in the Appendix of this operation manual to inspect and adjust the machine yourself. If the problem is still there - Brother International XL-2121 | Users Manual - English - Page 6
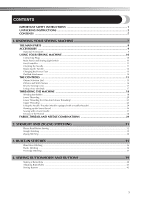
CONTENTS IMPORTANT SAFETY INSTRUCTIONS 1 UNPACKING INSTRUCTIONS 3 CONTENTS ...5 1. KNOWING YOUR SEWING MACHINE 7 THE MAIN PARTS ...8 ACCESSORIES ...9 Optional Accessories ...9 USING YOUR SEWING MACHINE 10 Connecting Plugs ...10 Main Power and Sewing Light Switch ...11 Foot Controller ...11 - Brother International XL-2121 | Users Manual - English - Page 7
and Embroidering ...47 OPTIONAL ACCESSORIES 49 Using the Walking Foot ...49 Using the Quilting Foot ...50 Using the 1/4-Inch Quilting Foot ...51 6. APPENDIX ...53 MAINTENANCE ...54 Changing the Light Bulb ...54 Cleaning ...55 Troubleshooting ...57 Repacking the Machine ...60 INDEX ...61 6 - Brother International XL-2121 | Users Manual - English - Page 8
1 KNOWING YOUR SEWING MACHINE - Brother International XL-2121 | Users Manual - English - Page 9
controller plug and connect the machine to the power supply. D Presser foot lever (Page 23) E Foot controller (Page 11) You can use this to control the sewing speed, and to start and stop sewing. Parts Code for Zigzag Presser Foot: XC4901-051 Foot Controller: Model N Parts Code: XC5458-021 (110/120V - Brother International XL-2121 | Users Manual - English - Page 10
-021 Optional Accessories 1. 2. 3. No. Part Name 1 Walking Foot 2 Quilting Foot 3 1/4-Inch Quilting Foot Part Code U.S.A. Others SA107 F034N (XC2165-002) SA129 F005N (XC1948-002) SA125 F001N (XC1944-002) Note ● The accessories that come with your machine depend on which model you - Brother International XL-2121 | Users Manual - English - Page 11
SEWING MACHINE USING YOUR SEWING MACHINE WARNING ● Use only regular mains household electricity for the power source. Using other power sources may result in fire, electric shock, or damage to the machine ● When servicing the machine, or when removing covers or changing bulbs, the machine must be - Brother International XL-2121 | Users Manual - English - Page 12
of cloth and dust to build up on the foot controller. Doing so could cause a fire or an electric shock. Note (For U.S.A. only) ● Foot Controller: Model N This foot controller can be used for Model XL-2121, XL-2125, XL-2230. . 11 - Brother International XL-2121 | Users Manual - English - Page 13
• Do not use a lot of force when loosening or tightening the needle clamp screw, otherwise certain parts of the sewing machine may be damaged. With the flat side of the needle toward the 5 back of the machine, put the needle in until it touches the needle stopper. 1 2 Remove the power supply plug - Brother International XL-2121 | Users Manual - English - Page 14
presser foot. If you leave the power on and step on the controller, the machine will start and you may be injured. ● Always use the correct presser foot for You will have to change the presser foot depending on what you want to sew and how. ■ Snap-On Type Raise the needle to its highest position by - Brother International XL-2121 | Users Manual - English - Page 15
KNOWING YOUR SEWING MACHINE Flat-Bed Attachment The accessories are stored in a compartment inside the flat-bed attachment. 1 Slide the flat-bed attachment to the left to open it. 1 1 2 1 Flat-bed attachment 2 Storage compartment Note ● Put the accessories inside a bag, and then store the bag - Brother International XL-2121 | Users Manual - English - Page 16
THE CONTROLS Pattern Selection Dial To choose a stitch, simply turn the pattern selection dial in either direction. Stitch widths and lengths are 1 shown on the following page. Note ● When you use the Pattern Selection Dial to choose a pattern, turn the balance wheel to the front ( - Brother International XL-2121 | Users Manual - English - Page 17
KNOWING YOUR SEWING MACHINE Patterns and Stitch Names 11 stitches Pattern 1 2 3 4 (1/32) 2.5 (3/32) 4.0 (3/16) 2.5 (3/32) 1.5 (1/16) 2.0 (1/16) 0.5 (1/32) 1.0 (1/16) Twin Needle No Instruction Manual Page 40 Yes 32, 44, 45 Yes 32, 45 No 32, 45 Yes 34, 42, 46, 47 No 34, 42, 46, 47 - Brother International XL-2121 | Users Manual - English - Page 18
you lightly push the foot controller. To sew forward, release the Reverse Sewing Lever. The machine will then sew forward. 1 1 Reverse sewing lever Using a Free-arm Style Free-arm sewing is convenient for sewing tubular and hard-to-reach areas. To change your machine to the free-arm style, lift out - Brother International XL-2121 | Users Manual - English - Page 19
● Only use the bobbin (part code: SA156, SFB (XA5539-151)) that has been designed for this sewing machine. Using of any other bobbin may cause damage to the machine. ● We designed the bobbin that comes with this machine. If you use bobbins from older models, the machine will not work properly. Only - Brother International XL-2121 | Users Manual - English - Page 20
controller to wind the thread CAUTION around the bobbin a few times. Then stop the machine. ● Make sure you follow the instructions carefully. If you do not cut the thread completely, and the bobbin is wound, the sound of the clutch engaging when beginning to sew or turning the balance wheel. 19 - Brother International XL-2121 | Users Manual - English - Page 21
1 Wound evenly 2 Wound poorly ● The bobbin was designed specifically for this sewing machine. If bobbins from older models are used, the machine will not operate correctly. Use only the enclosed bobbin or bobbins of the same type (part code: SA156, SFB (XA5539-151)). Actual size 11.5 mm (7/16 inch - Brother International XL-2121 | Users Manual - English - Page 22
1 Wound evenly 2 Wound poorly ● The bobbin was designed specifically for this sewing machine. If bobbins from older models are used, the machine will not operate correctly. Use only the enclosed bobbin or bobbins of the same type (part code: SA156, SFB (XA5539-151)). Actual size 11.5 mm (7/16 inch - Brother International XL-2121 | Users Manual - English - Page 23
KNOWING YOUR SEWING MACHINE Slide the button and open the cover. 2 1 2 Replace the bobbin cover. Put the left tab in 4 place (see arrow 1), and then press lightly on the - Brother International XL-2121 | Users Manual - English - Page 24
up. If the needle is not correctly raised, the sewing machine can not be threaded. Be sure to turn the balance wheel so that diagram above. Pass the thread through both thread guides: the back one first, and then the front one. Make sure you guide the thread through the 5 thread take-up lever - Brother International XL-2121 | Users Manual - English - Page 25
SEWING MACHINE Put the thread behind the guide above the 6 needle. Thread the needle from front to back leaving a 7 thread tail of about 5 cm (2 inches). 1 Using the Needle Threader (Models you incorrectly feed the thread you may cause sewing problems. Note ● When you use the needle threader, - Brother International XL-2121 | Users Manual - English - Page 26
(toward you). The hook will pull the thread through the needle. CAUTION ● The needle threader can only be used 1 2 1 with home sewing machine needles size 75/11-100/16. Check the table on page 1 Hook 2 Thread 47 for the appropriate needle and thread combinations. If you are using - Brother International XL-2121 | Users Manual - English - Page 27
KNOWING YOUR SEWING MACHINE Drawing up the lower thread While lightly holding the end of the upper 1 thread, slowly turn the balance wheel to the front (counterclockwise) once by hand to lower and then raise the needle. ■ One-touch lower threading This is only available on certain models. You - Brother International XL-2121 | Users Manual - English - Page 28
your machine so you can sew Threading the Left Needle with this needle and two top threads. You can use 1 Follow the same instructions for guide CAUTION above the needle before you pass it through the eye of the right needle. ● Use only twin needles that have been made for this machine (part - Brother International XL-2121 | Users Manual - English - Page 29
KNOWING YOUR SEWING MACHINE Tension of the Thread The tension of the fabric. 2 Memo ● We recommend that you do a test sample on scrap of a fabric before you start to sew. ■ Possible Problems If the Tension is Wrong Upper tension is too tight. Loops will appear on the surface of the fabric. 2 1 - Brother International XL-2121 | Users Manual - English - Page 30
a small needle (for example, 65/9 - 75/11) may bend or break the needle. Also, the seam may be uneven, the fabric may pucker, or the machine may skip stitches. 29 - Brother International XL-2121 | Users Manual - English - Page 31
KNOWING YOUR SEWING MACHINE 30 - Brother International XL-2121 | Users Manual - English - Page 32
2 STRAIGHT AND ZIGZAG STITCHING - Brother International XL-2121 | Users Manual - English - Page 33
● To avoid being injured, watch the needle carefully while you are using the machine. Keep your hands away from moving parts. ● Do not stretch or pull the fabric during sewing. If you do, the needle may be damaged and you may be injured. ● Do not use bent or broken needles. If you do - Brother International XL-2121 | Users Manual - English - Page 34
to the left hand side. Cut both threads with the thread cutter on the 3 left hand side of the machine. 1 2 Lower the presser foot and start sewing in the 3 new direction. ■ Finishing Sewing You can use stitching to lock the threads at the end of the seam or where you need to strengthen - Brother International XL-2121 | Users Manual - English - Page 35
(Satin) Stitch 0.5 (1/32) 5.0 (3/16) ■ Zigzag Stitch Turn the pattern selection dial to zigzag stitch, and then start sewing. 1 Buttonhole fine adjusting screw 1 2 We recommend that you sew using the Straight Stitch at the beginning and end of the Zigzag Stitches. (This acts as a reinforcement - Brother International XL-2121 | Users Manual - English - Page 36
3 BUILT-IN STITCHES - Brother International XL-2121 | Users Manual - English - Page 37
the fabric as in picture B. Leave a 6 mm (15/64 inch) overlap at the edge. Set the Pattern Selection Dial to Blind Hem 3 Stitch. Sew on the fold as in picture C. 4 Elastic Stitching Stitch Stitch Stitch Name Pattern Length Width [mm (inch.)] [mm (inch.)] Elastic Stitch 1.0 (1/16) 5.0 (3/16 - Brother International XL-2121 | Users Manual - English - Page 38
Overlock Stitch 2.5 (3/32) 5.0 (3/16) You can use this stitch to join together seams and finish them in one operation. It is also useful for sewing stretch materials. Set the Pattern Selection Dial to the Elastic 1 Overlock Stitch. Put the fabric under the presser foot so that 2 the seamline (or - Brother International XL-2121 | Users Manual - English - Page 39
BUILT-IN STITCHES 38 - Brother International XL-2121 | Users Manual - English - Page 40
4 SEWING BUTTONHOLES AND BUTTONS - Brother International XL-2121 | Users Manual - English - Page 41
of the stitch and then raise the needle. Step 3 c (Back bar tack) 1. Turn the pattern selection dial to 'c' (same position as in step 1). 2. Sew 5 to 6 stitches. 3. Stop the machine when the needle is at the right side of the stitch and then raise the needle from the material. Step 4 (Right side - Brother International XL-2121 | Users Manual - English - Page 42
and Cutting the Buttonhole To secure the stitching, turn the material 90 1 degrees counterclockwise and sew Straight Stitches to the end of the front bar tack of the buttonhole. Remove the material from the machine. We 2 recommend that you put pins across both ends of the buttonhole as protection - Brother International XL-2121 | Users Manual - English - Page 43
the width you want. Remove the power supply plug from the 2 outlet. Change the foot to the Button sewing foot. 3 Place the darning plate on the needle plate. 4 Remove the material from the machine. Cut 8 the upper and lower threads and tie both threads at the back of the material. CAUTION ● Make - Brother International XL-2121 | Users Manual - English - Page 44
5 USING ATTACHMENTS AND APPLICATIONS - Brother International XL-2121 | Users Manual - English - Page 45
should be positioned on the zipper side of the foot for best results. To sew the opposite side of the zipper, release 5 the foot by pressing the button zipper foot. CAUTION ● Make sure the needle does not hit the zipper during sewing. If the needle hits the zipper, the needle may break and you may - Brother International XL-2121 | Users Manual - English - Page 46
Selection Dial to Straight 1 Stitch. Loosen the tension of the upper thread so that 2 the lower thread lies on the underside of the material. Sew a single row (or many rows) of Straight 3 Stitches. Pull the lower threads to gather the material. 4 Darning Stitch Name Straight Stitch (Center Needle - Brother International XL-2121 | Users Manual - English - Page 47
create an applique by cutting a different piece of fabric into a shape and using it as a decoration. Baste the cut design to the fabric. 1 Carefully sew around the edge of the design 2 with a Zigzag Stitch. Cut away any fabric that is left outside the 3 stitching. Remove the basting, if necessary - Brother International XL-2121 | Users Manual - English - Page 48
.)] Other Zigzag Stitch 1.5 (1/16) 3.0 (1/8) Zigzag Stitch 2.0 (1/16) 5.0 (3/16) None Darning Plate Zigzag (Satin) Stitch 0.5 (1/32) 5.0 (3/16) ■ Preparing for sewing a Monogram and Embroidering Remove the power supply plug from the 1 outlet. Place the darning plate on the needle plate - Brother International XL-2121 | Users Manual - English - Page 49
while pressing the fabric with your middle and third fingers and supporting the outside of the hoop with your little fingers. Fill in the design is completely filled in. Keep the stitching close together. ■ Monogram Sew by moving the hoop slowly along the 1 lettering at a constant speed. - Brother International XL-2121 | Users Manual - English - Page 50
OPTIONAL ACCESSORIES Using the Walking Foot Stitch Stitch Stitch Name Pattern Length Width [ foot for straight sewing (Center Needle Position) and zigzag stitching. Do not use other patterns. Switch the machine off. 1 Raise the needle and the presser foot. 2 1 Forked part of operation lever - Brother International XL-2121 | Users Manual - English - Page 51
may be injured. ● Before you start sewing, make sure you turn the balance wheel toward the front of the machine to check that the needle does not foot, sew at medium to low speeds. 13 1 Use a screwdriver 2 Presser-foot holder 3 Presser-foot screw Attach the quilting foot, making sure that part 4 A - Brother International XL-2121 | Users Manual - English - Page 52
accurate seam allowance. 1 2 1 Quilting design (Line) The length of the stitch depends on how 8 quickly you move the fabric and on the machine's sewing speed. Sew while moving the fabric slowly. 3 4 1 Beginning of stitching. 2 Align this mark up the edge of the fabric. 3 End of stitching 4 Align - Brother International XL-2121 | Users Manual - English - Page 53
USING ATTACHMENTS AND APPLICATIONS ■ Quickly stitch together a quilt. 1 2 1 Top of fabric. 2 Seam 3.2 millimetres (1/8 inch) 52 - Brother International XL-2121 | Users Manual - English - Page 54
6 APPENDIX - Brother International XL-2121 | Users Manual - English - Page 55
on when you change the light bulb, you may get an electric shock. If the machine is on and you step on the foot controller, you may be injured. ● To screw on the back of the sewing 2 head. Then remove the light cover from the machine. Put the light cover back on and fasten the 4 screw. Replace - Brother International XL-2121 | Users Manual - English - Page 56
the needle plate cover. CAUTION ● Make sure you turn the balance wheel toward the front of the machine (counterclockwise). Turning the balance wheel in the other direction may damage the machine. Remove the shuttle. 6 Grasp the shuttle, and then pull it out. 1 1 Shuttle Use the cleaning brush or - Brother International XL-2121 | Users Manual - English - Page 57
that is scratched, otherwise the upper thread may become tangled, the needle may break or sewing performance may suffer. For a new shuttle (part code: XC3152-021), contact your nearest authorized service center. ● Make sure that you fit the shuttle properly, otherwise the needle may break. 56 - Brother International XL-2121 | Users Manual - English - Page 58
, check the following possible problems. If the problem it still there, contact your retailer or the nearest authorised service center. Symptom Possible cause How to put it right Reference The machine is not plugged in. Plug the machine in. page 10 The sewing machine does not work. The - Brother International XL-2121 | Users Manual - English - Page 59
fitted the spool properly, or the thread has come out of the guide above the needle.) Correct the upper threading. There are knots or tangles retailer or the nearest authorised service center. You have not used a bobbin that has been designed for this machine. Incorrect bobbins will not work - Brother International XL-2121 | Users Manual - English - Page 60
or the nearest authorized service center. page 23 - You have not used bobbin that has been designed for this machine. Incorrect bobbins will not presser foot that is correct for the type of stitch that you want to sew. - The stitch is not sewn correctly. The thread tension is incorrect. - Brother International XL-2121 | Users Manual - English - Page 61
that are appropriate for the type of fabric. Remove the tangle thread. If the thread is tangled in the shuttle, clean the shuttle. Replace the sewing light bulb. Reference - page 29 page 55 page 54 Repacking the Machine Keep the carton and packing materials. You may have to take or send the - Brother International XL-2121 | Users Manual - English - Page 62
R Repacking the Machine 60 Reverse Sewing Lever 17 S Sewing Buttons 42 Sewing Light Bulb Replacement 54 Sewing Light Switch 11 Sewing with a Twin accessory compartment ...14, 17 Triple Stretch Stitch 32 Foot Controller 11 Troubleshooting 57 Foot Controller Jack 10 Twin Needle Sewing - Brother International XL-2121 | Users Manual - English - Page 63
ENGLISH XC5142-0212 Printed in China
-
 1
1 -
 2
2 -
 3
3 -
 4
4 -
 5
5 -
 6
6 -
 7
7 -
8
-
9
-
10
-
11
-
12
-
13
-
14
-
15
-
16
-
17
-
18
-
19
-
20
-
21
-
22
-
23
-
24
-
25
-
26
-
27
-
28
-
29
-
30
-
31
-
32
-
33
-
34
-
35
-
36
-
37
-
38
-
39
-
40
-
41
-
42
-
43
-
44
-
45
-
46
-
47
-
48
-
49
-
50
-
51
-
52
-
53
-
54
-
55
-
56
-
57
-
58
-
59
-
60
-
61
-
62
-
63
 |
 |
Operation Manual
Operation Manual