Brother International XL-2121 Users Manual - English - Page 55
Maintenance
 |
View all Brother International XL-2121 manuals
Add to My Manuals
Save this manual to your list of manuals |
Page 55 highlights
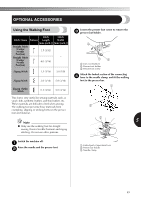
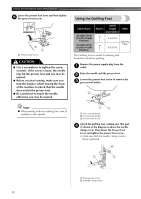
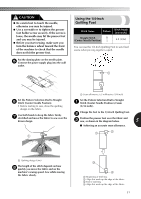
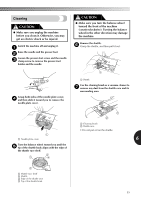
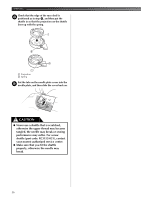
APPENDIX MAINTENANCE Changing the Light Bulb CAUTION ● Turn off the main power switch and unplug the machine before you change the light bulb. If the main power switch is on when you change the light bulb, you may get an electric shock. If the machine is on and you step on the foot controller, you may be injured. ● To avoid burns, let the light bulb cool down before you change it. Remove the power supply plug from the 1 outlet. Loosen the screw on the back of the sewing 2 head. Then remove the light cover from the machine. Put the light cover back on and fasten the 4 screw. Replace the sewing light bulb. 3 1 Loosen 2 Tighten 1 1 2 1 Bulb 54
-
 1
1 -
2
-
3
-
4
-
5
-
6
-
7
-
8
-
9
-
10
-
11
-
12
-
13
-
14
-
15
-
16
-
17
-
18
-
19
-
20
-
21
-
22
-
23
-
24
-
25
-
26
-
27
-
28
-
29
-
30
-
31
-
32
-
33
-
34
-
35
-
36
-
37
-
38
-
39
-
40
-
41
-
42
-
43
-
44
-
45
-
46
-
47
-
48
-
49
-
 50
50 -
 51
51 -
 52
52 -
 53
53 -
 54
54 -
 55
55 -
 56
56 -
 57
57 -
 58
58 -
 59
59 -
 60
60 -
61
-
62
-
63
 |
 |
APPENDIX
—————————————————————————————————————————————————————
54
MAINTENANCE
Changing the Light Bulb
1
Remove the power supply plug from the
outlet.
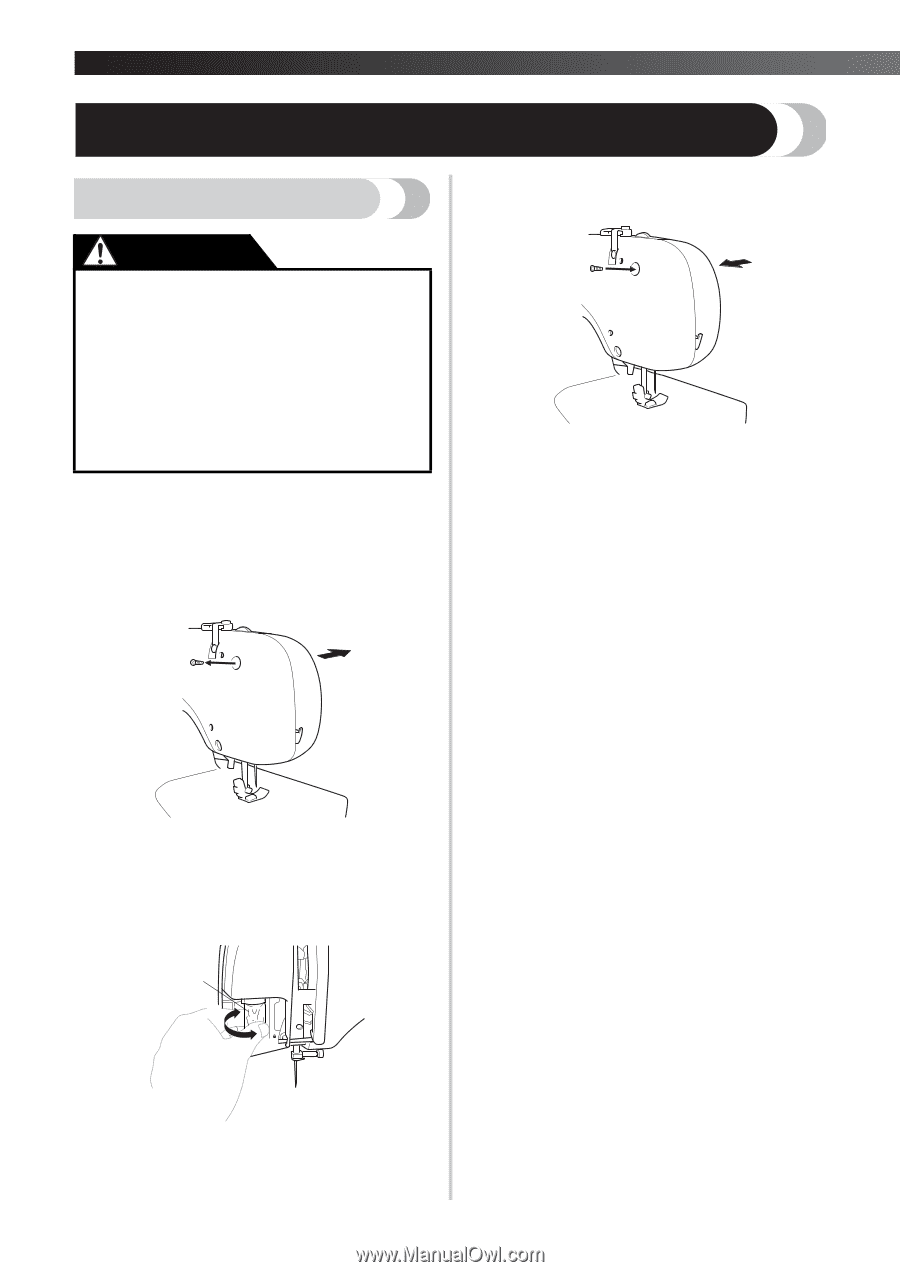
2
Loosen the screw on the back of the sewing
head. Then remove the light cover from the
machine.
3
Replace the sewing light bulb.
1
Loosen
2
Tighten
1
Bulb
4
Put the light cover back on and fasten the
screw.
●
Turn off the main power switch and
unplug the machine before you change
the light bulb. If the main power switch is
on when you change the light bulb, you
may get an electric shock. If the machine
is on and you step on the foot controller,
you may be injured.
●
To avoid burns, let the light bulb cool
down before you change it.
CAUTION
1
2
1