Brother International XL-3025 Users Manual - English
Brother International XL-3025 Manual
 |
View all Brother International XL-3025 manuals
Add to My Manuals
Save this manual to your list of manuals |
Brother International XL-3025 manual content summary:
- Brother International XL-3025 | Users Manual - English - Page 1
OPERATION MANUAL MANUAL DE 1NSTRUCCIONES k )r brother® - Brother International XL-3025 | Users Manual - English - Page 2
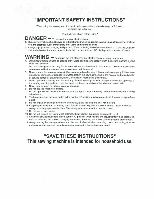
the needle, threading the bobbin, or changing the presser foot. 15. Always unplug the sewing machine from the electrical outlet when removing covers, lubricating, or when making any other user service adjustments mentioned in this instruction manual. "SAVE THESE INSTRUCTIONS" "This sewing machine is - Brother International XL-3025 | Users Manual - English - Page 3
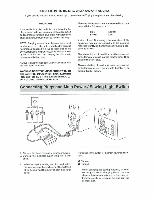
from the socket outlet. Turn onor off the switch for the main power and sewlight. O Turn on O Turn off When servicing the sewing machine, or when removing covers or changing lamps, the machine or the electrical set must be disconnected from the supply by removing the plug from the socket outlet. - Brother International XL-3025 | Users Manual - English - Page 4
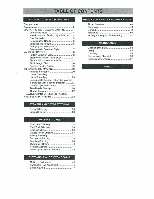
to Free-arm Style 7 VARIOUS CONTROLS 8 Pattern Selection Dial 8 Electronic Display (1 Line LCD) 11 Electronic Display (4 Line LCD) 12 Stitch Length Dial 18 Reverse Sewing Button 19 THREADING THE MACHINE 20 Winding the bobbin 20 Lower Threading 22 Upper Threading 23 Using - Brother International XL-3025 | Users Manual - English - Page 5
CONOZCA SU MAOUINA DE COSER Elementos principales 1 Accesorios 3 Funcionamiento de la mewing de coser 4 Conoxi6n de los enchufes 4 !Motivator principal y de luz 5 Pedal 5 Cambio do la aguja 6 VerilicaciOn do la aguja 6 Cambio delprensatelas 7 Conversion en modalidad de brazo libre - Brother International XL-3025 | Users Manual - English - Page 6
Principal parts Elementos principales 2 3 0 8 0 -a (1}b CC 8M= A 0 4. I C 1 - Brother International XL-3025 | Users Manual - English - Page 7
hold a second spool of thread for twin needle sewing. 0 Porta Bobinas Hace bobina pars la canilta que va a ser utilizada como bib interior. (I) Porta carretes Soporta elhilo de coser. (4) Selector de largo de puntada Conlrola el largo de las puntadas. (4) Palanca de elevation delprensatelas Levanla - Brother International XL-3025 | Users Manual - English - Page 8
pc.) * Zipper Foot (1 pc.) (3) Button Sewing Foot (1 pc.) (4) Needle Pack (Regular Single Needle No. 14) (3 Pm) (6) Twin Needle (1 pc.) (6) Bobbin (3 pcs.) 0) Darning Plate (1 pc.) (a) Screw Drivers (Large & Small) (2 pcs.) (i) Extra Spool Pin (1 pc.) (i0i Spool Holder (Large & Small) (2 pcs.) Pails - Brother International XL-3025 | Users Manual - English - Page 9
KNOWING YOUR SEWING MACHINE CONOZCA SU MAQUINA DE COSER OPERATING YOUR SEWING MACHINE Connecting Plugs 1. Connect the three-prong plug into the machine. It is located between the loot controller and the power supply plug on the cord. 2. Connect the power supply plug into a wall outlet. CAUTION 1. - Brother International XL-3025 | Users Manual - English - Page 10
can be used for sewing machine models X13025, XL3027 and XL3030. Pedal Al presionar ligerarnenle el pedal, la maquina funcionani a baja velocidad. Alaumentaria presion, se incrementa ramblen la velocidad de la maquina. Al softer el pedal, la maquina se para. Asegdrese siempre de no poner ningOn - Brother International XL-3025 | Users Manual - English - Page 11
KNOWING YOUR SEWING MACHINE CONOZCA SU MAOUINA DE COSER Replacing the Needle 1. Remove the no....ry supuly Verification de la aguja 1. La aguja do costura srempre debe ester bien recta y alilada Para una buena costura. 2. Para averiguar si la aguja no este doblada. coloque la parte plans de la - Brother International XL-3025 | Users Manual - English - Page 12
de golpe. Converting to Free-arm Style Free-arm sewing is convenient for sewing tubular and hard-to-reach areas on a garment. To change your machine to the free de acceso en los tejido. Pam uanslormar su maquina en esa modalidad, solohate felladesmontarelsoportedelos accesorios tirando de el - Brother International XL-3025 | Users Manual - English - Page 13
a stitch, simply turn the Pattern Selection Dial, located on the right side of the machine. The stitch selection dial may be turned in either direction. All stitches are preset in . (1) Pattern selection dial Distintos mandos Zw cc Selector de puntadas U O Para seleccionar una puntada, solo hate - Brother International XL-3025 | Users Manual - English - Page 14
) 5 (13/64) 5 (13/64) 5 (13/64) 5 (13/64) 5 (13/64) 5 (13/64) 5 (13/64) 5 (13/64) 5 (13/64) 0 RECOMMENDED PAGE IN LENGTH INSTRUCTIONS [mm(inch)] F-1.5 43 (1/64-1/16) 1.4 30 (3/64-5/32) 1.4 30 (3/64-5/32) F-4 33 (1/64.5132) F-4 33 (1/64-5/32) F•4 33 (1/64-5/32) F-2 34 (1/64.5/64 - Brother International XL-3025 | Users Manual - English - Page 15
SEWING M • CHINE CONOZCA SUMAMMA DECOSER Largo recomendado para cada puntada PUNTA DA 2 3 4 5 6 7 8 9 10 11 12 13 14 15 16 17 18 19 20 21 NOMBRE ANCHO LARGO PRE-PROGRAMADO RECOMENDADO (MM) (MM) OJAL AUTOMATICO DE 32) Fija 2.5 (3/32) PAGINA DEL MANUAL 43 30 30 33 33 33 34 35 36 34 37 37 38 - Brother International XL-3025 | Users Manual - English - Page 16
to give you instructions about how to make the correction. 1. When you slide the bobbin winder pin to the right for bobbin winding, the machine will only allow you to wind the bobbin and the message "BOBBIN WINDING' will appear on the display. 2. When you set the machine to sew a buttonhole, but the - Brother International XL-3025 | Users Manual - English - Page 17
(1) Recommended presser foot for the stitch ® Recommended stitch length ® Instruction for more LCD information on this stitch Pantalla electronica (Pantalla de cuatro lineas) Al seleccionar una puntada con el .selector de puntadas, aparecen en la pantalla las siguientes informations: el nombre - Brother International XL-3025 | Users Manual - English - Page 18
of the following major categories based on the sewing information you need: Al) SEWING PATTERN A2) USING MACHINE A3) TROUBLE SHOOTING A4) FABRIC•THREAD•NEEDLE r , A4 )I'MAIL • TietrAS NEEDLE 1- * A3)TROUBLE SHOOTING F' AfltISING MACHINE AI/SEWING PATTERN (SELECT WITH A KEY AND PRESS 1 KEY) 3. When - Brother International XL-3025 | Users Manual - English - Page 19
SEWING MACHINE CO,VOZCA SU MAOUINA DE COSEI? Uso de las teclas de instrucciones. (Ejemplo) Pantalla A E•1.5 I 1:OJAL O ± CAPREIAR IECIA 41 4 1. Presione !a lads A 2. Preston L4 tecla pars elegir una de las calegorlas principales que ilustra las inlormaciones necesitadas. Al) Molly° de - Brother International XL-3025 | Users Manual - English - Page 20
4 KEY) 4 A.21UnI NC HACHDIP DI/WINDING BOBBIN rrnoume GHOSTING BlINELTLE BREAKS h4/FAIIMIC•THTIEND NEEDLE K) /NORMAL EMIG I /ATM/ BUTEN:MOLE POOPIA) A21USING MACHINE B2)REPLACING BOHRI N Al) TROUBLE SIER711NG R21UPPER TIIRPAD BREAKS AA1FABII C • THREAD• ugEr); 02I LIMIT FABRIC 2 }PULL OUT - Brother International XL-3025 | Users Manual - English - Page 21
KNOWING YOUR SEWING MACHINE CONOZCA SU MAOUINA DE COSER Plangeneraldeinformacionenlapantalla decuatrolimas A 1:COAL P-I.5 IAPRETAR TECLA 11 A A MIRINTADA, El/TEIIE0 MIRMAL (Ak AoTertop-Htto-Acum 11.2)TEJIDO FIND 21PETIRAR LA PARTS ATMS DEL PIONSAISLAS CULOCAR RI. 1 0v0N4 Y VIJAY( A.2) INA Di - Brother International XL-3025 | Users Manual - English - Page 22
to give you instructions about how to make the correction. 1. When you slide the bobbin winder pin to the right for bobbin winding, the machine will only allow you to wind the bobbin and the message "BOBBIN WINDING SELECTED" will appear on the display. 2. When you set the machine to sew a buttonhole - Brother International XL-3025 | Users Manual - English - Page 23
does not feed the material. This is used for sewing on a button. The"F"areaisused formakinga Satin Stitch(a and thread being used. To determine the exact dial position, you should first test the stitch and length settings on para coser tin bortin. La zone 'F"se usa para realizerpuntadas de realce - Brother International XL-3025 | Users Manual - English - Page 24
while pressing rightly on the fool pedal. To sew forward, release the Reverse Sewing Button. The machine will then sew forward. Reverse sewing is used for backtacking and reinforcing seams. 0) Reverse sewing button Pulsador de retroceso Para coser hacia arras, apriete a tondo el pulsador deretraces - Brother International XL-3025 | Users Manual - English - Page 25
that the spool of thread will not turn. Pass the thread through the thread guide as shown following the dolled line on the machine. 3. Pass theendof thethread through thehole on the bobbin from the inside. (p Clutch release switch () Bobbin winding Enhebrado de la rnthquina Bobinado de la canilla - Brother International XL-3025 | Users Manual - English - Page 26
into the slit on the bobbin. 5. While holding the end of the thread, gently depress the foot controller to wind the thread around the bobbin a few times. Then stop the machine. 6. Trim the excess thread above the bobbin. Continue winding the thread onto the bobbin by depressing the foot controller - Brother International XL-3025 | Users Manual - English - Page 27
machine, it will fall out from the shuttle immediately atter staffing to sew. (I) Bobbin case laid' 0) Bobbin case finger 0) Tension spring (4) Metal linger (5) Notch B-1 1. Levante la aguja a suposition eras alta, girando la ruedecilla hacia usted (en el sentido contrario al de las mantillas de - Brother International XL-3025 | Users Manual - English - Page 28
. NOTA: Escoger un soporte de carrete apropiado dependiendo del tipo y diametro del carrete empleado. Eldiametro delsoporte delcarrete debe set solo un poco mas ancho que el del carrete, tal como ilustra la fig. B. I tit 4. Pass the upper thread through the thread guides as shown in fig. C. NOTE - Brother International XL-3025 | Users Manual - English - Page 29
. Lower thethreader slightlyandpositionthe thread under the guide. Oi Needle threader C) Guide 2. Move the threader to ils lowest position and guide the thread under the hook which passes through the eye of the needle. (a) Hook Uso del enhebrador (Cuando la maquina esta provista de un en hebrador - Brother International XL-3025 | Users Manual - English - Page 30
to the right toward the back of the machine and pull toward the back of the machine straight behind the presser fool. (t) Upper thread (2) Lower thread loop (at Lower thread Para sacar el hilo de la canilla 1. LeventeelprensetelaSyleagujeaSusposiciones mas &evades. 2. Conla manoizquierda, sujete - Brother International XL-3025 | Users Manual - English - Page 31
of the machine near the horizontal spool pin. Place the second spool of thread onto the vertical spool pin as shown in fig. A. TWIN NEEDLE THREADING Each needle should be threaded separately. 1. Threading the Right Needle Follow the same instructions for single needle threading using the thread from - Brother International XL-3025 | Users Manual - English - Page 32
. Reverse (2.) Sudace 0) Bobbin A A-1 Tensi6n de los hilos La tension de los hilos afeetara la calidad de las puntadas: puede rogue& cierto ajuste cuando cambia de tefido o hilo. NOTA: Le recomendamos hacer una prueba en gm pedazo de tea antes de empezar a coser en el tejido de trabajo. Alustes - Brother International XL-3025 | Users Manual - English - Page 33
KNOWING YOUR SEWING MACHINE CONOZCA SU MAOUINA DE COSER C Correct tension Correct tension is important since too Cotton Wrapped Polyester NOTE: 1. Select the correct needle and thread size from the above chart. 2. Use the same size thread for the upper and lower threads (spool and bobbin). 28 - Brother International XL-3025 | Users Manual - English - Page 34
Vera, Pana fina, Forros, Lino, Musefins 11 14 (provista con su maquina) Algooqn: 60-80 Sada: :4" Sentence Merceria 50. Algoden; 50-60 Hilo Merceria gruesa. Prendas de punto Prendas de punto simple, Prendas de punto doble, Jersey, Tricot de bola 14 Poliester envuelto de Wooden NOTA: 1. Elija - Brother International XL-3025 | Users Manual - English - Page 35
sewing in the forward direction by applying pressure to the foot controller. Puntadas rectas MilllefO 2 (Aguja a la frqulerdM 3 (Aguja en el centro) 21 (Mate Puntada Pespunto) Lave d° puntada 1-4 Frle 2.5 Pam empezar a coser 1. Gire elselector depuntadas pare vet puntada deseada en la ventana de - Brother International XL-3025 | Users Manual - English - Page 36
andstartsewingin thenow direction. Cambio de sentido de costura 1. Pare la maquina en donde quiera cambiar de direction, con la aguja picada N te) 0 -c N LNG C) C) Finishing Sewing Reverse stitching is used to lock the threads at the endof the seamor wherever reinforcement is needed. - Brother International XL-3025 | Users Manual - English - Page 37
the machine. g.; Thread cutter Para retirar el tejldo de la maqulna 1. Pare la maquina. sewing lightweight fabrics. No.21 (Triple Stretch Stitch) is used for stretch fabrics. Pentodes en derecho y tejidos elasticos La punlada No 2 (Aguja a la izquierda) se usa para rzsturas en el!ado derecho y de - Brother International XL-3025 | Users Manual - English - Page 38
Selection Dial. Then select the stitch length. It is recommended to sew using the Straight Stitch at the beginning and end of the Zigzag Stitches. Puntadas stitch width. Then, set the stitch length in the -F" range. Puntada de realce Cuando se define ellargo dela puntada enla parte "F". se coserAn puntadas - Brother International XL-3025 | Users Manual - English - Page 39
threads should be the same color as the fabric. 2. Fold back the fabric to the desired location of the hem as shown in fig. A. Then, fold the edge of the fabric as infig.B. Leave a 6 mm (1/41overlap at the edge. 3. Set the Pattern Selection Dial to either 7 or 10. 4. Sew sin coser para esconderlos - Brother International XL-3025 | Users Manual - English - Page 40
can be used to sew a picot (lace like) edge on a lightweight fabric. 1. Set the Pattern Selection Dial to 8. 2. Sew the fabric on the thread tension than normal. 4. Sew at a slow speed. Puntada Ondas Namara depuntada 8 (Puntada Ondas) Largo de puntada F-3 La puntada ondas puede usarse pare coser - Brother International XL-3025 | Users Manual - English - Page 41
nylon thread is used, the stitch will not be visible. 1. Place theedge of thetwopiecesof fabric together and center them under the presser fool. 2. Sew them together using the Elastic Stitch taking care to keep the two fabric edges close together as shown in fig. C. Puntada elastica Nornero de - Brother International XL-3025 | Users Manual - English - Page 42
elpatchwork. Ponga el selector de puntadas en 11. nn L • Scallop Stitching P.attein 12 (Scallop Stitch) Stitch Length F-1.5 This machine automatically produces a Scallop Stitch which may be used as a decorative edging. 1. Set the Pattern Selection Dial to 12. 2. Sew the Scallop Stitch along - Brother International XL-3025 | Users Manual - English - Page 43
stitches can be used for making decora live top stitching and for smocking Set the Pattern Selection Dial to 13 or 14. Puntadas decorativas 114/10merode punmda pueden servir pare puntadas decoralivas de "arta castors" y pare hater !runes decorativos. Ponga el selector de puntada en 13 6 14. - Brother International XL-3025 | Users Manual - English - Page 44
Set the Pattern Selection Dial to 15. 3. Stitchalong theedge, pullingboth threadsslightly when beginning to sew. • Use thicker than normal threads for sewing. 4. After sewing, juntar dospiezas de lejido, dejando un espacio entre las dos orillas. 1. Doble las minas de las dospiezas de tejidopars - Brother International XL-3025 | Users Manual - English - Page 45
join together seams and finish them in one operation. The Arrowhead Stitch is ideal for sewing the edge of a blanket, while the Elastic Overlock and Slant Overlock Stitches are useful when sewing stretch materials. 1. Set the Pattern Selection Dial to 16, 18 or 19. 2. Position the fabric under the - Brother International XL-3025 | Users Manual - English - Page 46
top stitch o when hemming blankets, tablecloths or draperies o when embroidering. 1. Set the Pattern Selection Dial to 17. 2. Place the fabric right side up and Plums) Largo de punlads F7ja 2,5 La puntada pluma puede usarse coma puntada de tope decoratheo o pare of dobladillo de frazadas, manteles, - Brother International XL-3025 | Users Manual - English - Page 47
sew heavyweight stretch fabrics wherever a Zigzag Stitch could be used. The Triple Zigzag Stretch Stitch can also be used as a decorative top stitch. Set elastics de tnPlepespuntoopuntada festentriplefambienpuede server como puntada decorative en el derecho del tejido. Ponga el selector de puntadas - Brother International XL-3025 | Users Manual - English - Page 48
thread, start the machine. 8. Buttonhole stitching is done in order, 1-4, as shown in fig. D. 9. Stop the machine when the bar tacks are sewn. Para coser y empiece a coser. 8. Elcosido delojalsehatepar order?. de 1a 4. WI come aparece en la fig. D. 9. Pare la maquina cuando Lodeslosremates esten - Brother International XL-3025 | Users Manual - English - Page 49
(1) Align the marks on the foot and on the fabric. O Starting mark on the fabric (0 Marks on the loot O Bolton plate QQ Mincelasmarcas delprenselelasconlas del WOO. O Marco do Thick) en ellefido ® Marcos on elprensateias. Q. Placa pare botones. A B O 3 C 4 - Brother International XL-3025 | Users Manual - English - Page 50
1. To secure the stitching, turn the material 90 degrees counterclockwise and sew Straight Stitches (3) to the end of the front bar tack of the buttonhole. 2. Remove the material from the machine. It is recommended that pins be placed across both ends of the buttonhole as protection against cutting - Brother International XL-3025 | Users Manual - English - Page 51
I owjer c.the 0 Lado lzquierdo 0 Largo de punlada ® Mas code (i) Mils largo (s) En pale izquierda, cosy la pale derecha del ojal y mire de nuevo la alimentation del tejido. 4. Silopane derecha delojales demasiada depomade (7) Tomillo do ajuste lino de gal Qe Lado derecho En woo quo • - Brother International XL-3025 | Users Manual - English - Page 52
if it hits see step 1. 5. At a slow speed, sew approximately 10 stitches. 6. Remove the material from the machine. Cut the upper and lower threads and tie both threads at the back of the material. Costura de botones Puntada Largocepagoda Prensatelas Otros 4,56 6 cualquiera FpeLernroaslolris Placa - Brother International XL-3025 | Users Manual - English - Page 53
the left side of the zipper (J) Left pin for sewing the right side of the zipper A 2 Insercion de cremalleras Puntado 3 Largo de punlada Prensatelas 2-3 Pata de crematleraS La pats de cremalleras sinAapare coser varies tipos de cremalleras y puede colocarse facilmente hacia la izquierda - Brother International XL-3025 | Users Manual - English - Page 54
1. Set the Pattern Selection Dial to 3. 2. Loosen the tension of he upper thread (to about 2) so that the lower thread lies on the underside of the material. 3. Sew a single row or multiple rows of Straight Stitches. 4. Pull the lower thread(s) to gather the material. Fruncido Malteds 3 Largo de - Brother International XL-3025 | Users Manual - English - Page 55
la operacienhaste queelzurcido se haya completed° creando unas cuantas knees de puntadas paralelas. trease fig. B. B Appliques Pattern 4, Baste the cut design to the fabric in the location where desired. 2. Carefully sew around the edge of the cutout design with a Zigzag Stitch (patterns 4, 5 or - Brother International XL-3025 | Users Manual - English - Page 56
plate. 2. Set the Pattern Selection Dial to the appropriate Zigzag Stitch setting. 3. Draw with the foot removed. 6. Pull the lower thread up through the work at the startingposition by turning middle and third fingers and supporting the outside of the hoop Coloquela Lela debajo de la aguja ybajela - Brother International XL-3025 | Users Manual - English - Page 57
USING ATTACHMENTS AND APPLICATIONS USO DE ACCESORIOS Y APLICACIONES MONOGRAMMING 1. Sew moving the hoop slowly along the lettering at a constant speed. 2. Secure with a few straight stitches at the end of the last letter. Monogramas 1. Cosa moviendo - Brother International XL-3025 | Users Manual - English - Page 58
from the machine as Illustrated in fig. B. Cambio de la bombilla 1. Desenchule la maquina. 2. Alloje el tornillo de la cubierta de la maquina tal como se indica en la fig. A. 3. Retire la cubierta de la maquina tat como se indica en Pa lig. B. reA- too l B fl 4. Replace the sewing light bulb - Brother International XL-3025 | Users Manual - English - Page 59
a week if it is used more than one hour a day. If the machine is used more often, oil every day. Sewing machine oil is available from your local sewing machine dealer or service center. Engrasado I. lksonchule magunia. 2. Ponga 2 ci 3 gotas de aceite en cada uno de los puntos sehalados en la fig - Brother International XL-3025 | Users Manual - English - Page 60
Remove any accumulated lint and thread from the retainingring,hook, driverandrace body with a brush. 2. A cloth dampened with machine oil should be used to un cepillo. 2. Limpie el polvo de la lanzadera con un trapo impregnado de aceite de maquina. 3. Limpie el gadio de la misma manera. 4. Vuelva a - Brother International XL-3025 | Users Manual - English - Page 61
using the machine. If the problem continues, the following check list may help you to improve the operation. It you still have difficulties, contact your nearest service center. Listado de posibles incidencias Cada vezqueencuentredilicultadesalcoser, vuelva a consultor la paste de este manual de - Brother International XL-3025 | Users Manual - English - Page 62
.thread is not correctly installed. Page 23 Upper thread is tangled. Lower thread is tangled. 4 Page 25 Bobbin is not threaded The combination of needle size/ thread size/fabric is incorrect. Page 28 No Spool of thread is not correctly installed. Lower threading is not correct. Lint is - Brother International XL-3025 | Users Manual - English - Page 63
Elhilo superior es demasiado &ante • Pagina 27 No Pagina 22 No • Elhilo inferior es demasiado tirante • Nona 27 No Paigina 6 No La comb:moon tarnaho de aguja/ grueso de hilo/ tejido no es correct Pagina 29 No El carrete este rnal colocado Elhilo inferior este mal enhebrado Hay polvo en el tondo - Brother International XL-3025 | Users Manual - English - Page 64
MACHINE IS MACHINE DOES NOISY OR SLOW NOT START Stitch Length Dial is set combine ion of needle size/ thread size/fabric is incorrect Insufficient oiling Thread is tangled. feed dogs move the fabric. Do not pull No Page 22-25 the fabric. No Page 5 No Clutch Release Switch is set at bobbin - Brother International XL-3025 | Users Manual - English - Page 65
Algina 29 No Se este usando una aguja inferior RIgina 6 Pagina 55-561No Se este usando une aguja inferior Fella de aceite Pagina 6 INO La combinacian lama& de aguja/ grueso de hilo/ tejido no es correcta Pagina 54 Psigina 4 No El interruplor principal este apegado Pagina 5 N No So use bien el - Brother International XL-3025 | Users Manual - English - Page 66
for future use. It may become necessary to reship the sewing machine. Improper packing or improper packing material could result in damage during shipping. Instructions forrepacking themachine areillustrated below. Embalaje de la maquina Guarde la cap de carton y el embalaje por si aca so nocesita - Brother International XL-3025 | Users Manual - English - Page 67
A Accessories Applique Arrowhead Stitch B Bead Stitch Blind Hem Stitch Buttonhole Buttonhole Fine Adjustment Button Sewing C Cleaning Connecting Plugs Darning Double Action Stitch Drawing Up Lower Thread E Elastic Stitch Elastic Overlock Stitch Embroidering F Fagoting Stitch Feather Stitch Feed Dog - Brother International XL-3025 | Users Manual - English - Page 68
Zigzag Stretch Stitch Troubleshooting Twin Needle Sewing 27 30 42 57, 59 26 U Upper Tension Control Dial 27 Upper Threading 23 va Winding the Bobbin 20 M Modalidad brazo fibre Monogramas O 0jales Pedal Puloador do rctrocoso Puntada de triple pespunte Puntada de union Puntada elastics - Brother International XL-3025 | Users Manual - English - Page 69
NOTE - Brother International XL-3025 | Users Manual - English - Page 70
NOTA - Brother International XL-3025 | Users Manual - English - Page 71
•l a - Brother International XL-3025 | Users Manual - English - Page 72
English Spanish 194252.111 Printed in Taiwan
-
 1
1 -
 2
2 -
 3
3 -
 4
4 -
 5
5 -
 6
6 -
 7
7 -
8
-
9
-
10
-
11
-
12
-
13
-
14
-
15
-
16
-
17
-
18
-
19
-
20
-
21
-
22
-
23
-
24
-
25
-
26
-
27
-
28
-
29
-
30
-
31
-
32
-
33
-
34
-
35
-
36
-
37
-
38
-
39
-
40
-
41
-
42
-
43
-
44
-
45
-
46
-
47
-
48
-
49
-
50
-
51
-
52
-
53
-
54
-
55
-
56
-
57
-
58
-
59
-
60
-
61
-
62
-
63
-
64
-
65
-
66
-
67
-
68
-
69
-
70
-
71
-
72
 |
 |
OPERATION
MANUAL
MANUAL
DE
1NSTRUCCIONES
k
)r
brother®