Canon ZR25MC ZR25 MC Instruction Manual - Page 35
Picture angle, Camcorder moves
 |
UPC - 013803000733
View all Canon ZR25MC manuals
Add to My Manuals
Save this manual to your list of manuals |
Page 35 highlights
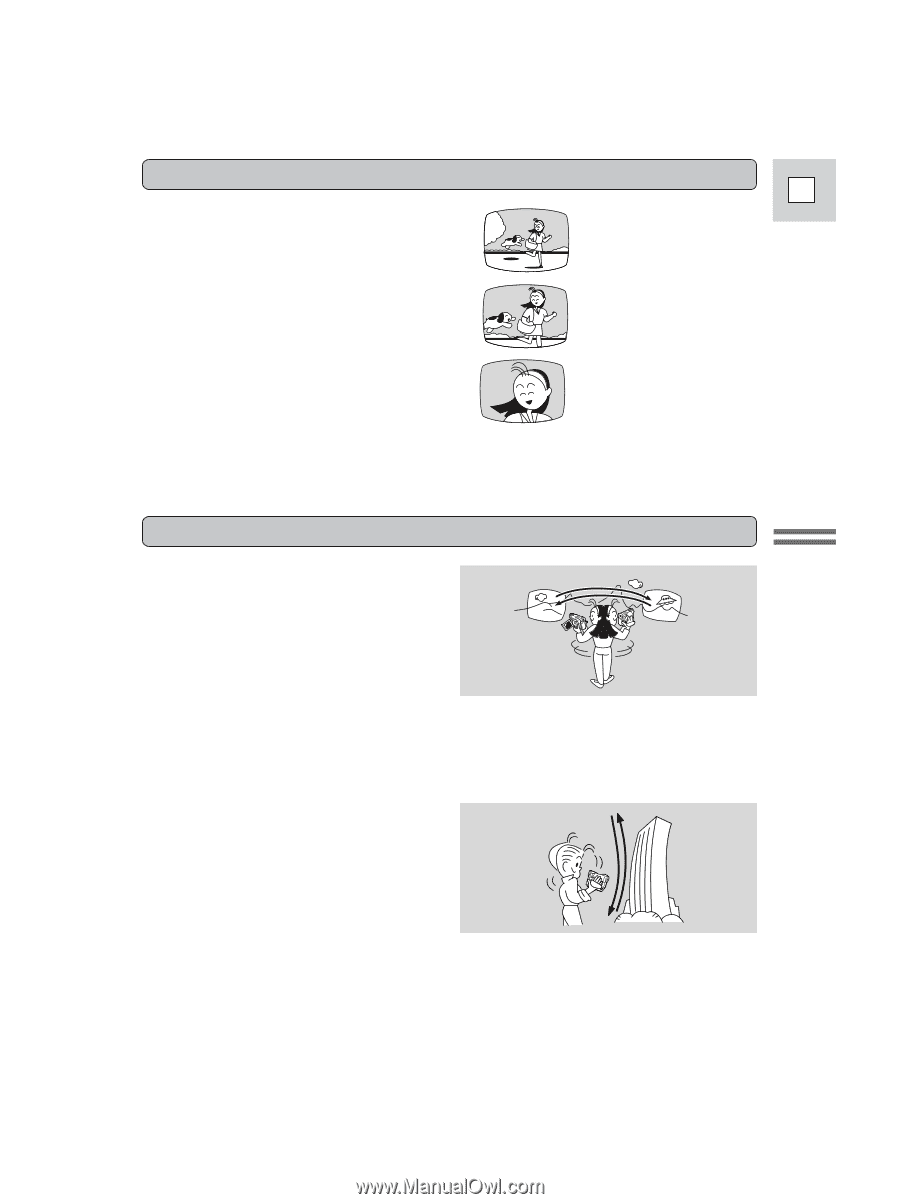
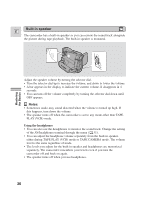
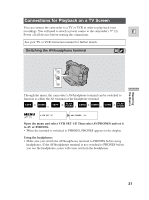
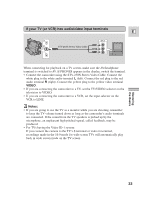
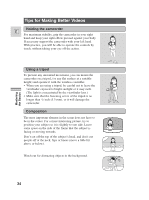
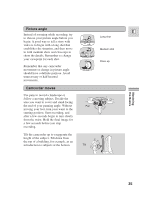
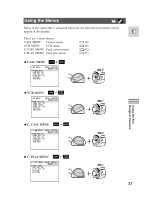
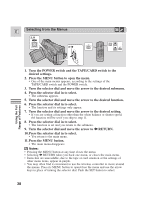
Picture angle Instead of zooming while recording, try to choose your picture angle before you begin. A good way to tell a story with video is to begin with a long shot that establishes the situation, and then move in with medium shots and close-ups to show the details. Remember to change your viewpoint for each shot. Remember that any camcorder movement or change in picture angle should have a definite purpose. Avoid unnecessary or half-hearted movements. E Long shot Medium shot Close-up Mastering the Basics Camcorder moves Use pans to record a landscape or follow a moving subject. Decide the area you want to cover and stand facing the end of your panning angle. Without Pan moving your feet, turn your waist to the starting position. Start recording, and after a few seconds begin to turn slowly from the waist. Hold the final image for a few seconds before you stop recording. Tilt the camcorder up to exaggerate the height of the subject. Tilt down from the top of a building, for example, as an introduction to subjects at the bottom. Tilt 35
-
 1
1 -
2
-
3
-
4
-
5
-
6
-
7
-
8
-
9
-
10
-
11
-
12
-
13
-
14
-
15
-
16
-
17
-
18
-
19
-
20
-
21
-
22
-
23
-
24
-
25
-
26
-
27
-
28
-
29
-
 30
30 -
 31
31 -
 32
32 -
 33
33 -
 34
34 -
 35
35 -
 36
36 -
 37
37 -
 38
38 -
 39
39 -
 40
40 -
41
-
42
-
43
-
44
-
45
-
46
-
47
-
48
-
49
-
50
-
51
-
52
-
53
-
54
-
55
-
56
-
57
-
58
-
59
-
60
-
61
-
62
-
63
-
64
-
65
-
66
-
67
-
68
-
69
-
70
-
71
-
72
-
73
-
74
-
75
-
76
-
77
-
78
-
79
-
80
-
81
-
82
-
83
-
84
-
85
-
86
-
87
-
88
-
89
-
90
-
91
-
92
-
93
-
94
-
95
-
96
-
97
-
98
-
99
-
100
-
101
-
102
-
103
-
104
-
105
-
106
-
107
-
108
-
109
-
110
-
111
-
112
-
113
-
114
-
115
-
116
-
117
-
118
-
119
-
120
-
121
-
122
-
123
-
124
-
125
-
126
-
127
-
128
-
129
-
130
-
131
-
132
-
133
-
134
-
135
-
136
-
137
-
138
-
139
-
140
-
141
-
142
-
143
-
144
-
145
-
146
 |
 |