Canon ZR25MC ZR25 MC Instruction Manual - Page 96
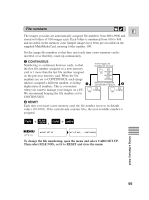
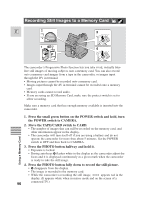
Recording Still Images to a Memory Card
 |
UPC - 013803000733
View all Canon ZR25MC manuals
Add to My Manuals
Save this manual to your list of manuals |
Page 96 highlights
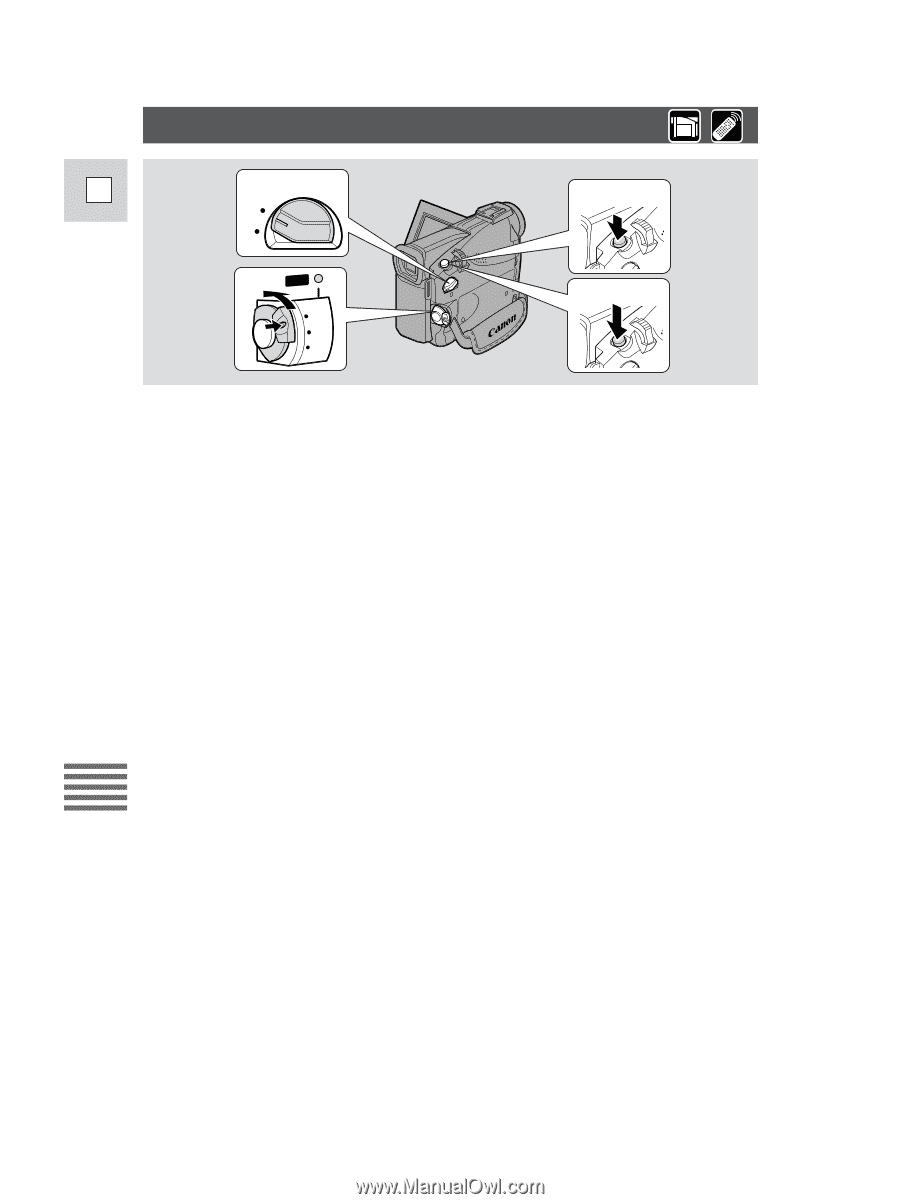
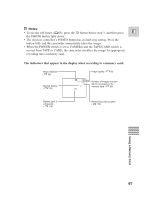
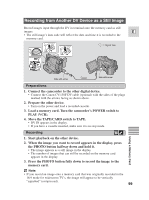
Recording Still Images to a Memory Card E 2 3 CARD TAPE 1 POWER 4 CAMERA OFF PLAY(VCR) The camcorder's Progressive Photo function lets you take vivid, virtually blurfree still images of moving subjects onto a memory card. You can also record onto a memory card images from a tape in the camcorder, or images input through the DV in terminal. • Moving pictures cannot be recorded onto a memory card. • Images input through the AV in terminal cannot be recorded onto a memory card. • Memory cards cannot record audio. • If you are using an SD Memory Card, make sure the protect switch is set to allow recording. Make sure a memory card that has enough memory available is inserted into the camcorder. 1. Press the small green button on the POWER switch and hold, turn the POWER switch to CAMERA. 2. Move the TAPE/CARD switch to CARD. • The number of images that can still be recorded on the memory card, and other information appear in the display. • The camcorder will turn itself off if you are using a battery and do not operate the camcorder for more than about 5 minutes. Set the POWER switch to OFF and then back to CAMERA. Using a Memory Card 3. Press the PHOTO button halfway and hold it. • Exposure is locked. • During autofocus F flashes white in the display as the camcorder adjust the focus and it is displayed continuously as a green mark when the camcorder is ready to take the still image. 4. Press the PHOTO button fully down to record the still picture. • F disappears from the display. • The image is recorded to the memory card. • While the camcorder is recording the still image, >>>> appears red in the display. (It appears white when in mirror mode and on the screen of a 96 connected TV.)
-
 1
1 -
2
-
3
-
4
-
5
-
6
-
7
-
8
-
9
-
10
-
11
-
12
-
13
-
14
-
15
-
16
-
17
-
18
-
19
-
20
-
21
-
22
-
23
-
24
-
25
-
26
-
27
-
28
-
29
-
30
-
31
-
32
-
33
-
34
-
35
-
36
-
37
-
38
-
39
-
40
-
41
-
42
-
43
-
44
-
45
-
46
-
47
-
48
-
49
-
50
-
51
-
52
-
53
-
54
-
55
-
56
-
57
-
58
-
59
-
60
-
61
-
62
-
63
-
64
-
65
-
66
-
67
-
68
-
69
-
70
-
71
-
72
-
73
-
74
-
75
-
76
-
77
-
78
-
79
-
80
-
81
-
82
-
83
-
84
-
85
-
86
-
87
-
88
-
89
-
90
-
 91
91 -
 92
92 -
 93
93 -
 94
94 -
 95
95 -
 96
96 -
 97
97 -
 98
98 -
 99
99 -
 100
100 -
 101
101 -
102
-
103
-
104
-
105
-
106
-
107
-
108
-
109
-
110
-
111
-
112
-
113
-
114
-
115
-
116
-
117
-
118
-
119
-
120
-
121
-
122
-
123
-
124
-
125
-
126
-
127
-
128
-
129
-
130
-
131
-
132
-
133
-
134
-
135
-
136
-
137
-
138
-
139
-
140
-
141
-
142
-
143
-
144
-
145
-
146
 |
 |