Canon imageFORMULA ScanFront 300 ScanFront 300/300P Instructions - Page 129
FTP server, ScanFront Service Server, Certificates, Importing a Certificate
 |
View all Canon imageFORMULA ScanFront 300 manuals
Add to My Manuals
Save this manual to your list of manuals |
Page 129 highlights
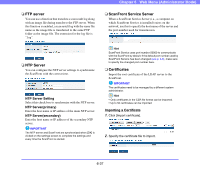
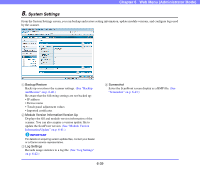
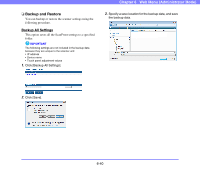
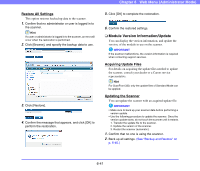
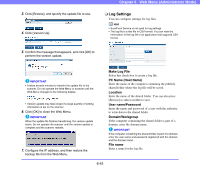
Chapter 6 Web Menu (Administrator Mode) ❏ FTP server You can use a function that transfers a scan result log along with an image file during transfer to the FTP server. When this function is enabled, a scan result log with the same file name as the image file is transferred to the same FTP folder as the image file. The extension for the log file is ".log". ❏ ScanFront Service Server When a ScanFront Service Server (i.e., a computer on which ScanFront Service is installed) exists on the network, use this to specify the host name of the server and the port number used for transmission. ❏ NTP Server You can configure the NTP server settings to synchronize the ScanFront with the correct time. NTP Server Setting Select this check box to synchronize with the NTP server. NTP Server(primary) Enter the host name or IP address of the main NTP server. NTP Server(secondary) Enter the host name or IP address of the secondary NTP server. IMPORTANT The NTP server and ScanFront are synchronized when [OK] is clicked on the settings screen to complete the settings and every time the ScanFront is started. Hint ScanFront Service uses port number 50000 to communicate with the ScanFront by default. If the default port number used by ScanFront Service has been changed (see p. 4-6), make sure to specify the changed port number here. ❏ Certificates Import the root certificate of the LDAP server to the ScanFront. IMPORTANT The certificates need to be managed by a different system administrator. Hint • Only certificates in the CER file format can be imported. • Up to 50 certificates can be imported. Importing a Certificate 1. Click [Import certificate]. 2. Specify the certificate file to import. 6-37
-
 1
1 -
2
-
3
-
4
-
5
-
6
-
7
-
8
-
9
-
10
-
11
-
12
-
13
-
14
-
15
-
16
-
17
-
18
-
19
-
20
-
21
-
22
-
23
-
24
-
25
-
26
-
27
-
28
-
29
-
30
-
31
-
32
-
33
-
34
-
35
-
36
-
37
-
38
-
39
-
40
-
41
-
42
-
43
-
44
-
45
-
46
-
47
-
48
-
49
-
50
-
51
-
52
-
53
-
54
-
55
-
56
-
57
-
58
-
59
-
60
-
61
-
62
-
63
-
64
-
65
-
66
-
67
-
68
-
69
-
70
-
71
-
72
-
73
-
74
-
75
-
76
-
77
-
78
-
79
-
80
-
81
-
82
-
83
-
84
-
85
-
86
-
87
-
88
-
89
-
90
-
91
-
92
-
93
-
94
-
95
-
96
-
97
-
98
-
99
-
100
-
101
-
102
-
103
-
104
-
105
-
106
-
107
-
108
-
109
-
110
-
111
-
112
-
113
-
114
-
115
-
116
-
117
-
118
-
119
-
120
-
121
-
122
-
123
-
 124
124 -
 125
125 -
 126
126 -
 127
127 -
 128
128 -
 129
129 -
 130
130 -
 131
131 -
 132
132 -
 133
133 -
 134
134 -
135
-
136
-
137
-
138
-
139
-
140
-
141
-
142
-
143
-
144
-
145
-
146
-
147
-
148
-
149
-
150
-
151
-
152
-
153
-
154
-
155
-
156
-
157
-
158
-
159
-
160
-
161
-
162
-
163
-
164
-
165
-
166
-
167
-
168
-
169
-
170
-
171
-
172
-
173
-
174
-
175
-
176
-
177
-
178
-
179
-
180
-
181
-
182
-
183
-
184
-
185
-
186
-
187
-
188
-
189
-
190
-
191
-
192
-
193
-
194
-
195
-
196
-
197
-
198
-
199
-
200
-
201
 |
 |