Canon imageFORMULA ScanFront 400 CAC/PIV ScanFront 400 CAC/PIV Configuration G
Canon imageFORMULA ScanFront 400 CAC/PIV Manual
 |
View all Canon imageFORMULA ScanFront 400 CAC/PIV manuals
Add to My Manuals
Save this manual to your list of manuals |
Canon imageFORMULA ScanFront 400 CAC/PIV manual content summary:
- Canon imageFORMULA ScanFront 400 CAC/PIV | ScanFront 400 CAC/PIV Configuration G - Page 1
ScanFront 400 CAC/PIV Version 1.3.1 Configuration Guide 16005-13-UD1-003 - Canon imageFORMULA ScanFront 400 CAC/PIV | ScanFront 400 CAC/PIV Configuration G - Page 2
This page is intentionally left blank. ScanFront 400 CAC/PIV V1.3.1 Configuration Guide 2 - Canon imageFORMULA ScanFront 400 CAC/PIV | ScanFront 400 CAC/PIV Configuration G - Page 3
Contents Preface 5 How to Use This Manual 5 Symbols Used in This Manual 5 Abbreviations Used in This Manual 6 Hyperlinks ...6 Legal Notices ...7 Trademarks ...7 Copyright...7 Disclaimers ...7 Viewing the Device and Application Information 100 3 ScanFront 400 CAC/PIV V1.3.1 Configuration Guide - Canon imageFORMULA ScanFront 400 CAC/PIV | ScanFront 400 CAC/PIV Configuration G - Page 4
Chapter 5 Appendix 101 5.1 Troubleshooting 101 5.2 List of Error Messages for Smart Card Settings 103 5.2.1 Smart Card Reader Configuration Screen Messages SSL Configuration Screen Message 106 5.2.8 S/MIME Configuration Screen Message 107 ScanFront 400 CAC/PIV V1.3.1 Configuration Guide 4 - Canon imageFORMULA ScanFront 400 CAC/PIV | ScanFront 400 CAC/PIV Configuration G - Page 5
Service system software. This manual does not include the requirements or specifications for the ScanFront 400 CAC/PIV application. Symbols Used in This Manual The following symbols are used in this manual to explain procedures, restrictions, and instructions 400 CAC/PIV V1.3.1 Configuration Guide - Canon imageFORMULA ScanFront 400 CAC/PIV | ScanFront 400 CAC/PIV Configuration G - Page 6
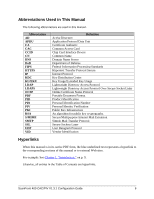
are used in this manual. Abbreviation AD APDU CA User Datagram Protocol Vendor Identification Hyperlinks When this manual is in its native PDF form, the blue underlined text represents a hyperlink to the corresponding sections of this manual or to external Web sites. For example: See Chapter 1, - Canon imageFORMULA ScanFront 400 CAC/PIV | ScanFront 400 CAC/PIV Configuration G - Page 7
DIRECT, INCIDENTAL, OR CONSEQUENTIAL DAMAGES OF ANY NATURE, OR LOSSES OR EXPENSES RESULTING FROM THE USE OF THIS MATERIAL. 7 ScanFront 400 CAC/PIV V1.3.1 Configuration Guide - Canon imageFORMULA ScanFront 400 CAC/PIV | ScanFront 400 CAC/PIV Configuration G - Page 8
This page is intentionally left blank. ScanFront 400 CAC/PIV V1.3.1 Configuration Guide 8 - Canon imageFORMULA ScanFront 400 CAC/PIV | ScanFront 400 CAC/PIV Configuration G - Page 9
for configuring the software. 1.1 Overview The ScanFront 400 CAC/PIV customized solution provides a log in service, and requires a user to authenticate to the ScanFront 400 device using a CAC or PIV card. authenticated to configure the solution. 9 ScanFront 400 CAC/PIV V1.3.1 Configuration Guide - Canon imageFORMULA ScanFront 400 CAC/PIV | ScanFront 400 CAC/PIV Configuration G - Page 10
screen. • Configure the FIPS 140-2 Validation Mode. • Register an SFTP Private Key for SFTP operations (via Remote Access Only). ScanFront 400 CAC/PIV V1.3.1 Configuration Guide 10 - Canon imageFORMULA ScanFront 400 CAC/PIV | ScanFront 400 CAC/PIV Configuration G - Page 11
device requires the proper configuration of all items documented in this guide. Failure to correctly configure the device will affect its operation. 1.3.1 Operating Environment The ScanFront 400 CAC/PIV device must have exactly one supported USB type CAC or PIV card reader connected. See "Cards and - Canon imageFORMULA ScanFront 400 CAC/PIV | ScanFront 400 CAC/PIV Configuration G - Page 12
Software Requirements The following software is required by ScanFront 400 CAC/PIV: • Supported Browsers: Internet Explorer 11 or Edge is required for the administrator to configure Smart capabilities in relation to SMTP authentication.) ScanFront 400 CAC/PIV V1.3.1 Configuration Guide 12 - Canon imageFORMULA ScanFront 400 CAC/PIV | ScanFront 400 CAC/PIV Configuration G - Page 13
1.3.3 Cards and Card Reader Requirements The following USB card readers are supported: Type Smart Card Smart Card Smart Card Smart Card Smart Card Smart Card Smart Card Model SCM , see the documentation that came with your smart card reader. 13 ScanFront 400 CAC/PIV V1.3.1 Configuration Guide - Canon imageFORMULA ScanFront 400 CAC/PIV | ScanFront 400 CAC/PIV Configuration G - Page 14
CAC/PIV and an LDAP server. TCP Port 636 Similar to LDAP, but which incorporates SSL for greater security. ScanFront 400 CAC/PIV V1.3.1 Configuration Guide 14 - Canon imageFORMULA ScanFront 400 CAC/PIV | ScanFront 400 CAC/PIV Configuration G - Page 15
, an LDAP Address Book server must be configured. • A smart card reader must be connected before starting the device. 15 ScanFront 400 CAC/PIV V1.3.1 Configuration Guide - Canon imageFORMULA ScanFront 400 CAC/PIV | ScanFront 400 CAC/PIV Configuration G - Page 16
This page is intentionally left blank. ScanFront 400 CAC/PIV V1.3.1 Configuration Guide 16 - Canon imageFORMULA ScanFront 400 CAC/PIV | ScanFront 400 CAC/PIV Configuration G - Page 17
Administrator Settings from the touch panel display, or remotely from a supported Web browser. • To access the device remotely from your supported Web browser, enter https:///chorin-webapp/. the Administrator Settings. 17 ScanFront 400 CAC/PIV V1.3.1 Configuration Guide - Canon imageFORMULA ScanFront 400 CAC/PIV | ScanFront 400 CAC/PIV Configuration G - Page 18
1. When the ScanFront 400 CAC/PIV device is powered ON for the first time, the Change Password screen appears, as shown below. ScanFront 400 CAC/PIV V1.3.1 Configuration Guide 18 - Canon imageFORMULA ScanFront 400 CAC/PIV | ScanFront 400 CAC/PIV Configuration G - Page 19
address for the Administrator in the [Administrator Address] text box. The device reboots. If the screen below appears, press [OK], and verify and perform the instructions on the screen. 19 ScanFront 400 CAC/PIV V1.3.1 Configuration - Canon imageFORMULA ScanFront 400 CAC/PIV | ScanFront 400 CAC/PIV Configuration G - Page 20
been set, and after the Administrator has logged on to the machine. 1. From the Main screen, press [Administrator Settings]. ScanFront 400 CAC/PIV V1.3.1 Configuration Guide 20 - Canon imageFORMULA ScanFront 400 CAC/PIV | ScanFront 400 CAC/PIV Configuration G - Page 21
2. Enter your Administrator password in the [Password] text box ➞ press [OK]. If you do not want to enter the Administrator password, press [Cancel]. The Administrator Settings screen is displayed. 21 ScanFront 400 CAC/PIV V1.3.1 Configuration Guide - Canon imageFORMULA ScanFront 400 CAC/PIV | ScanFront 400 CAC/PIV Configuration G - Page 22
This page is intentionally left blank. ScanFront 400 CAC/PIV V1.3.1 Configuration Guide 22 - Canon imageFORMULA ScanFront 400 CAC/PIV | ScanFront 400 CAC/PIV Configuration G - Page 23
Configures the smart card drivers that are supported by SCS. Configures the default algorithms message "No Reader Found" until you connect a supported card reader to the ScanFront 400 CAC/PIV device, setting pages may not work. For instructions on creating and installing a server certificate - Canon imageFORMULA ScanFront 400 CAC/PIV | ScanFront 400 CAC/PIV Configuration G - Page 24
Card Reader Follow the procedure below to configure a smart card reader. 1. Log on to the ScanFront 400 CAC/PIV device as an Administrator. For instructions on how to log on to the device as the Administrator, see Chapter 2, "Logging On," on p. 17. 2. Press [Smart Card Settings]. The Smart Card - Canon imageFORMULA ScanFront 400 CAC/PIV | ScanFront 400 CAC/PIV Configuration G - Page 25
characters for the profile name. The new card reader profile is added to the Card Reader Profiles list. 25 ScanFront 400 CAC/PIV V1.3.1 Configuration Guide - Canon imageFORMULA ScanFront 400 CAC/PIV | ScanFront 400 CAC/PIV Configuration G - Page 26
• The Gemalto PC USB-TR PIV (different from the GemPC USB TR) card reader is not supported. • Card readers and cards are specific to your installation location. For more information about your specific card that came with your smart card reader. ScanFront 400 CAC/PIV V1.3.1 Configuration Guide 26 - Canon imageFORMULA ScanFront 400 CAC/PIV | ScanFront 400 CAC/PIV Configuration G - Page 27
3.2 If you want to select an existing card reader profile, select the radio button next to the desired card reader profile in the Card Reader Profiles list. 27 ScanFront 400 CAC/PIV V1.3.1 Configuration Guide - Canon imageFORMULA ScanFront 400 CAC/PIV | ScanFront 400 CAC/PIV Configuration G - Page 28
Card Reader Profiles list. To delete a card reader profile, select the profile, and then click the [Trash Can] icon. ScanFront 400 CAC/PIV V1.3.1 Configuration Guide 28 - Canon imageFORMULA ScanFront 400 CAC/PIV | ScanFront 400 CAC/PIV Configuration G - Page 29
4. Click [Save]. The card reader profile is saved in the persistent data storage in the ScanFront 400 CAC/PIV device. If successful, a check mark appears on the [Save] button, and the Card Reader status changes to "Reader Connected". 29 ScanFront 400 CAC/PIV V1.3.1 Configuration Guide - Canon imageFORMULA ScanFront 400 CAC/PIV | ScanFront 400 CAC/PIV Configuration G - Page 30
are included with the application. 1. Log on to the ScanFront 400 CAC/PIV device as the Administrator. For instructions on how to log on to the device as the Administrator, see Chapter 2, "Logging On," on p. the list of default drivers installed. ScanFront 400 CAC/PIV V1.3.1 Configuration Guide 30 - Canon imageFORMULA ScanFront 400 CAC/PIV | ScanFront 400 CAC/PIV Configuration G - Page 31
display the details about a driver, click the [View] icon to the right of the driver's name ➞ click [Close]. 31 ScanFront 400 CAC/PIV V1.3.1 Configuration Guide - Canon imageFORMULA ScanFront 400 CAC/PIV | ScanFront 400 CAC/PIV Configuration G - Page 32
3.1 To configure the PIV driver, click the [Crossed Wrenches] icon next to the PIV driver. ScanFront 400 CAC/PIV V1.3.1 Configuration Guide 32 - Canon imageFORMULA ScanFront 400 CAC/PIV | ScanFront 400 CAC/PIV Configuration G - Page 33
the PIV card's local PIN. NOTE If you do not want to configure the PIV driver, click [Cancel]. 33 ScanFront 400 CAC/PIV V1.3.1 Configuration Guide - Canon imageFORMULA ScanFront 400 CAC/PIV | ScanFront 400 CAC/PIV Configuration G - Page 34
and drag-and-drop it to select its priority. 6. Click [Save]. The smart card driver configuration settings are saved. ScanFront 400 CAC/PIV V1.3.1 Configuration Guide 34 - Canon imageFORMULA ScanFront 400 CAC/PIV | ScanFront 400 CAC/PIV Configuration G - Page 35
to configure the cryptographic algorithms. Supported FIPS 140-2 Validated Encryption 186-2-based PRNG, Dual EC DRBG (SP800-90) Supported Non FIPS Compliant Algorithms • Symmetric Ciphers: • Digests: 400 CAC/PIV device as the Administrator. For instructions on how to log on to the device as - Canon imageFORMULA ScanFront 400 CAC/PIV | ScanFront 400 CAC/PIV Configuration G - Page 36
2. Click the [Cryptography] tab. The Cryptography configuration screen is displayed. 3. From the Default Asymmetric Algorithm and Key Size drop-down list, select [RSA 1024], [RSA 2048], [RSA 3072], or [RSA 4096]. ScanFront 400 CAC/PIV V1.3.1 Configuration Guide 36 - Canon imageFORMULA ScanFront 400 CAC/PIV | ScanFront 400 CAC/PIV Configuration G - Page 37
4. From the Default Symmetric Algorithm and Key Size drop-down list, select [AES 128], [AES 192], or [AES 256]. 5. From the Default Hash Algorithm and Key Size drop-down list, select [SHA 1], [SHA 256], [SHA 384], or [SHA 512]. 37 ScanFront 400 CAC/PIV V1.3.1 Configuration Guide - Canon imageFORMULA ScanFront 400 CAC/PIV | ScanFront 400 CAC/PIV Configuration G - Page 38
FIPS 140-2 Mode, only FIPS 140-2 validated algorithms are used. • If you are running ScanFront 400 CAC/PIV in an environment that does not fully support FIPS 140-2 algorithms, such as Windows Server 2003, you must switch to the Non-FIPS 140-2 Mode. ScanFront 400 CAC/PIV V1.3.1 Configuration - Canon imageFORMULA ScanFront 400 CAC/PIV | ScanFront 400 CAC/PIV Configuration G - Page 39
8. If you switched modes, click [Perform Self-Test] ➞ click [OK]. 9. Click [Save]. The Cryptography configuration settings are saved. 39 ScanFront 400 CAC/PIV V1.3.1 Configuration Guide - Canon imageFORMULA ScanFront 400 CAC/PIV | ScanFront 400 CAC/PIV Configuration G - Page 40
a log file. Follow the procedure below to configure the Logging settings. 1. Log on to the ScanFront 400 CAC/PIV device as the Administrator. For instructions on how to log on to the device as the Administrator, see Chapter 2, "Logging On," on p. 17. The Smart Card Reader configuration screen is - Canon imageFORMULA ScanFront 400 CAC/PIV | ScanFront 400 CAC/PIV Configuration G - Page 41
server, enter the IP address or host name of the new syslog server in the [Host] text box. IMPORTANT The [This Computer] button is not supported, and does not perform any functions. You can enter a maximum of 300 characters for the syslog server's host name or IP address. 41 ScanFront 400 - Canon imageFORMULA ScanFront 400 CAC/PIV | ScanFront 400 CAC/PIV Configuration G - Page 42
port number). You can enter a maximum of 5 numbers (from 0 to 65,535) for the syslog server's UDP port number. ScanFront 400 CAC/PIV V1.3.1 Configuration Guide 42 - Canon imageFORMULA ScanFront 400 CAC/PIV | ScanFront 400 CAC/PIV Configuration G - Page 43
. Report application state. Messages that provide some visibility into the functional process. Messages only of concern to developer. 43 ScanFront 400 CAC/PIV V1.3.1 Configuration Guide - Canon imageFORMULA ScanFront 400 CAC/PIV | ScanFront 400 CAC/PIV Configuration G - Page 44
server ➞ click [OK]. • To copy a syslog server's information, click the [Copy] icon to the right of the syslog server. ScanFront 400 CAC/PIV V1.3.1 Configuration Guide 44 - Canon imageFORMULA ScanFront 400 CAC/PIV | ScanFront 400 CAC/PIV Configuration G - Page 45
any log messages to the Log file). • Lower File Logging Levels increase the log size on the device. 45 ScanFront 400 CAC/PIV V1.3.1 Configuration Guide - Canon imageFORMULA ScanFront 400 CAC/PIV | ScanFront 400 CAC/PIV Configuration G - Page 46
, click [Download] next to or ➞ click [Save] ➞ follow the instructions on the screen to save the file. If you want to display a log file, click [Open] instead of [ File> or ➞ click [OK]. ScanFront 400 CAC/PIV V1.3.1 Configuration Guide 46 - Canon imageFORMULA ScanFront 400 CAC/PIV | ScanFront 400 CAC/PIV Configuration G - Page 47
10. From the Maximum Log File Size drop-down list, select the maximum log size. The default size is '100000' bytes. 47 ScanFront 400 CAC/PIV V1.3.1 Configuration Guide - Canon imageFORMULA ScanFront 400 CAC/PIV | ScanFront 400 CAC/PIV Configuration G - Page 48
applied. [Only Audit Events]: Only audit events are filtered. [Only Audit Event Failures]: Only audit event failures are filtered. ScanFront 400 CAC/PIV V1.3.1 Configuration Guide 48 - Canon imageFORMULA ScanFront 400 CAC/PIV | ScanFront 400 CAC/PIV Configuration G - Page 49
console). • Reading the console log requires Canon developer tools. 13. Click [Save]. The Logging configuration settings are saved. 49 ScanFront 400 CAC/PIV V1.3.1 Configuration Guide - Canon imageFORMULA ScanFront 400 CAC/PIV | ScanFront 400 CAC/PIV Configuration G - Page 50
. Follow the procedure below to configure the Certificate Checking settings. 1. Log on to the ScanFront 400 CAC/PIV device as the Administrator. For instructions on how to log on to the device as the Administrator, see Chapter 2, "Logging On," on p. 17. The Smart Card Reader configuration screen - Canon imageFORMULA ScanFront 400 CAC/PIV | ScanFront 400 CAC/PIV Configuration G - Page 51
2. Click the [Certificates] tab. The Certificate Checking screen is displayed. 51 ScanFront 400 CAC/PIV V1.3.1 Configuration Guide - Canon imageFORMULA ScanFront 400 CAC/PIV | ScanFront 400 CAC/PIV Configuration G - Page 52
3. To upload a trusted certificate, click [Browse] to the right of the [Certificate Upload] text box ➞ navigate to the certificate ➞ click [Upload]. A confirmation screen is displayed. ScanFront 400 CAC/PIV V1.3.1 Configuration Guide 52 - Canon imageFORMULA ScanFront 400 CAC/PIV | ScanFront 400 CAC/PIV Configuration G - Page 53
and 'No email Security'. - Validation of an SSL certificate when using FTP scan destinations and FTPS or SFTP. 53 ScanFront 400 CAC/PIV V1.3.1 Configuration Guide - Canon imageFORMULA ScanFront 400 CAC/PIV | ScanFront 400 CAC/PIV Configuration G - Page 54
process fails, an error message is displayed on the screen. If all processes are successful, a success message is displayed. ScanFront 400 CAC/PIV V1.3.1 Configuration Guide 54 - Canon imageFORMULA ScanFront 400 CAC/PIV | ScanFront 400 CAC/PIV Configuration G - Page 55
Card Authentication settings. 1. Log on to the ScanFront 400 CAC/PIV device as the Administrator. For instructions on how to log on to the device as the Administrator, see Chapter 2, "Logging On," Authentication configuration screen is displayed. 55 ScanFront 400 CAC/PIV V1.3.1 Configuration Guide - Canon imageFORMULA ScanFront 400 CAC/PIV | ScanFront 400 CAC/PIV Configuration G - Page 56
if you want to check the KU/EKU for the user's certificate. IMPORTANT • If there are any problems with the card certificate, such as an expired or untrustworthy certificate, authentication will fail. • Before you Checking Settings," on p. 50. ScanFront 400 CAC/PIV V1.3.1 Configuration Guide 56 - Canon imageFORMULA ScanFront 400 CAC/PIV | ScanFront 400 CAC/PIV Configuration G - Page 57
to the card's OCSP Responder URL, click [Test Connection] next to the [Default OCSP Responder URL] text box. 57 ScanFront 400 CAC/PIV V1.3.1 Configuration Guide - Canon imageFORMULA ScanFront 400 CAC/PIV | ScanFront 400 CAC/PIV Configuration G - Page 58
you want to check the KDC's certificate's revocation status. IMPORTANT • If there are any problems with the KDC certificate, such as an expired or untrustworthy certificate, authentication will fail. the Certificate Checking Settings," on p. 50. ScanFront 400 CAC/PIV V1.3.1 Configuration Guide 58 - Canon imageFORMULA ScanFront 400 CAC/PIV | ScanFront 400 CAC/PIV Configuration G - Page 59
fails, an error message is displayed on the screen. If all processes are successful, a success message is displayed. 59 ScanFront 400 CAC/PIV V1.3.1 Configuration Guide - Canon imageFORMULA ScanFront 400 CAC/PIV | ScanFront 400 CAC/PIV Configuration G - Page 60
the SSL Settings Follow the procedure below to configure the SSL settings. 1. Log on to the ScanFront 400 CAC/PIV device as the Administrator. For instructions on how to log on to the device as the Administrator, see Chapter 2, "Logging On," on p. 17. The Smart Card Reader configuration screen is - Canon imageFORMULA ScanFront 400 CAC/PIV | ScanFront 400 CAC/PIV Configuration G - Page 61
the OCSP. If the [Verify Revocation Status] check box is selected, the device checks either the OCSP server for the SSL certificate, or the one manually specified in the [Default OCSP Responder URL] text box. 61 ScanFront 400 CAC/PIV V1.3.1 Configuration - Canon imageFORMULA ScanFront 400 CAC/PIV | ScanFront 400 CAC/PIV Configuration G - Page 62
process fails, an error message is displayed on the screen. If all processes are successful, a success message is displayed. ScanFront 400 CAC/PIV V1.3.1 Configuration Guide 62 - Canon imageFORMULA ScanFront 400 CAC/PIV | ScanFront 400 CAC/PIV Configuration G - Page 63
in the persistent data storage in the ScanFront 400 CAC/PIV device. 1. Log on to the ScanFront 400 CAC/PIV device as the Administrator. For instructions on how to log on to the device as the Administrator, see Chapter 2, "Logging On," on p. 17. The Smart Card Reader configuration screen is displayed - Canon imageFORMULA ScanFront 400 CAC/PIV | ScanFront 400 CAC/PIV Configuration G - Page 64
Change the Sign Messages]: Select this check box if you want users to change the setting for signed messages. ScanFront 400 CAC/PIV V1.3.1 Configuration Guide 64 - Canon imageFORMULA ScanFront 400 CAC/PIV | ScanFront 400 CAC/PIV Configuration G - Page 65
KU/EKU]: Select this check box if you want to verify the KU/EKU on the sender's certificate. 65 ScanFront 400 CAC/PIV V1.3.1 Configuration Guide - Canon imageFORMULA ScanFront 400 CAC/PIV | ScanFront 400 CAC/PIV Configuration G - Page 66
. If the [Verify Revocation Status] check box is selected, ScanFront 400 CAC/PIV checks either the OCSP server for the sender certificate, or the one manually specified in the [Sender OCSP Responder URL] text box. ScanFront 400 CAC/PIV V1.3.1 Configuration - Canon imageFORMULA ScanFront 400 CAC/PIV | ScanFront 400 CAC/PIV Configuration G - Page 67
6. Under , select the [Allow Sender Email/Smart Card Mismatch] check box to enable the sender to use an e-mail address other than the e-mail address on their smart card. 67 ScanFront 400 CAC/PIV V1.3.1 Configuration Guide - Canon imageFORMULA ScanFront 400 CAC/PIV | ScanFront 400 CAC/PIV Configuration G - Page 68
may flag the e-mail message as being tampered, and may indicate that the signature is invalid or not trusted. ScanFront 400 CAC/PIV V1.3.1 Configuration Guide 68 - Canon imageFORMULA ScanFront 400 CAC/PIV | ScanFront 400 CAC/PIV Configuration G - Page 69
to the sender's OCSP Responder URL, click [Test Connection] next to the [Sender OCSP Responder URL] text box. 69 ScanFront 400 CAC/PIV V1.3.1 Configuration Guide - Canon imageFORMULA ScanFront 400 CAC/PIV | ScanFront 400 CAC/PIV Configuration G - Page 70
. [Verify KU/EKU]: Select this check box if you want to verify the KU/EKU on the recipient's certificate. ScanFront 400 CAC/PIV V1.3.1 Configuration Guide 70 - Canon imageFORMULA ScanFront 400 CAC/PIV | ScanFront 400 CAC/PIV Configuration G - Page 71
. If the [Verify Revocation Status] check box is selected, ScanFront 400 CAC/PIV checks either the OCSP server for the recipient's certificate, or the one manually specified in the [Recipient OCSP Responder URL] text box. 71 ScanFront 400 CAC/PIV V1.3.1 Configuration - Canon imageFORMULA ScanFront 400 CAC/PIV | ScanFront 400 CAC/PIV Configuration G - Page 72
11. Under , select the [Allow Recipient Email/Smart Card Mismatch] check box to enable a different recipient's e-mail address from the e-mail address listed in the certificate used for encryption. ScanFront 400 CAC/PIV V1.3.1 Configuration Guide 72 - Canon imageFORMULA ScanFront 400 CAC/PIV | ScanFront 400 CAC/PIV Configuration G - Page 73
12. From the Encryption drop-down list, select the cryptographic algorithm to use to encrypt e-mail messages. The default setting is 'AES 256'. 73 ScanFront 400 CAC/PIV V1.3.1 Configuration Guide - Canon imageFORMULA ScanFront 400 CAC/PIV | ScanFront 400 CAC/PIV Configuration G - Page 74
process fails, an error message is displayed on the screen. If all processes are successful, a success message is displayed. ScanFront 400 CAC/PIV V1.3.1 Configuration Guide 74 - Canon imageFORMULA ScanFront 400 CAC/PIV | ScanFront 400 CAC/PIV Configuration G - Page 75
3.10 Exiting the Smart Card Settings Follow the procedure below to exit the Smart Card Settings page. Click [Exit] in the top-right corner from any Smart Card Settings configuration screen. 75 ScanFront 400 CAC/PIV V1.3.1 Configuration Guide - Canon imageFORMULA ScanFront 400 CAC/PIV | ScanFront 400 CAC/PIV Configuration G - Page 76
This page is intentionally left blank. ScanFront 400 CAC/PIV V1.3.1 Configuration Guide 76 - Canon imageFORMULA ScanFront 400 CAC/PIV | ScanFront 400 CAC/PIV Configuration G - Page 77
the SMB Settings," on p. 88.) • Device Configuration > ScanFront Maintenance settings (See "Configuring the ScanFront Maintenance Settings," on p. 91.) 77 ScanFront 400 CAC/PIV V1.3.1 Configuration Guide - Canon imageFORMULA ScanFront 400 CAC/PIV | ScanFront 400 CAC/PIV Configuration G - Page 78
the buttons that are shown on a specific user's Home screen. 1. Log on to the ScanFront 400 CAC/PIV device as the Administrator. For instructions on how to log on to the device as the Administrator, see Chapter 2, "Logging On," on p. 17. 2. Press [User Administration]. The User Administration - Canon imageFORMULA ScanFront 400 CAC/PIV | ScanFront 400 CAC/PIV Configuration G - Page 79
menu is displayed. 4. From the [Edit] menu, press [Restriction]. The first page of the Restriction settings is displayed. 79 ScanFront 400 CAC/PIV V1.3.1 Configuration Guide - Canon imageFORMULA ScanFront 400 CAC/PIV | ScanFront 400 CAC/PIV Configuration G - Page 80
5. Under , clear the check marks from the check boxes of the buttons that you do not want the selected user to have access to on their individual Home screen of the ScanFront 400 CAC/PIV device's UI. ScanFront 400 CAC/PIV V1.3.1 Configuration Guide 80 - Canon imageFORMULA ScanFront 400 CAC/PIV | ScanFront 400 CAC/PIV Configuration G - Page 81
] button is displayed on the Home screen, and it contains both the Home Folder and Shared Folder destinations. 81 ScanFront 400 CAC/PIV V1.3.1 Configuration Guide - Canon imageFORMULA ScanFront 400 CAC/PIV | ScanFront 400 CAC/PIV Configuration G - Page 82
6. From the Restriction settings screen, press [] to get to the second page. The second page of the Restriction settings is displayed. ScanFront 400 CAC/PIV V1.3.1 Configuration Guide 82 - Canon imageFORMULA ScanFront 400 CAC/PIV | ScanFront 400 CAC/PIV Configuration G - Page 83
is a check mark in the [Hide Restricted Buttons] check box. 8. Press [OK]. The feature user restrictions are set. 83 ScanFront 400 CAC/PIV V1.3.1 Configuration Guide - Canon imageFORMULA ScanFront 400 CAC/PIV | ScanFront 400 CAC/PIV Configuration G - Page 84
describes how to configure the default home folder for each user. 1. Log on to the ScanFront 400 CAC/PIV device as the Administrator. For instructions on how to log on to the device as the Administrator, see Chapter 2, "Logging On," on p. 17. 2. Press [User Administration]. The User Administration - Canon imageFORMULA ScanFront 400 CAC/PIV | ScanFront 400 CAC/PIV Configuration G - Page 85
menu is displayed. 4. From the [Edit] menu, press [Modify]. The first page of the Edit screen is displayed. 85 ScanFront 400 CAC/PIV V1.3.1 Configuration Guide - Canon imageFORMULA ScanFront 400 CAC/PIV | ScanFront 400 CAC/PIV Configuration G - Page 86
5. Press the down arrow ( ) to display the second page.. The second page of the edit screen displays. ScanFront 400 CAC/PIV V1.3.1 Configuration Guide 86 - Canon imageFORMULA ScanFront 400 CAC/PIV | ScanFront 400 CAC/PIV Configuration G - Page 87
Home Folder Name for all users, the Administrator must change the Home Folder Name for the Default User. 87 ScanFront 400 CAC/PIV V1.3.1 Configuration Guide - Canon imageFORMULA ScanFront 400 CAC/PIV | ScanFront 400 CAC/PIV Configuration G - Page 88
or disable the SMBV1 setting. The ScanFront 400 CAC/PIV device supports SMBV2 and SMBV3 automatically. This setting is for those users who still use the SMBV1 protocol. 1. Log on to the ScanFront 400 CAC/PIV device as the Administrator. For instructions on how to log on to the device as the - Canon imageFORMULA ScanFront 400 CAC/PIV | ScanFront 400 CAC/PIV Configuration G - Page 89
3. Press [SMB Settings]. The SMB Settings screen is displayed. 89 ScanFront 400 CAC/PIV V1.3.1 Configuration Guide - Canon imageFORMULA ScanFront 400 CAC/PIV | ScanFront 400 CAC/PIV Configuration G - Page 90
the WINS server's IP address in the [WINS Server IP] text box. 5. Press [OK]. The SMB Settings are set. ScanFront 400 CAC/PIV V1.3.1 Configuration Guide 90 - Canon imageFORMULA ScanFront 400 CAC/PIV | ScanFront 400 CAC/PIV Configuration G - Page 91
disable remote operation from the ScanFront 400 CAC/PIV device. 1. Log on to the ScanFront 400 CAC/PIV device as the Administrator. For instructions on how to log on to the device as the Administrator, see Chapter 2, "Logging On," on p. 17. 2. Press [Device Configuration]. The Device Configuration - Canon imageFORMULA ScanFront 400 CAC/PIV | ScanFront 400 CAC/PIV Configuration G - Page 92
3. Press [ScanFront Maintenance]. The ScanFront Maintenance screen is displayed. 4. Press [Device Detail Setting]. The Device Detail Setting screen is displayed. ScanFront 400 CAC/PIV V1.3.1 Configuration Guide 92 - Canon imageFORMULA ScanFront 400 CAC/PIV | ScanFront 400 CAC/PIV Configuration G - Page 93
off automatically. You can select from 'After 1 minute' to 'After 120 minutes'. The default time is 'After 5 minutes'. 93 ScanFront 400 CAC/PIV V1.3.1 Configuration Guide - Canon imageFORMULA ScanFront 400 CAC/PIV | ScanFront 400 CAC/PIV Configuration G - Page 94
Mode automatically. You can select from 'After 1 minute' to 'After 120 minutes'. The default time is 'After 12 minutes'. ScanFront 400 CAC/PIV V1.3.1 Configuration Guide 94 - Canon imageFORMULA ScanFront 400 CAC/PIV | ScanFront 400 CAC/PIV Configuration G - Page 95
select from '-3.0 (LOW)' to '3.0 (HIGH)'. The default reduction ratio is '0.0'. 9. Press [OK]. The Device Detail Settings are set. 95 ScanFront 400 CAC/PIV V1.3.1 Configuration Guide - Canon imageFORMULA ScanFront 400 CAC/PIV | ScanFront 400 CAC/PIV Configuration G - Page 96
the network where the ScanFront 400 CAC/PIV device is located). 1. Log on to the ScanFront 400 CAC/PIV device as the Administrator. For instructions on how to log on to the device as the Administrator, see Chapter 2, "Logging On," on p. 17. 2. Click [Device Configuration]. The Device Configuration - Canon imageFORMULA ScanFront 400 CAC/PIV | ScanFront 400 CAC/PIV Configuration G - Page 97
3. Click [Server Certificate]. The Server Certificate screen is displayed. 4. From the Device drop-down list, select the name of the ScanFront CAC/PIV device. 97 ScanFront 400 CAC/PIV V1.3.1 Configuration Guide - Canon imageFORMULA ScanFront 400 CAC/PIV | ScanFront 400 CAC/PIV Configuration G - Page 98
5. Next to , click [Choose File] ➞ navigate to and select the server certificate that you want to upload to the device ➞ click [Open] ➞ [OK]. The server certificate's name is displayed next to [Choose File]. ScanFront 400 CAC/PIV V1.3.1 Configuration Guide 98 - Canon imageFORMULA ScanFront 400 CAC/PIV | ScanFront 400 CAC/PIV Configuration G - Page 99
6. In the [Password] text box, enter the password to protect the server certificate file. 7. Click [OK]. The server certificate is uploaded to the ScanFront 400 CAC/PIV device selected in step 4, and the ScanFront 400 CAC/PIV device restarts. 99 ScanFront 400 CAC/PIV V1.3.1 Configuration Guide - Canon imageFORMULA ScanFront 400 CAC/PIV | ScanFront 400 CAC/PIV Configuration G - Page 100
/PIV device and application information. 1. From the Home screen, press [About]. 2. View the device and application information ➞ press [Close]. ScanFront 400 CAC/PIV V1.3.1 Configuration Guide 100 - Canon imageFORMULA ScanFront 400 CAC/PIV | ScanFront 400 CAC/PIV Configuration G - Page 101
possible causes and remedies. 5.1 Troubleshooting This section describes the possible issues remedies. Problem The card reader is missing or is not recognized. Remedy 1 Connect a supported or on the ScanFront 400 CAC/PIV device. Problem PIV card type support is not enabled, and a PIV card was - Canon imageFORMULA ScanFront 400 CAC/PIV | ScanFront 400 CAC/PIV Configuration G - Page 102
. Remedy Insert a PIV card into the card reader, or have the system administrator enable CAC card support. Problem No light appears on your USB card reader after you connected it, or your smart card is not Contact your System Administrator. ScanFront 400 CAC/PIV V1.3.1 Configuration Guide 102 - Canon imageFORMULA ScanFront 400 CAC/PIV | ScanFront 400 CAC/PIV Configuration G - Page 103
is in the hexadecimal format 0x1234. Make sure that you enter only alphanumeric characters for the profile name. 103 ScanFront 400 CAC/PIV V1.3.1 Configuration Guide - Canon imageFORMULA ScanFront 400 CAC/PIV | ScanFront 400 CAC/PIV Configuration G - Page 104
and remedy. Message Self-test failed - see log for more information. Cause The self-test failed when switching FIPS 140-2 modes. There may be a problem with the ScanFront 400 device's system software, or an error occurred in the ScanFront 400 CAC/PIV device. Remedy Check the ScanFront 400 device - Canon imageFORMULA ScanFront 400 CAC/PIV | ScanFront 400 CAC/PIV Configuration G - Page 105
] text field is not a valid port address. Make sure that the [Port] text field contains a valid port number. 105 ScanFront 400 CAC/PIV V1.3.1 Configuration Guide - Canon imageFORMULA ScanFront 400 CAC/PIV | ScanFront 400 CAC/PIV Configuration G - Page 106
error occurred due to the REASON listed. Remedy Check the network connection to the OCSP server, and try again. ScanFront 400 CAC/PIV V1.3.1 Configuration Guide 106 - Canon imageFORMULA ScanFront 400 CAC/PIV | ScanFront 400 CAC/PIV Configuration G - Page 107
to the REASON listed. Remedy Check the network connection to the OCSP or SMTP server, and try again. 107 ScanFront 400 CAC/PIV V1.3.1 Configuration Guide - Canon imageFORMULA ScanFront 400 CAC/PIV | ScanFront 400 CAC/PIV Configuration G - Page 108
This page is intentionally left blank. ScanFront 400 CAC/PIV V1.3.1 Configuration Guide 108
-
 1
1 -
 2
2 -
 3
3 -
 4
4 -
 5
5 -
 6
6 -
 7
7 -
8
-
9
-
10
-
11
-
12
-
13
-
14
-
15
-
16
-
17
-
18
-
19
-
20
-
21
-
22
-
23
-
24
-
25
-
26
-
27
-
28
-
29
-
30
-
31
-
32
-
33
-
34
-
35
-
36
-
37
-
38
-
39
-
40
-
41
-
42
-
43
-
44
-
45
-
46
-
47
-
48
-
49
-
50
-
51
-
52
-
53
-
54
-
55
-
56
-
57
-
58
-
59
-
60
-
61
-
62
-
63
-
64
-
65
-
66
-
67
-
68
-
69
-
70
-
71
-
72
-
73
-
74
-
75
-
76
-
77
-
78
-
79
-
80
-
81
-
82
-
83
-
84
-
85
-
86
-
87
-
88
-
89
-
90
-
91
-
92
-
93
-
94
-
95
-
96
-
97
-
98
-
99
-
100
-
101
-
102
-
103
-
104
-
105
-
106
-
107
-
108
 |
 |

16005-13-UD1-003
ScanFront 400 CAC/PIV
Version 1.3.1
Configuration Guide