Cisco WBPN User Guide - Page 13
Windows XP, Macintosh OSX, Control Panel, Network Connections, Local Area, Connection
 |
View all Cisco WBPN manuals
Add to My Manuals
Save this manual to your list of manuals |
Page 13 highlights
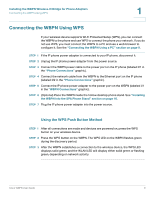
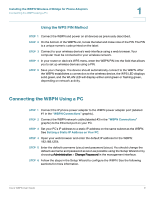
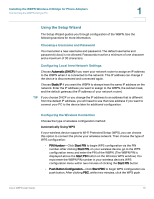
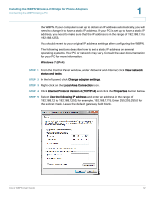
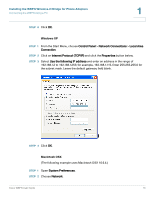
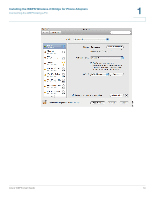
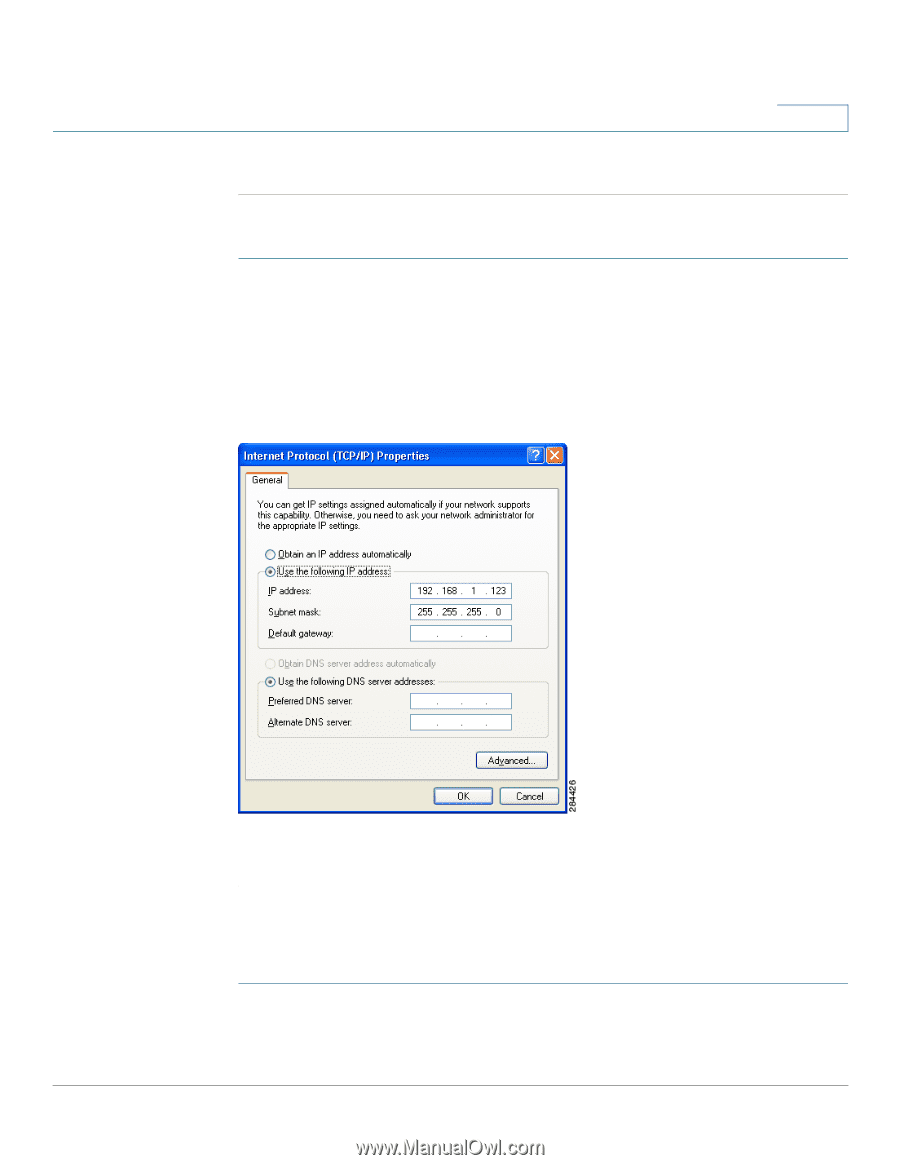
Installing the WBPN Wireless-N Bridge for Phone Adapters Connecting the WBPN Using a PC 1 STEP 6 Click OK. Windows XP STEP 1 From the Start Menu, choose Control Panel > Network Connections > Local Area Connection. STEP 2 Click on Internet Protocol (TCP/IP) and click the Properties button below. STEP 3 Select Use the following IP address and enter an address in the range of 192.168.1.2 to 192.168.1.253; for example, 192.168.1.115. Enter 255.255.255.0 for the subnet mask. Leave the default gateway field blank. STEP 4 Click OK. Macintosh OSX (The following example uses Macintosh OSX 10.6.4.) STEP 1 Open System Preferences. STEP 2 Choose Network. Cisco WBPN User Guide 13
-
 1
1 -
2
-
3
-
4
-
5
-
6
-
7
-
 8
8 -
 9
9 -
 10
10 -
 11
11 -
 12
12 -
 13
13 -
 14
14 -
 15
15 -
 16
16 -
 17
17 -
 18
18 -
19
-
20
-
21
-
22
-
23
-
24
-
25
-
26
-
27
-
28
-
29
-
30
-
31
-
32
-
33
 |
 |
Installing the WBPN Wireless-N Bridge for Phone Adapters
Connecting the WBPN Using a PC
Cisco WBPN User Guide
13
1
STEP
6
Click
OK
.
Windows XP
STEP 1
From the Start Menu, choose
Control Panel
>
Network Connections
>
Local Area
Connection
.
STEP
2
Click on
Internet Protocol (TCP/IP)
and click the
Properties
button below.
STEP
3
Select
Use the following IP address
and enter an address in the range of
192.168.1.2 to 192.168.1.253; for example, 192.168.1.115. Enter 255.255.255.0 for
the subnet mask. Leave the default gateway field blank.
STEP
4
Click
OK
.
Macintosh OSX
(The following example uses Macintosh OSX 10.6.4.)
STEP 1
Open
System Preferences
.
STEP
2
Choose
Network
.