Cisco WBPN User Guide - Page 16
Installing the WBPN Into the SPA Phone Stand, Con IPv4 - wireless n bridge configuration
 |
View all Cisco WBPN manuals
Add to My Manuals
Save this manual to your list of manuals |
Page 16 highlights
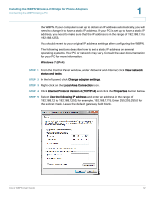
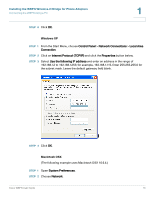
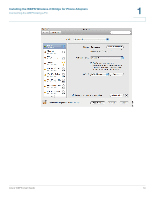
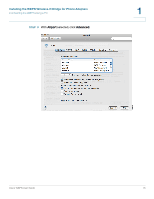
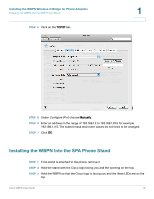
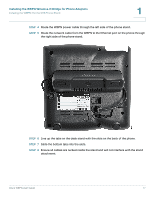
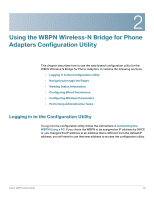
Installing the WBPN Wireless-N Bridge for Phone Adapters Installing the WBPN Into the SPA Phone Stand STEP 4 Click on the TCP/IP tab. 1 STEP 5 Under Configure IPv4, choose Manually. STEP 6 Enter an address in the range of 192.168.1.2 to 192.168.1.253; for example, 192.168.1.115. The subnet mask and router values do not need to be changed. STEP 7 Click OK. Installing the WBPN Into the SPA Phone Stand STEP 1 If the stand is attached to the phone, remove it. STEP 2 Hold the stand with the Cisco logo facing you and the opening on the top. STEP 3 Hold the WBPN so that the Cisco logo is facing you and the three LEDs are on the top. Cisco WBPN User Guide 16
-
 1
1 -
2
-
3
-
4
-
5
-
6
-
7
-
8
-
9
-
10
-
 11
11 -
 12
12 -
 13
13 -
 14
14 -
 15
15 -
 16
16 -
 17
17 -
 18
18 -
 19
19 -
 20
20 -
 21
21 -
22
-
23
-
24
-
25
-
26
-
27
-
28
-
29
-
30
-
31
-
32
-
33
 |
 |
Installing the WBPN Wireless-N Bridge for Phone Adapters
Installing the WBPN Into the SPA Phone Stand
Cisco WBPN User Guide
16
1
STEP 4
Click on the
TCP/IP
tab.
STEP
5
Under
Configure IPv4
, choose
Manually
.
STEP
6
Enter an address in the range of 192.168.1.2 to 192.168.1.253; for example,
192.168.1.115. The subnet mask and router values do not need to be changed.
STEP
7
Click
OK
.
Installing the WBPN Into the SPA Phone Stand
STEP 1
If the stand is attached to the phone, remove it.
STEP
2
Hold the stand with the Cisco logo facing you and the opening on the top.
STEP
3
Hold the WBPN so that the Cisco logo is facing you and the three LEDs are on the
top.