Cisco WBPN User Guide - Page 9
Using the WPS PIN Method, Connecting the WBPN Using a PC - wireless bridge default password
 |
View all Cisco WBPN manuals
Add to My Manuals
Save this manual to your list of manuals |
Page 9 highlights
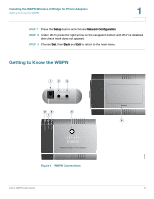
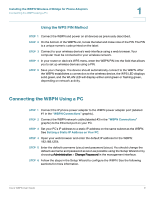
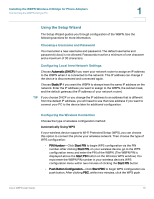
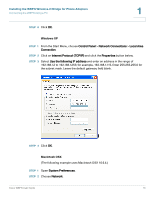
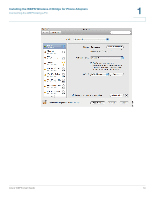
Installing the WBPN Wireless-N Bridge for Phone Adapters Connecting the WBPN Using a PC 1 Using the WPS PIN Method STEP 1 Connect the WBPN and power on all devices as previously described. STEP 2 On the bottom of the WBPN unit, locate the label and make note of the PIN. The PIN is a unique numeric code printed on the label. STEP 3 Connect to your wireless device's web interface using a web browser. Your computer must be connected to your wireless network. STEP 4 In your router or device's WPS menu, enter the WBPN PIN into the field that allows you to set up wireless devices using a PIN. STEP 5 Save your changes. The device should automatically connect to the WBPN. After the WBPN establishes a connection to the wireless device, the WPS LED displays solid green, and the WLAN LED will display either solid green or flashing green, depending on network activity. Connecting the WBPN Using a PC STEP 1 Connect the IP phone power adapter to the WBPN power adapter port (labeled #1 in the "WBPN Connections" graphic). STEP 2 Connect the WBPN network cable (labeled #3 in the "WBPN Connections" graphic) to the Ethernet port on your PC. STEP 3 Set your PC's IP address to a static IP address on the same subnet as the WBPN. See Setting a Static IP Address on Your PC. STEP 4 Open your web browser and enter the default IP address for the WBPN: 192.168.1.254. STEP 5 Enter the default username (cisco) and password (cisco). You should change the default username and password as soon as possible using the Setup Wizard or by choosing Administration > Change Password in the management interface. STEP 6 Follow the steps in the Setup Wizard to configure the WBPN. See the following sections for more information. Cisco WBPN User Guide 9
-
 1
1 -
2
-
3
-
 4
4 -
 5
5 -
 6
6 -
 7
7 -
 8
8 -
 9
9 -
 10
10 -
 11
11 -
 12
12 -
 13
13 -
 14
14 -
15
-
16
-
17
-
18
-
19
-
20
-
21
-
22
-
23
-
24
-
25
-
26
-
27
-
28
-
29
-
30
-
31
-
32
-
33
 |
 |